Black Listed Email Address
There may be many situations where you need to block or restrict some email addresses
from your mail list. The Odoo system allows you to add these emails to the blacklist. If
you restrict mail lists by adding them to the mailing list, they won't receive mailings
anymore. The Black Listed Email Addresses menu can be accessed from the Configuration
tab of the Odoo Email Marketing module.
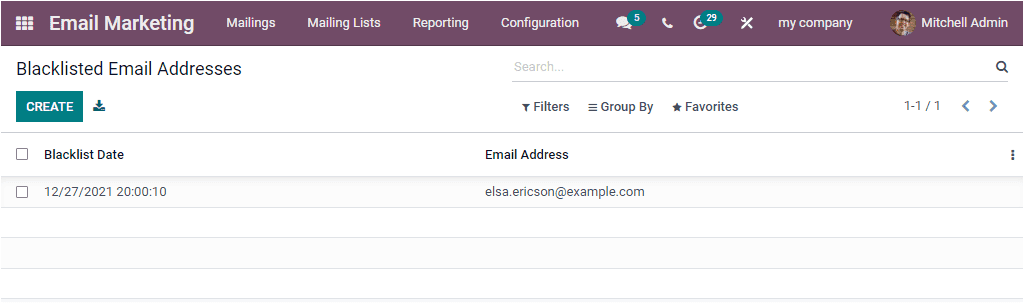
The Blacklisted Email Addresses window will list out all the Blacklisted email addresses
details along with the Black list Date and Email Address. It is simple to add a new
email address to the blacklist. You can click on the CREATE icon available on the top
left corner of the window to do this. The create icon will lead you to a new window
where you can give the Email Address which you want to add to the blacklist. Then you
can view the Active field, and the system automatically activates this field.

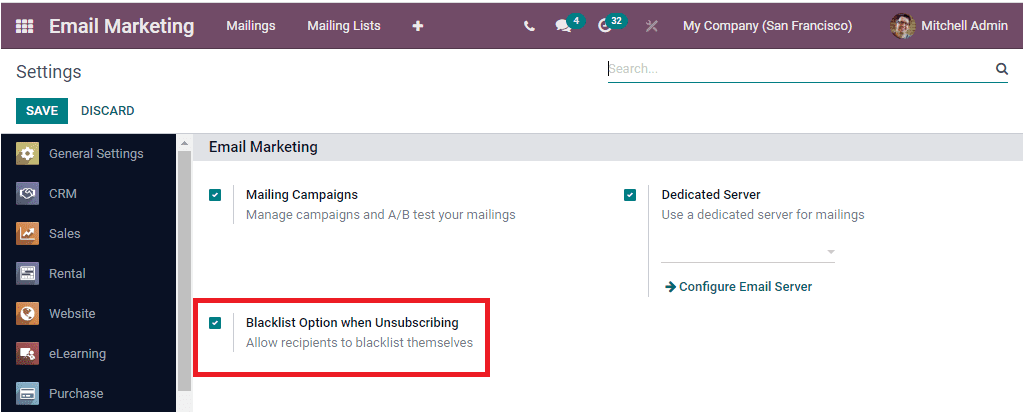
When you go to the Settings window of the Email Marketing module, you can see the option
named Blacklist Option when Unsubscribing. This option allows the
recipients to manage his state in the blacklist via the unsubscription page. So allowing
recipients to blacklist themselves, you should activate the Blacklist Option
when Unsubscribing tool is available on the settings window.
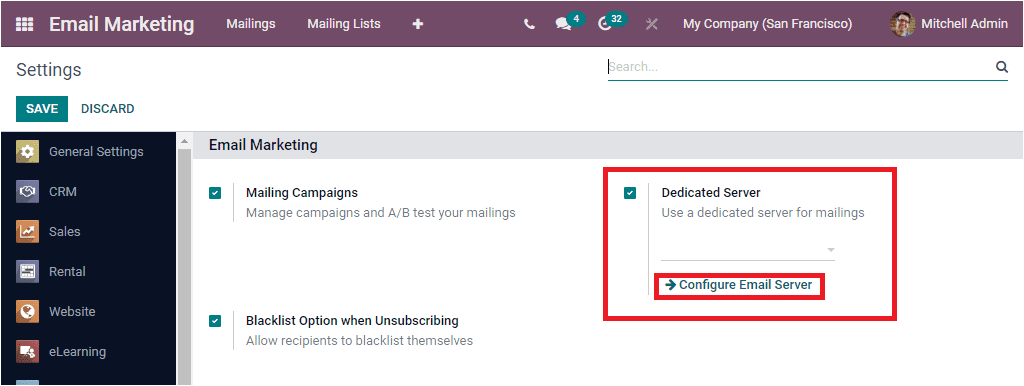
The Settings window also provides you with an advanced option called Dedicated Server.
Odoo offers you a dedicated server for your mailings with this advanced feature. To get
the advantages of this option, you should activate the Dedicated
Serveroption. Then you can configure the dedicated mailing server. For
configuring a dedicated mailing server, you can click on the Configure Email Server
option, as shown in the image below.
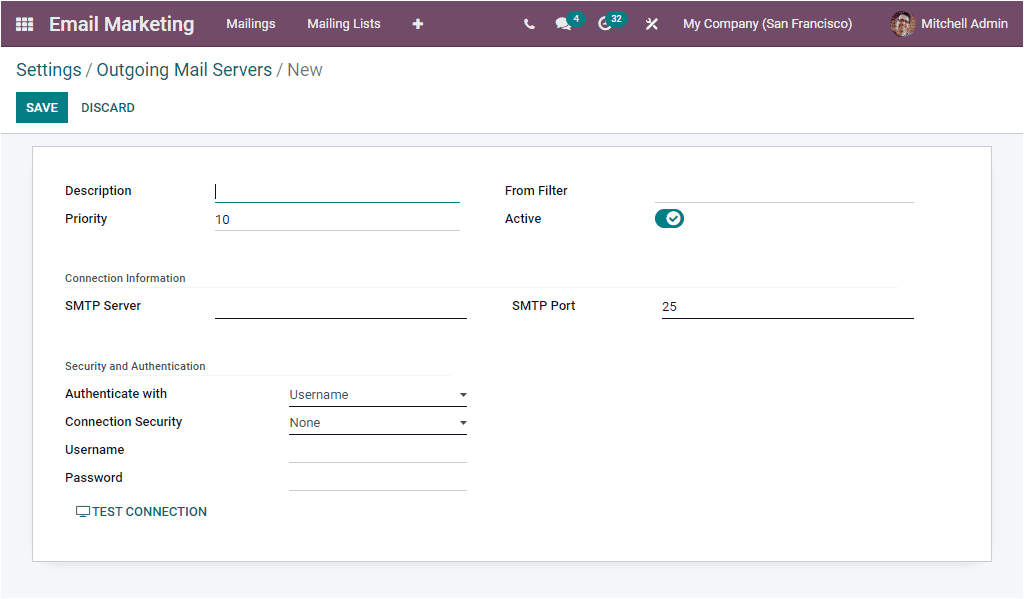
The Configure Email Server menu will lead you to the configuration area and where you can
configure a new dedicated email server.
As we clear on the configuration steps of the outgoing mail server, let us look into the
Reporting section of the module.