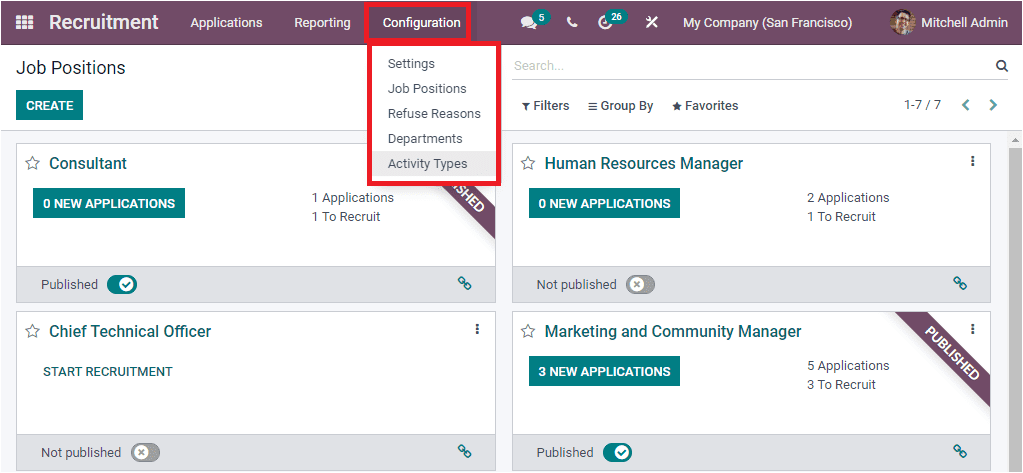
Configurations
Under the Configuration tab of the Odoo Recruitment module, you have different sub-menus such as Settings, Job Position, Refuse Reasons, Department, and Activity Types.
Settings
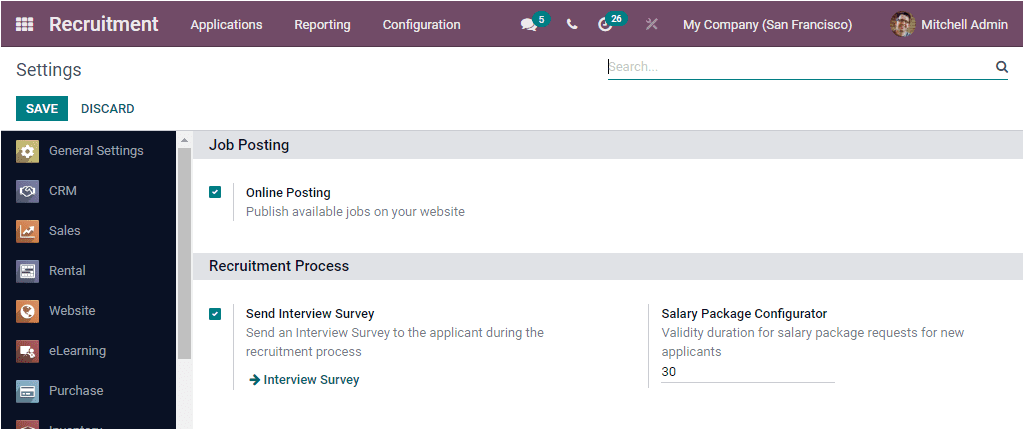
The Settings window of the Odoo Recruitment module will include the following options. This window is described in two sections as Job Posting and Recruitment Process. Under the Job Posting section, you have the Online Postingoption which will allow you to publish available jobs on your website. Keep in mind that you should check the box near the option, and then you can click on the SAVE button to save new changes, and now the option will be in the operating mode.
You have two options under the Recruitment Proces tab. Which are Send Interview Surveyand Salary Package Configurator.When you activate the Send Interview Survey option, the system will help you send an interview survey to the applicant during the recruitment process. In the case of Salary Package Configurator, this will permit you to set a validity duration for salary package requests for new applicants.
These are the options available under the Settings menu of the Odoo Recruitment module. Now let us look into the Job Positions menu, which can also be accessed from the Configuration tab.
Job Position
The Job Position menu available under the Configuration tab of the Odoo Recruitment module allows you to enter into the Job Positions menu as depicted in the below image.
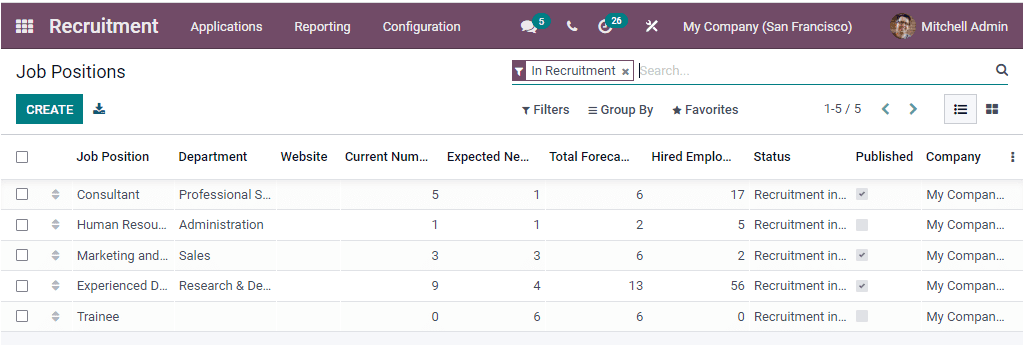
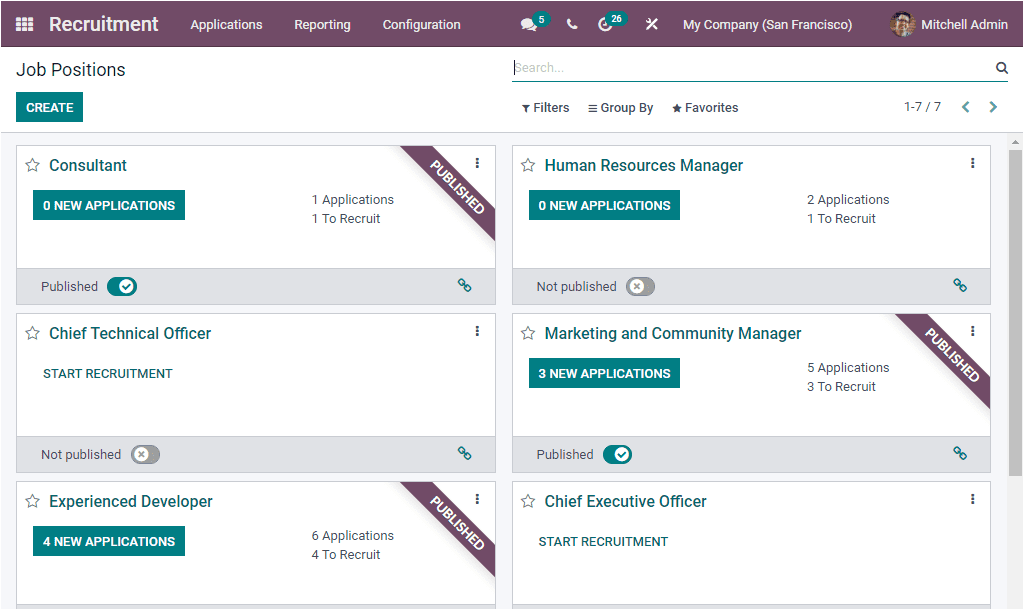
The Job Position window will display all the predefined Job Positions both in List view and Kanban view. The window will include the details such as Job Position, Department, Website, Current Number of Employees, Expected New Employees, Total Forecasted Employees, Hired Employees, Status, Published, and Company. This window will allow you to configure new Job Positions. This can be done by selecting the CREATE button available on the top left corner of the window.
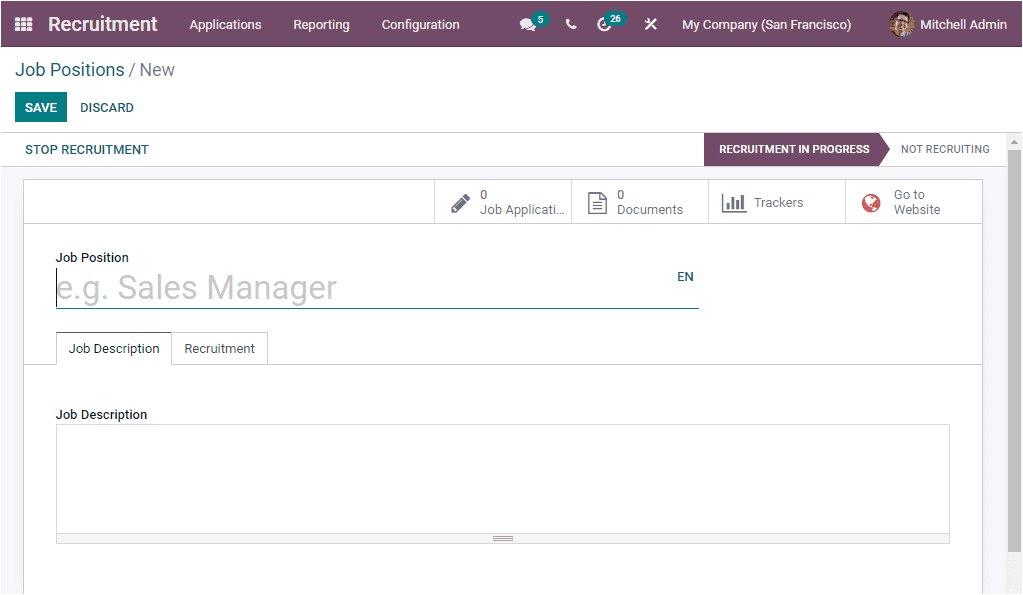
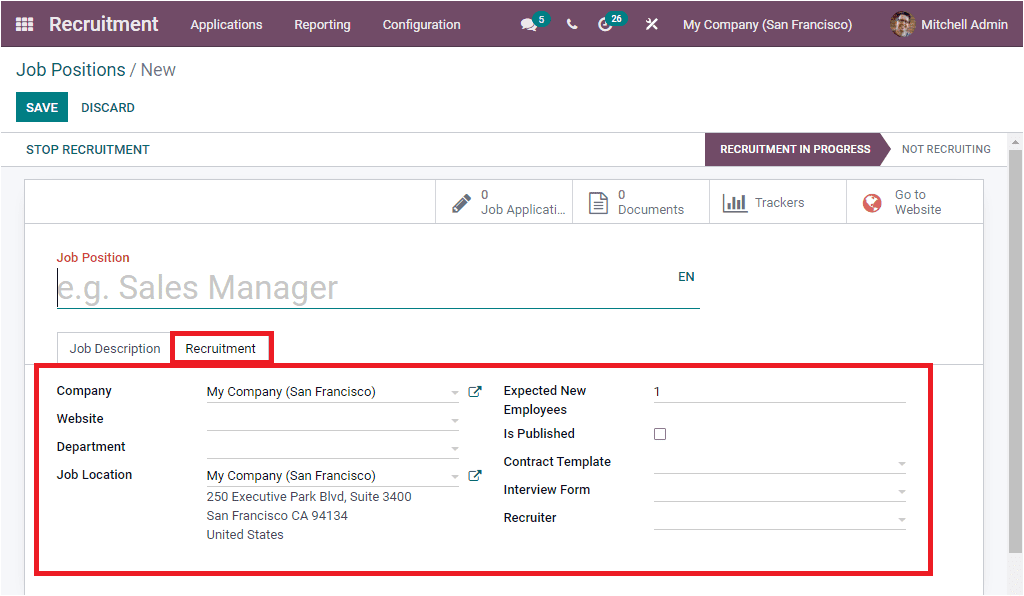
Upon selecting the CREATE icon, Odoo will depict you a new Job Position creation form as shown in the above image. In this Job Position creation form, you have to fill the field Job Position. Then under the Job Description tab, you can provide a customized Job Description in the given box. Moreover you can allocate the Website name where you want to publish this job position. Then you have to mention which of the Department this Job Position belongs to. The Company details and Job Location will be auto allocated. After that you can specify the number of new employees you are expecting to recruit. This can be provided in the Expected New Employees field. Moreover, if the application is published on the website of the company, you can activate the Is Published field. In addition the default contract used when making an offer to an applicant can be defined under the Contract Template field. After that you can select an interview form for this job position and also you have the provision to print or answer this interview from all applicants who apply for this job. Finally you can provide the name of the Recruiter in the given space.
When you give all these details, you can click on the SAVE button to save the details. Similarly, based upon the modules you installed, the window will depict some smart buttons such as Job Application, Documents, Trackers, and Go to Website at the right top of the window.
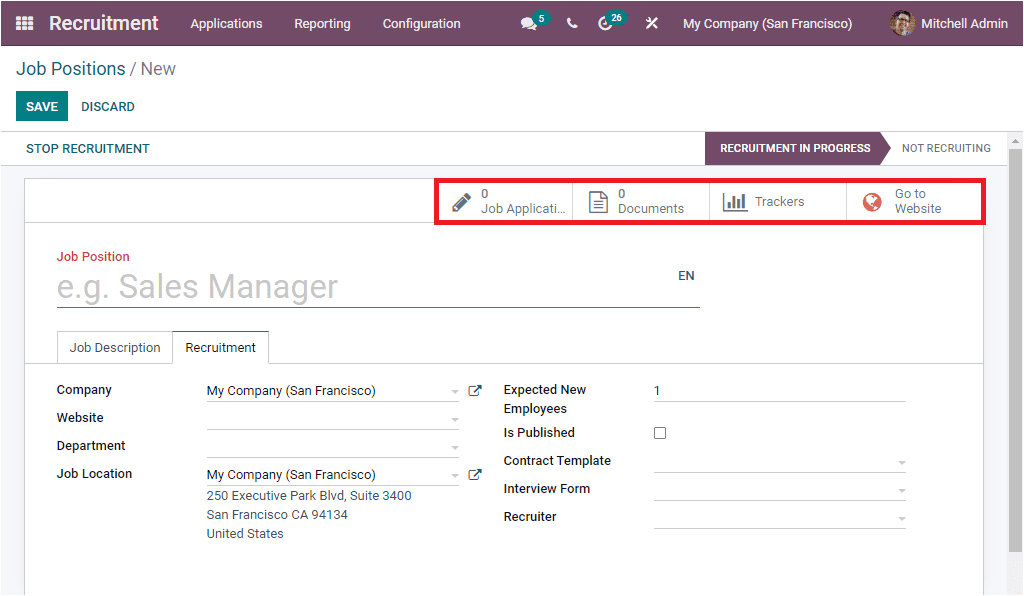
We can use the Go to Website button to navigate the website to publish the job position.
The Odoo system also allows you to create Job Positions directly using the home dashboard window.
Here on this Job Positions page, you can access the CREATE icon for creating new job positions. Upon selecting this icon, you will depict a pop-up window where you can fill in the Job Position name and then click on the CREATE icon, as we discussed earlier.

The following menu available under the Configuration tab of the Odoo Recruitment module is the Refuse Reasons menu. Let us have a look at this window.
Refuse Reasons
The Refuse Reasons menu in the Odoo Recruitment module will take you into the Refuse Reasons window, as shown in the below image.

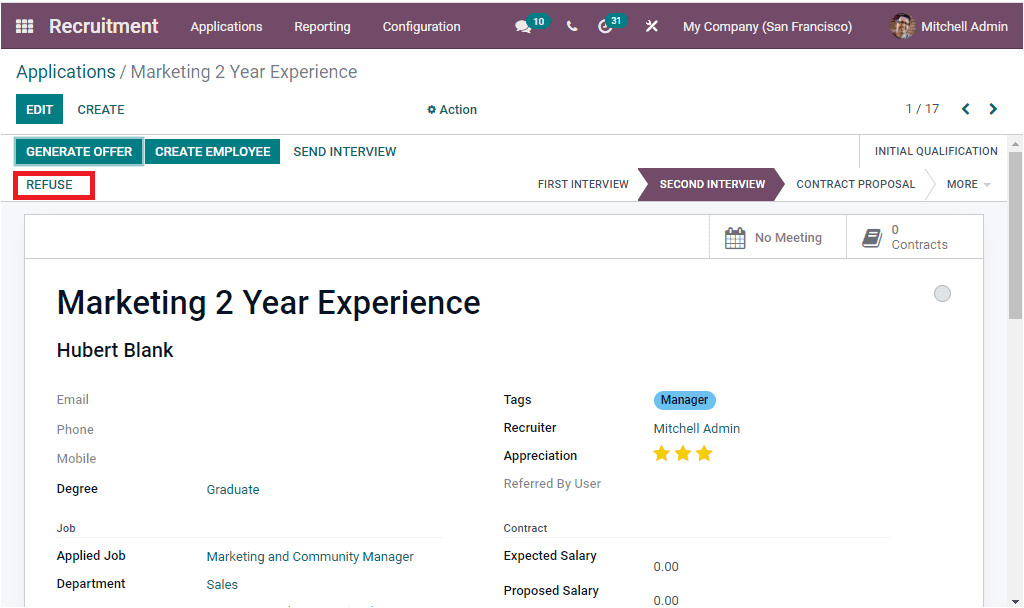
In this Refuse Reasons window, you can view all the Refuse Reasons described in the platform along with the Description and Email Template. If you want to create a new Refuse Reasons, Odoo allows you to make it in the same window. For that, you can click on the CREATE icon. Now you will depict a new row where you will be able to provide the Description and Email Template. You can use this feature for the rejection of an application. If you are not satisfied with the applicant’s performance or the applicant's qualifications are not enough for your job requirements, you have the option to refuse the job application. You can perform this by clicking on the REFUSE button on the Applications window, as highlighted in the image below.
When you click on the REFUSE button, you will depict a pop-up window where you can provide the configured Refuse Reason Using the drop-down menu.
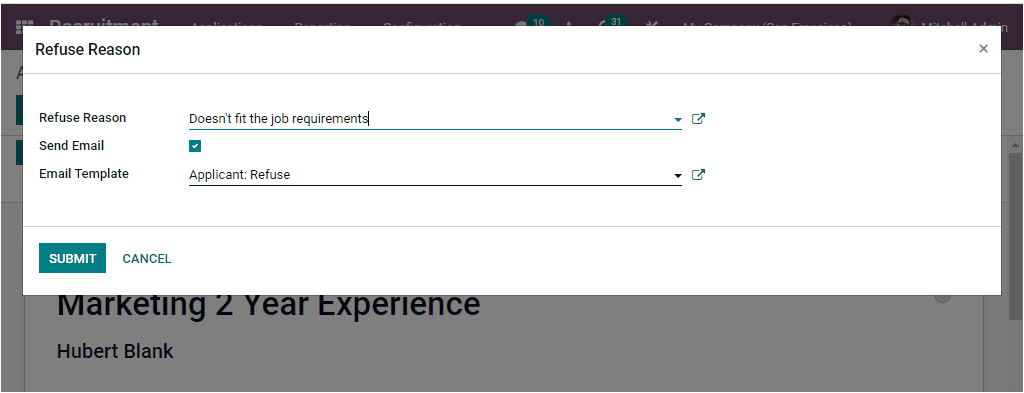
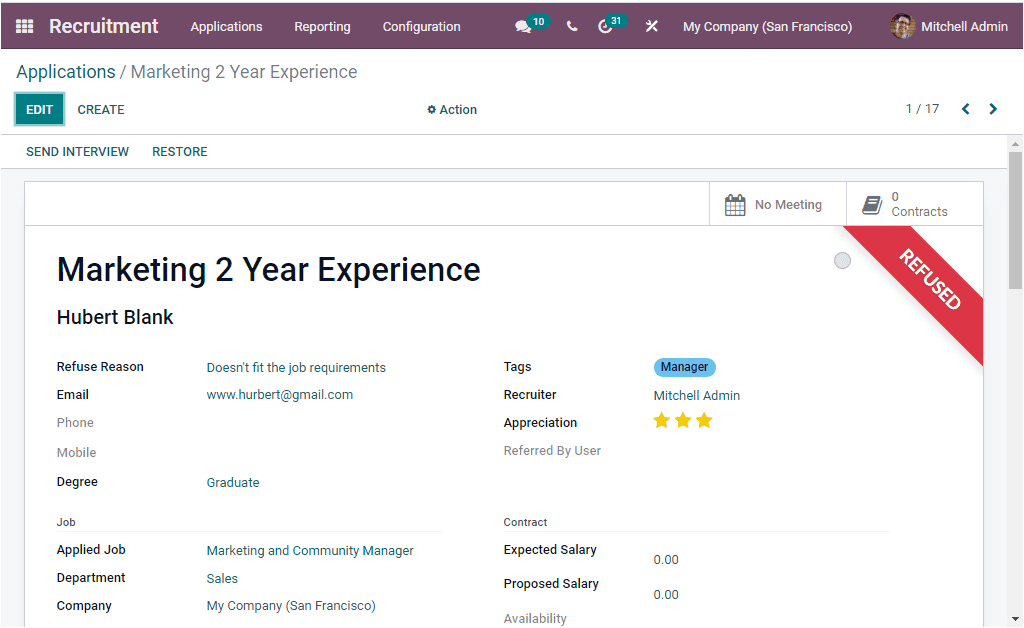
After allocating the Refuse Reason, you can click on the SUBMIT button. Now the Application will be marked as REFUSED, as shown in the image below.
Let us take a look at the Department menu.
Department
Odoo Recruitment module also provides access to the Department section. The Department menu available under the Configuration tab of the Odoo Recruitment module will allow you to access the Department window. The image of the window is displayed below.
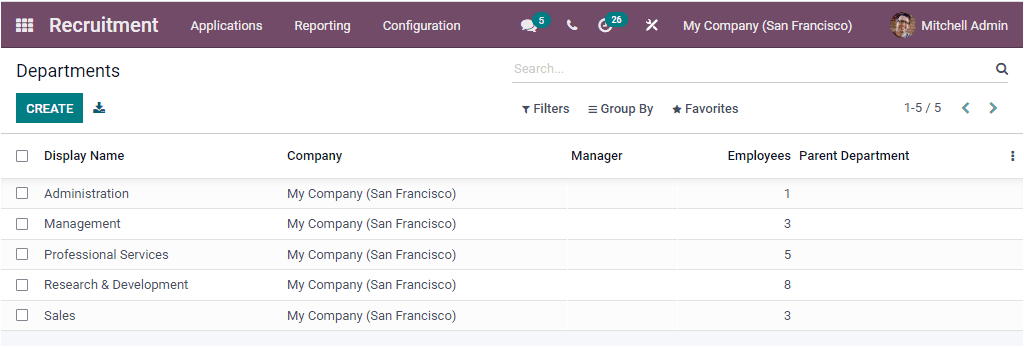
This Department window will display all the departments that are already created in the platform along with the vital information regarding each of the defined departments such as Display Name, Company, Manager, Employees, and Parent Department. You are also able to create new departments using the CREATE button. The screenshot of the Department creation form is depicted below.
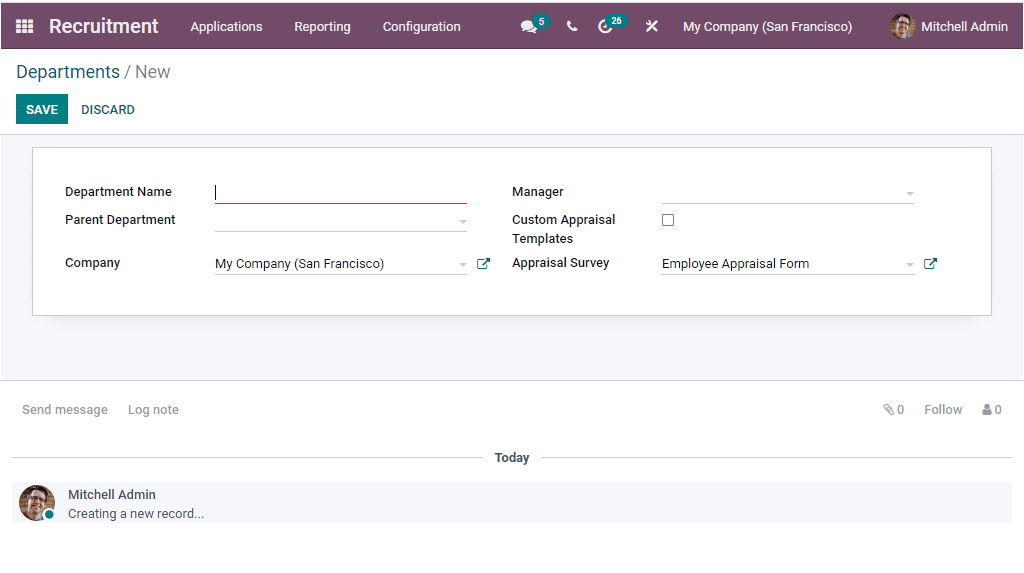
In this Department creation form, you should give the details such as Department Name, Parent Department, and Manager. Allocating the parent department in the new creation form will help you to subcategorize various company departments. The Company and Appraisal Survey fields are auto-assigned, and the platform allows you to change or modify it if needed. You are also able to activate the Custom Appraisal Templates field.
We can move on to the following menu, Activity Type.
Activity Type
You can access the Activity Type window available in the Odoo Recruitment module from the Configuration tab of the module. Initially, let us have a look into the Activity Type window.
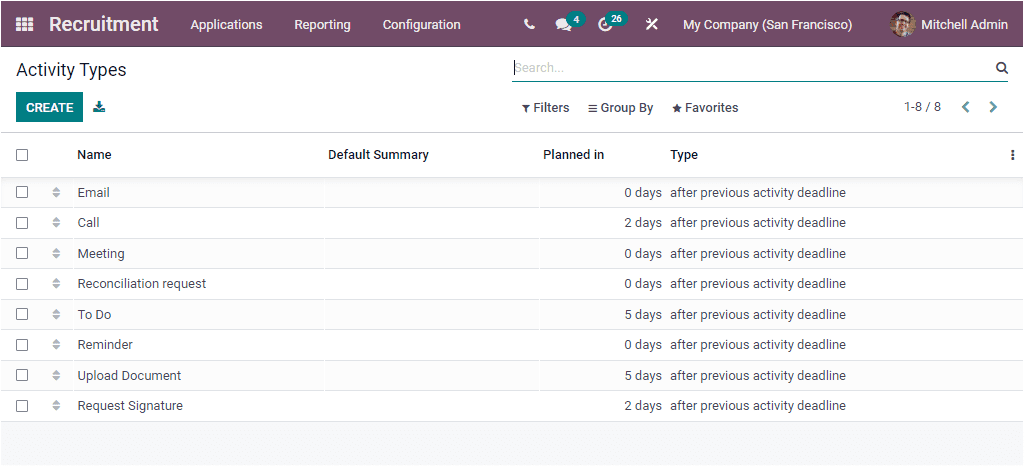
In the Activity Type window, you can access every activity that we have already defined in the platform. If you are creating a new activity type, it will also be saved into this window. The Activity type window will display the activities and details such as Name of the Activity Types, Default Summary, Planned in, and Type. To create a new Activity Type, you can click on the CREATE icon available on the top left corner. Now you will depict a window as shown in the below screenshot.
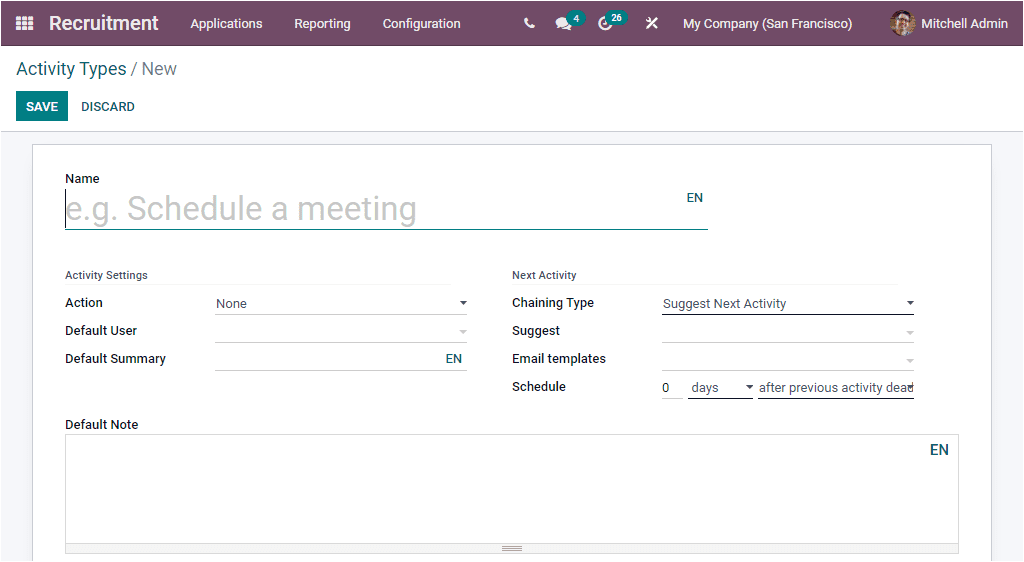
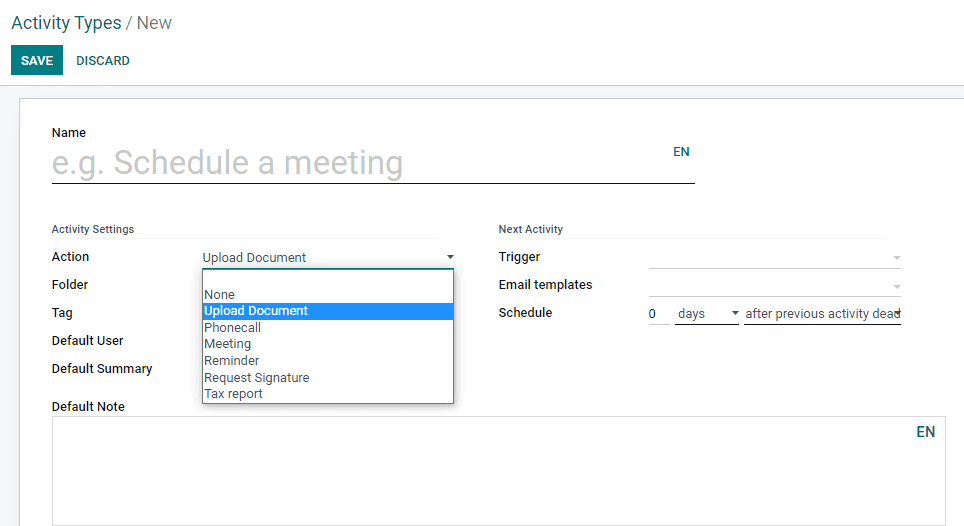
In this Activity Types window, you should provide the Name of the Activity Type. Then in the Activity Settings section, you can define the Action using the drop-down menu. This drop-down menu includes the options such as None, Upload Document, Phone call, Meeting, Reminder, Request Signature, and Tax Report
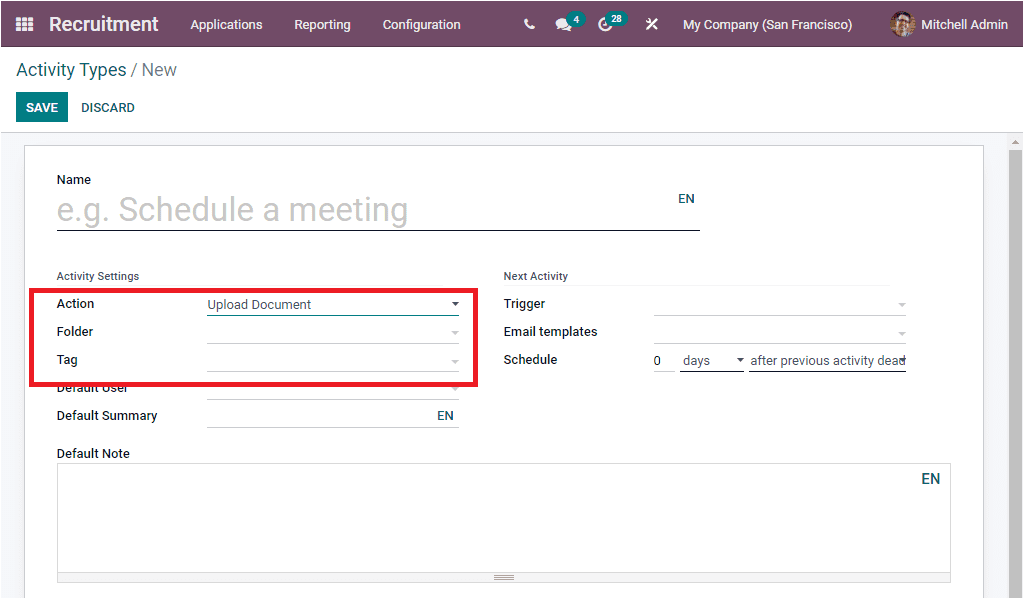
If you are selecting the Upload Document, you will also need to define a folder. By defining it, the upload activities will generate a document. You can also mention the Tags for quick access.
After specifying the Action, you have to mention the Default User and Default Summary. Under the Next Activity section, you have to fill the Trigger, Email Templates, and Schedule fields. In the Trigger field, you are able to provide the next activity. So that the system will automatically schedule this defined activity once the current one is marked as done. Moreover, the Schedule field allows you to plan the action deadline. You can determine the number of days/week/month before executing the action deadline. The unit of delay can be made after the completion date or after the previous activity deadline. Similarly, a Default Note can be described in the provided space.
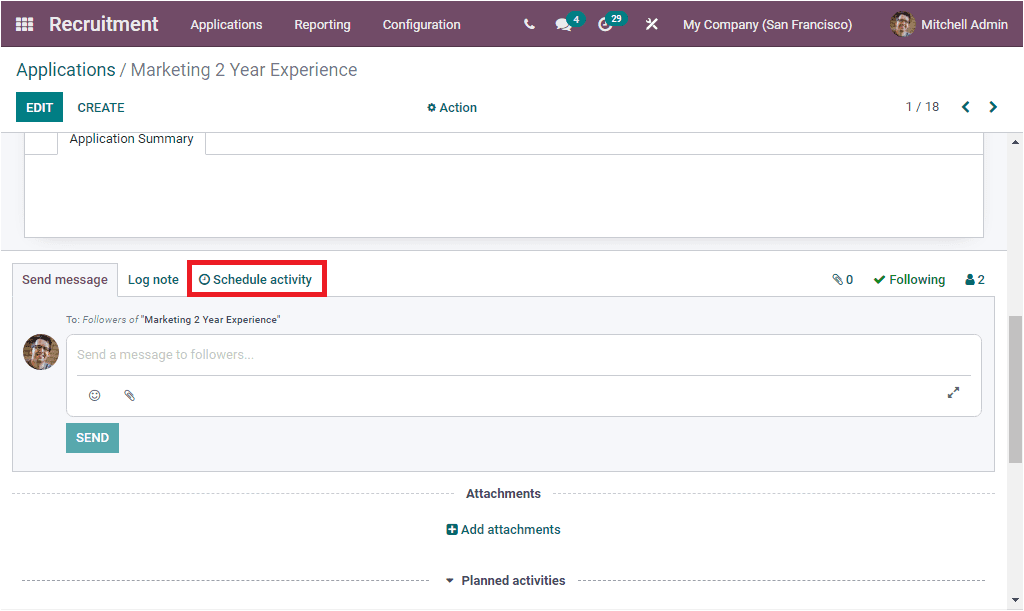
Odoo system also allows you to schedule various activities for various operations. For example, in this module, Odoo will enable you to schedule activities on the Applications. In the Application window, you can effortlessly execute activity scheduling. The activity scheduling option can be viewed at the bottom of the respective application records. When you scroll down the respective Application window, you will be able to view the Send Message, Log note, and Schedule activity options, where you can select the Schedule Activity menu.
Upon selecting the Schedule Activity menu, you will depict the Schedule Activity pop-up window as shown in the image below.
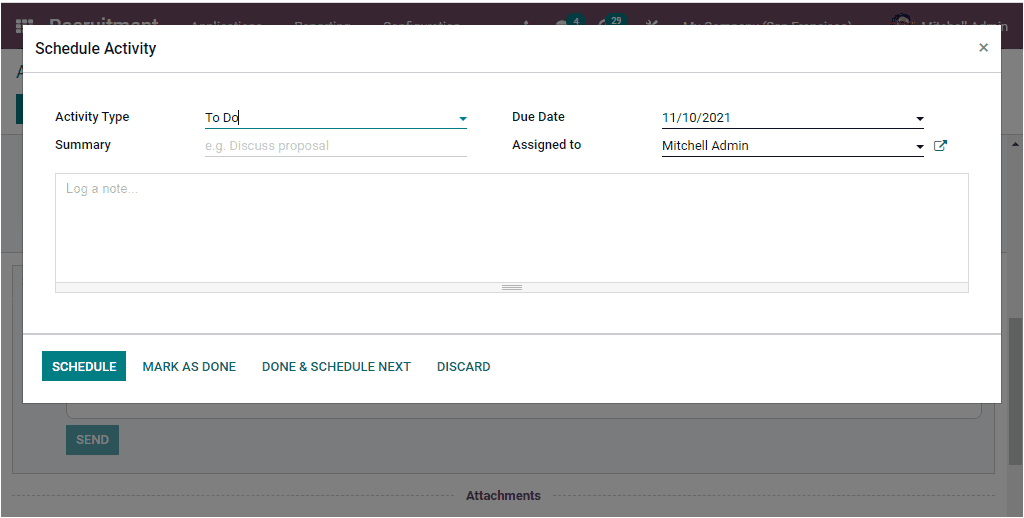
Here in this scheduling window, you should select the Activity Type, Summary, Due Date of the operation. In addition, you should also need to assign a person along with a Log note.
So far, we were having a detailed analysis of Activity Type, Schedule Activity options, and now let us look into the Reporting section of the Odoo Recruitment module.