Repair Management
The Repairs Management module in Odoo 15 provides an exclusive ERP solution and
supporting platform for almost all types of Manufacturing companies or vendors.
This Repairs Management module ensures adorable support that can customize and easily
integrate with the Manufacturing and Inventory modules of this platform.
As we know Repairing is an important and unavoidable part that could be operated
for both the stored products and for the sold products of a company. It is the most
valuable responsibility of a company that maintains and carries out the Repair processes
of their products in order to increase the credibility of their products and retain
customer support towards the organization. If you provide valuable service support
to your customers in the form of Repair services, it is certain your customer satisfaction
rate also will be in the highest mode.
Managing all these Repair orders manually may create some inappropriate situations
and confusion. It may also result in service delays, lagging, and even forgetting
some of them. This creates a sense of discomfort, dissatisfaction in the customers
and acts as a chance to lose your business.
By implementing a Repair Management system, you can make your customer satisfied
and help you to give back the product in real working condition on time. This Odoo
Repair module assists you to easily run, plan, organize, execute, monitor, and operate
your repair orders in a short span of time. In addition, the Repair module consists
of a flexible and adjustable mode of designing and that will be very effective for
all other modules to remain interconnected in all aspects of the operations of the
company.
The Repair management module provides you the provision to effectively carry out
all your after-sales services of products and also helps you to manage, remove or
replace the damaged portions of a sold product. Odoo designed the Repairs module
mainly for repairing your sold products and repairing the products which have been
manufactured. Using this robust application, you can work on broken or damaged products
and can execute the fixing and reconditioning of them. The module helps you to effectively
carry out all operations and also helps to gather the details on the damaged products.
Moreover, it will assist you to follow and track the repaired product in each stage
of operation. This module can be considered as one of the simplest modules in the
Odoo platform that will help you to bring unexpected advantages to your daily business
operations. This module can be easily integrated with all other important modules
in Odoo.
Now let us have a look into the module to understand the work flaw.
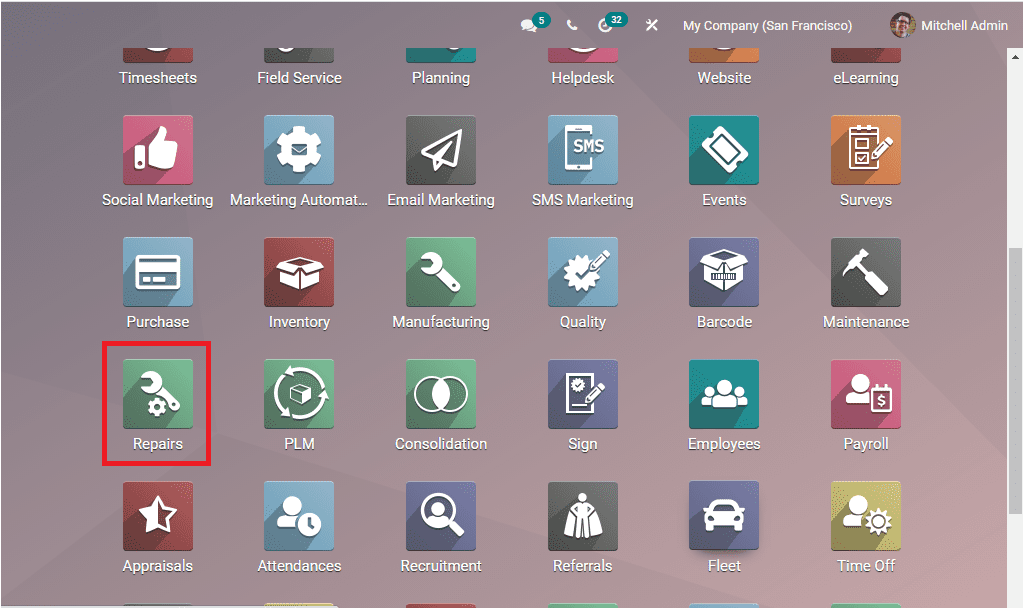
First of all, what you want to do is to install the Repair module from Odoo Applications.
When you install the module, you can view the Repairs module menu icon on your Odoo
dashboard as highlighted in the image below:
Upon selecting this menu, you will be entered into the Repairs module as shown in
the image below:
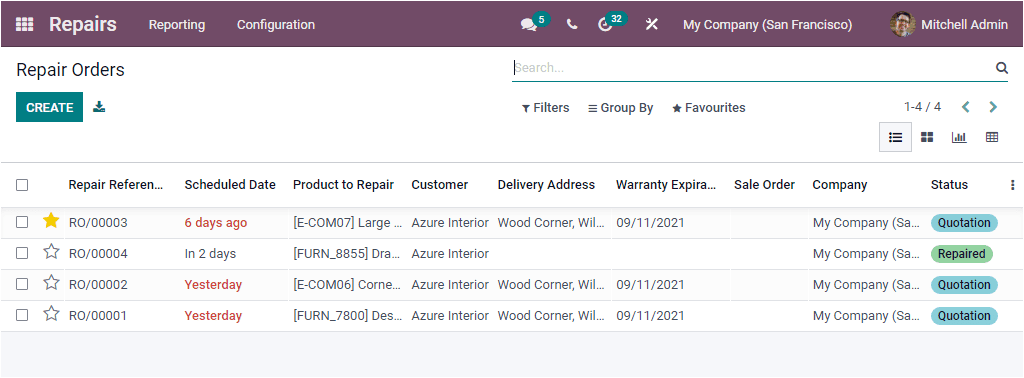
This window will depict all the Repair Orders described in the platform along with
the important details on each record such as Repair Reference, Scheduled Date, Product
to Repair, Customer, Delivery Address, Warranty Expiration, Sale Order, Company,
and Status. In a repair order, you can detail the components you remove, add, or
replace and record the time you spent on the different operations. This is the List
view of the Repair Orders window and you are also able to view this window in Kanban,
Graph, and Pivot views. In addition, you can select the lines to perform additional
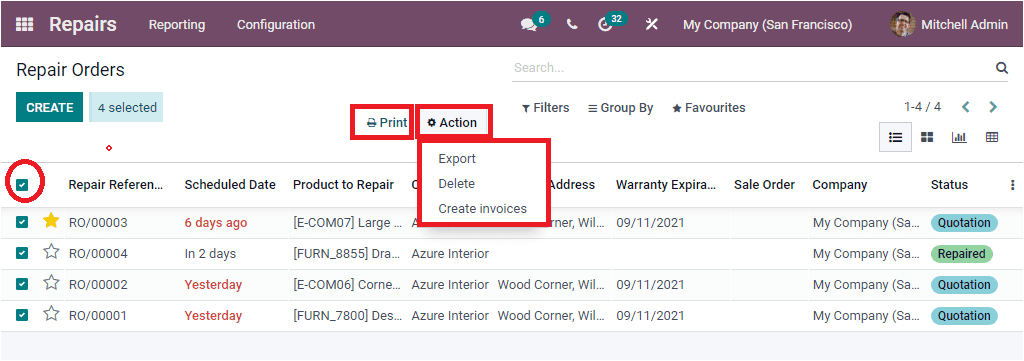
actions or take print of these records. For selecting all of these records, you
can check the box which is available on the top left corner of the window as highlighted
in the below image. Now you will depict the Print and Action button as highlighted
in the below image. The Action menu includes the sub-menus such as Export, Delete,
Create invoices.
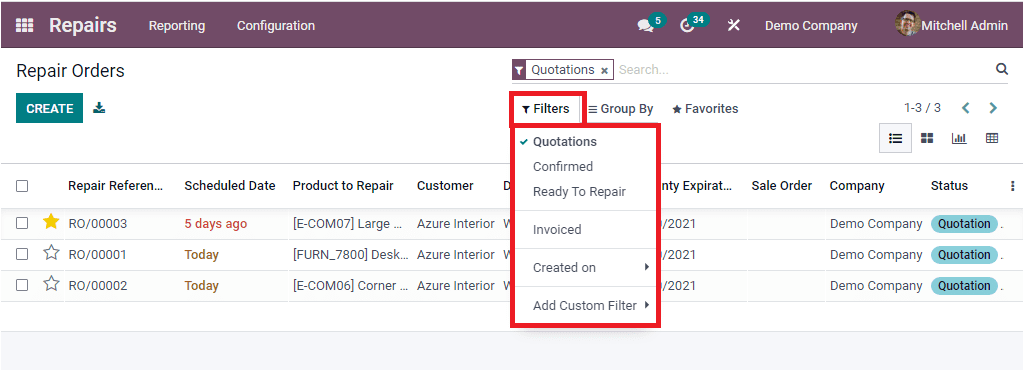
Similarly, you are able to mark the priority by clicking on the star icon and this
facility is very useful for marking urgent records. Additionally, the Filters menu
available in the window includes multiple default and customizable options. The
default filters available on this page are Quotations, Confirmed, Ready To Repair,
Invoiced, and Created On.
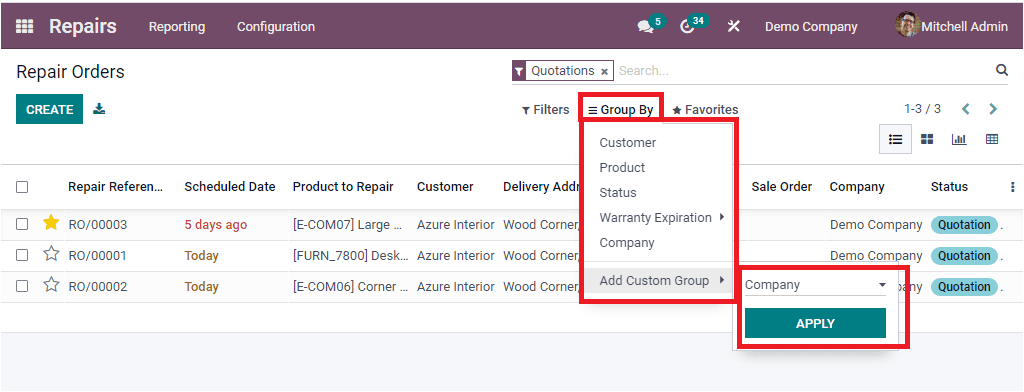
In the same way, the Group By menu allows you to group by a condition to acquire
the right data which you are searching for. The default Group By options available
in the window are Customer, Product, Status, Warranty Expiration, and Company. And
also you have the Add Custom Group menu that will allow you to customize various
groups based on your business requirements.
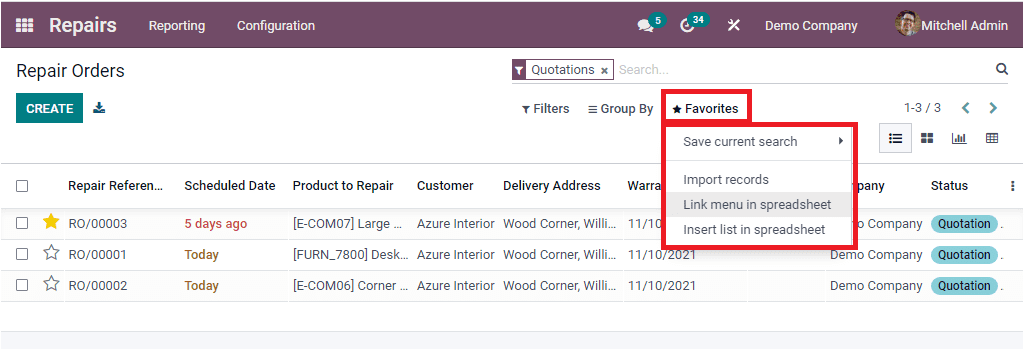
The Favourites tab will include the options such as Save current search, Import
Records, Link menu in spreadsheet, and Insert List in spreadsheet.
Now come to the Repair Orders, all of these predefined Repair Orders can be selected
for viewing in detail.
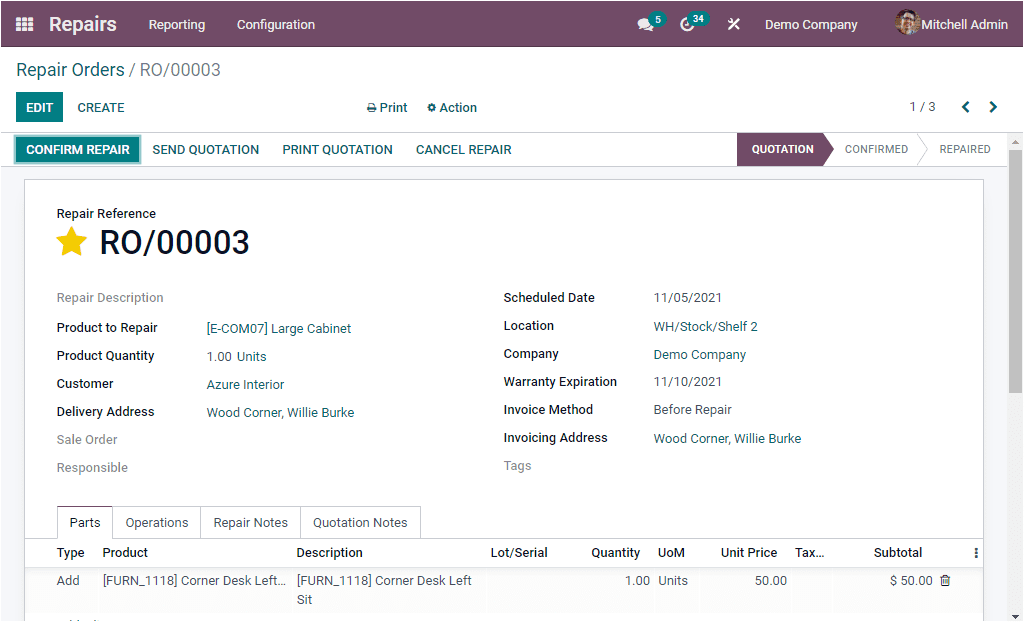
All the summary and allocations related to this Repair Order will be saved and displayed
in the window. Odoo also allows you to edit the details if any. This can be done
by clicking on the EDIT menu available on the left top corner of the window.
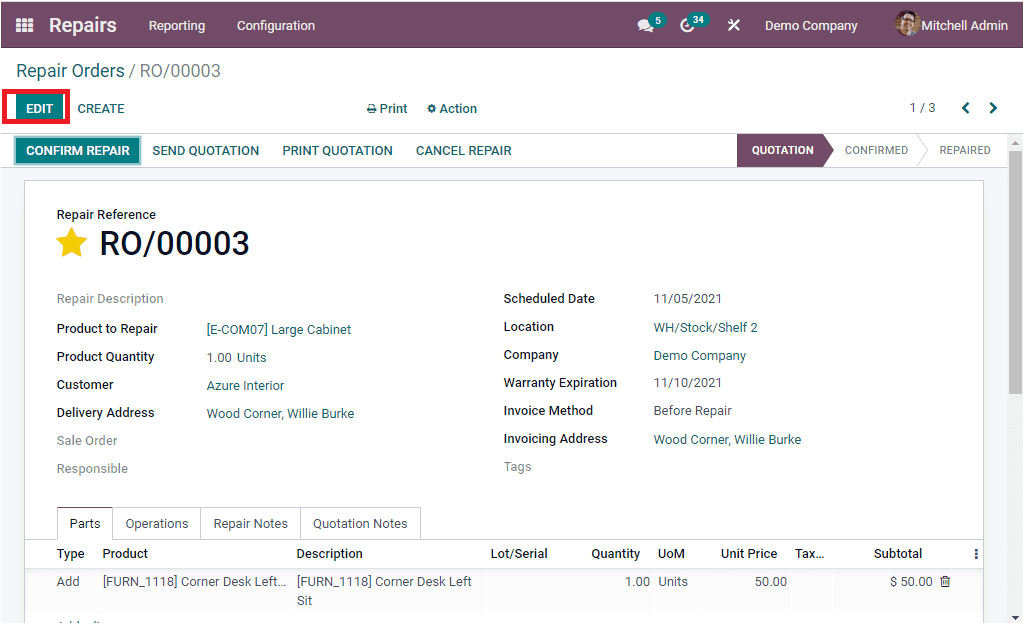
Back in the Repair Orders window, where you can view the CREATE button on the top
left corner. You can click on this button to get the Repair Orders creation window.
The screenshot of the Repair Orders creation window is depicted below.
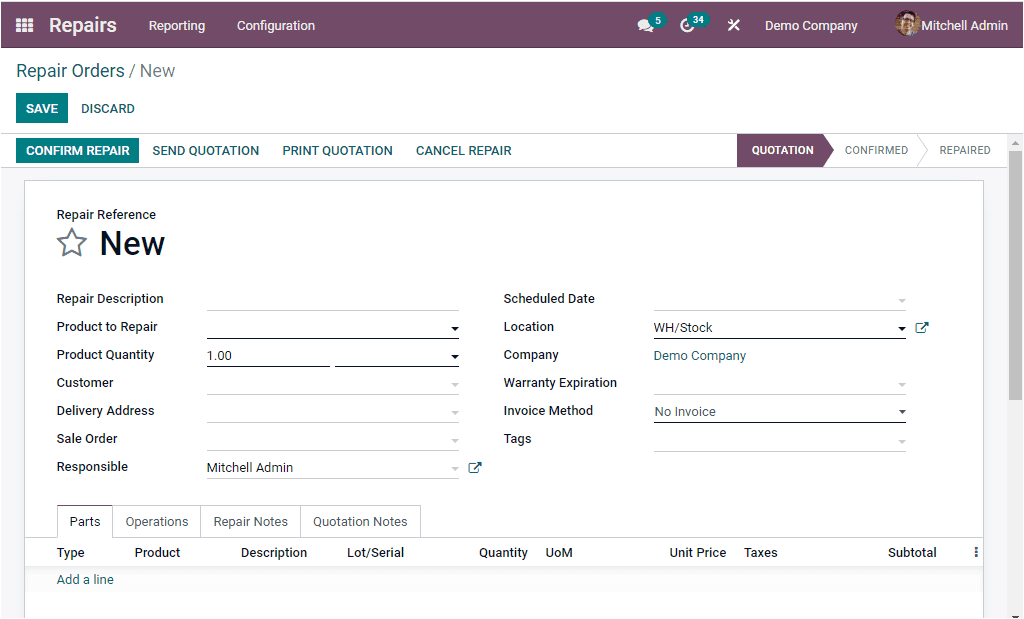
Using this creation form you can create new repair orders effortlessly. Initially,
in the creation form, you can provide a Repair Description and then you can specify
the product which you want to repair in the Product to Repair field. Then you can
allocate the Product Quantity. After that, you can choose the Customer for whom
the order will be invoiced and delivered. Similarly, you can mention the Delivery
Address. In addition, you can describe the Sale Order from which the product to
be repaired comes. The Responsible Person for this operation will be auto allocated
in the Responsible field. The Scheduled Date should be defined using the calendar
available. Furthermore, the Location where the product is to repair can be described
along with the Company and Warranty Expiration. Additionally, the Invoice Method
can be defined in between the options No Invoice, Before Repair, and After Repair.
The invoicing method can be specified based on if the repair work is a paid one
or not. The Before Repair and After Repair options will allow you to generate an
invoice before or after the repair is done respectively. If you select either of
these options, you should include the Invoicing Address. In the case of ‘No Invoice,’
you are not required to generate an invoice for this repair order. The No invoice
option can be selected in the cases when the product has a warranty or has free
service support. The window also allows you to allocate Tags. The Priority and Scheduled
Date are the new fields or options included in the 15’ th edition. Now the main
summary on the Repair Order is defined and now you have multiple tabs such as Parts,
Operations, Repair Notes, and Quotation Notes.
Under the Parts tab, you will have to include the details of the
product which you want to create a repair order. Hence we can say that the part
of the product that is needed for the repair is mentioned as the product. So you
can add the details of the product part which you are required to add or remove
to repair the damages. You can add the details using the Add a line menu available.
By selecting this menu, you can include the details. First, you can specify the
Type - this can be either Add or Remove. This field allows you to find out the type
of operation. That is because you are able to add or remove the product parts based
on your requirements. Then the Product can be allocated along with the description,
Quantity, Unit of Measure, Unit Price, Taxes, and subtotal.
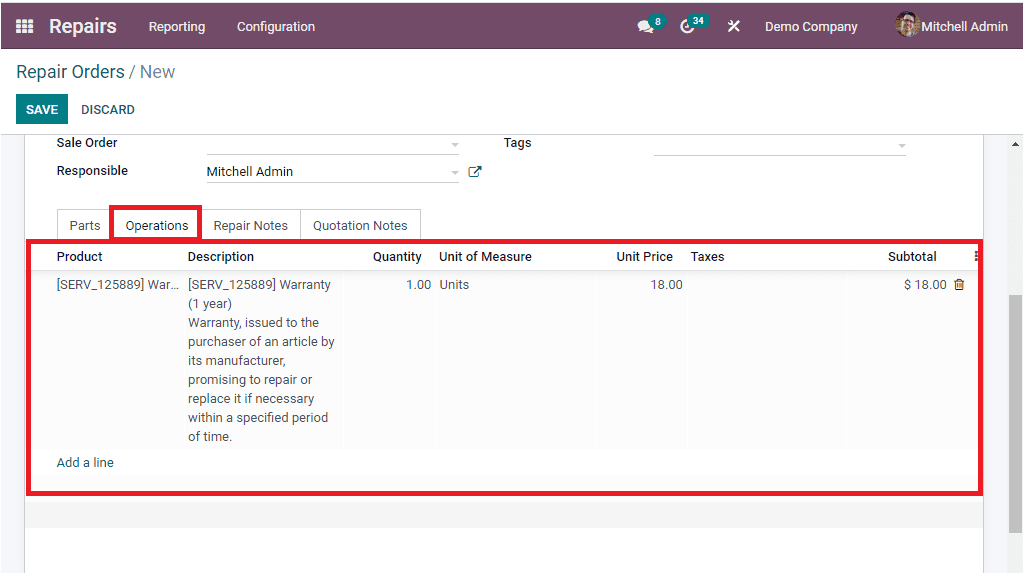
When we look at the Operations tab of the Repair Orders creation window, you can
define the operation details of the repair order by clicking on the Add a line option.
So you are able to mention whether it is a warranty, allowance, etc.
The Repair Notes tab allows you to customize a repair note and allows you to include
it in the window. In the same way, you can include quotation notes under the Quotation
Notes tab. Odoo modified the Notes tab in its 15 edition and brought new two notes
tabs as Repair Notes and Quotation Notes. So right now it will be very convenient
to differentiate between repair order notes and quotation notes.
After completing all these steps, you can click on the SAVE button to save the details.
Now your window will look like in the image below:
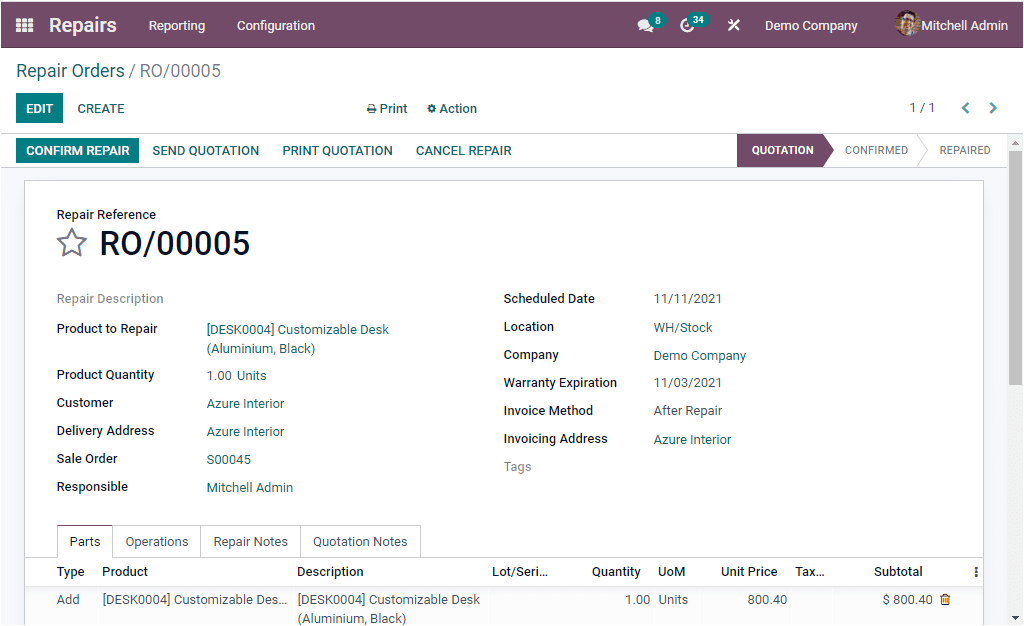
Now the Repair Order is in the Quotation stage and you can confirm the repair by
clicking on the CONFIRM REPAIR icon available on the top left side of the window.
Please note that here we selected the Invoice Method as After Repair. So the invoice
will be generated after finishing off the repair work. When you confirm the repair,
it will change into the CONFIRMED stage. Now you are able to start repair operations.
For confirming it, you can click on the START REPAIR button as highlighted in the
image below :
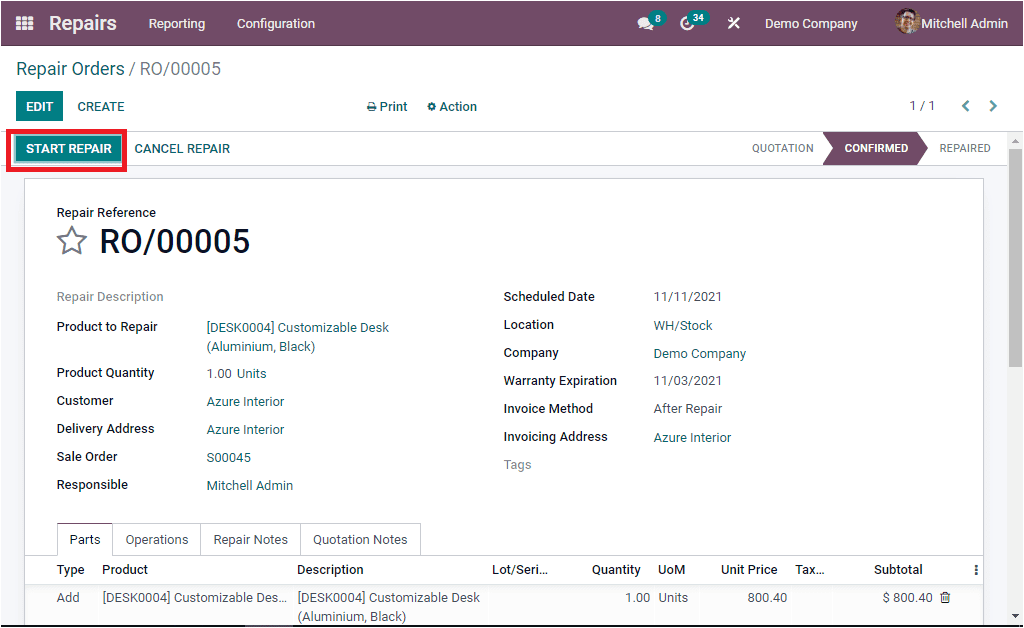
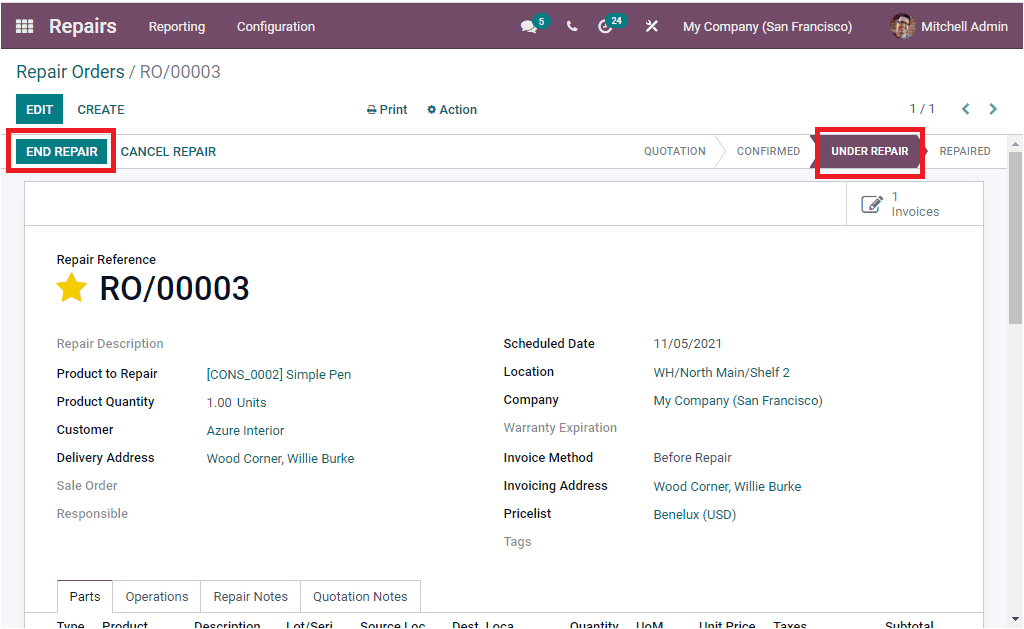
Now the stage of the repair order will be changed into the UNDER REPAIR.
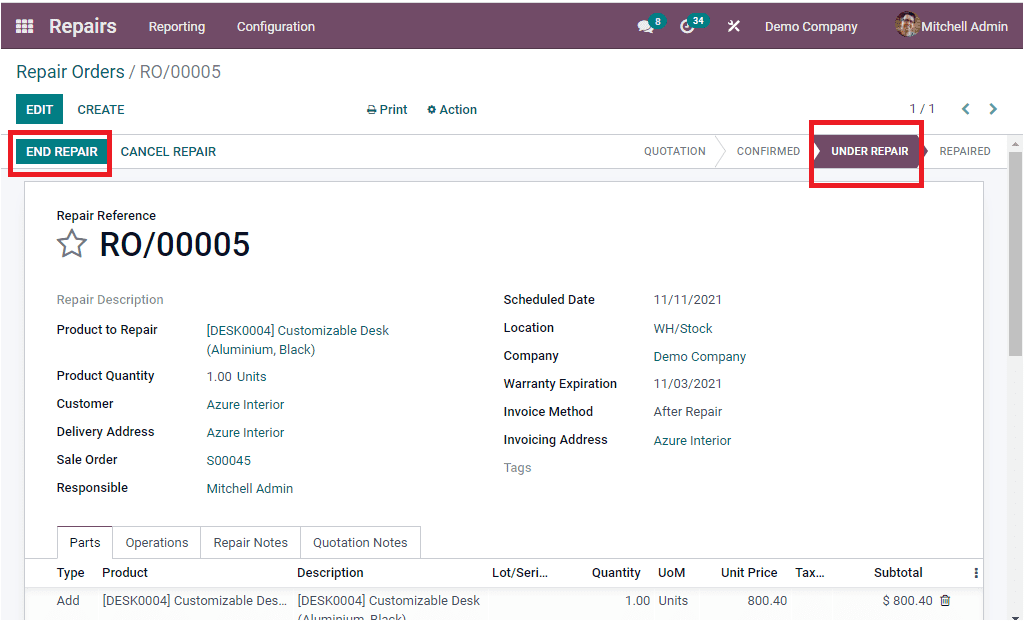
When you complete your task, you can click on the END REPAIR button available in
the top left corner of the window. Now the repair was completed and it is time to
create an invoice as we selected the Invoice Method as After Repair. Before that,
let us list out each of the stages available in a repair process.
Draft: This draft status or stage is used when you are encoding
a new and unconfirmed repair order.
Confirmed: The Confirmed stage can be used when you confirm the
repair order.
Ready To Repair: In the Ready To Repair stage, the product will
start to be repaired. You can start repairing only after the repair order is confirmed.
Under Repair: Under Repair stage will display when the repair is
in progress.
To be Invoiced: This stage will display when the repair order generates
the invoice before or after the repair is done.
Done: The Done stage is set when the repair is completed.
Cancelled: The Cancelled stage is applied if the repair order is
cancelled.
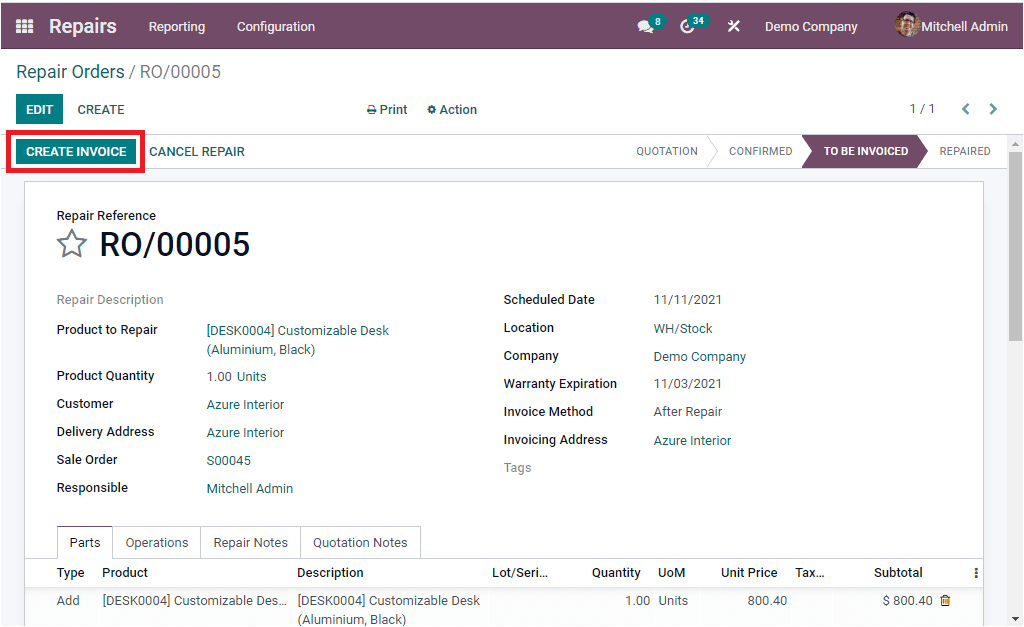
For doing this you have to select the CREATE INVOICE button available on the top
left corner as highlighted in the above image. When you select the CREATE INVOICE
button, you will be able to view an invoice.
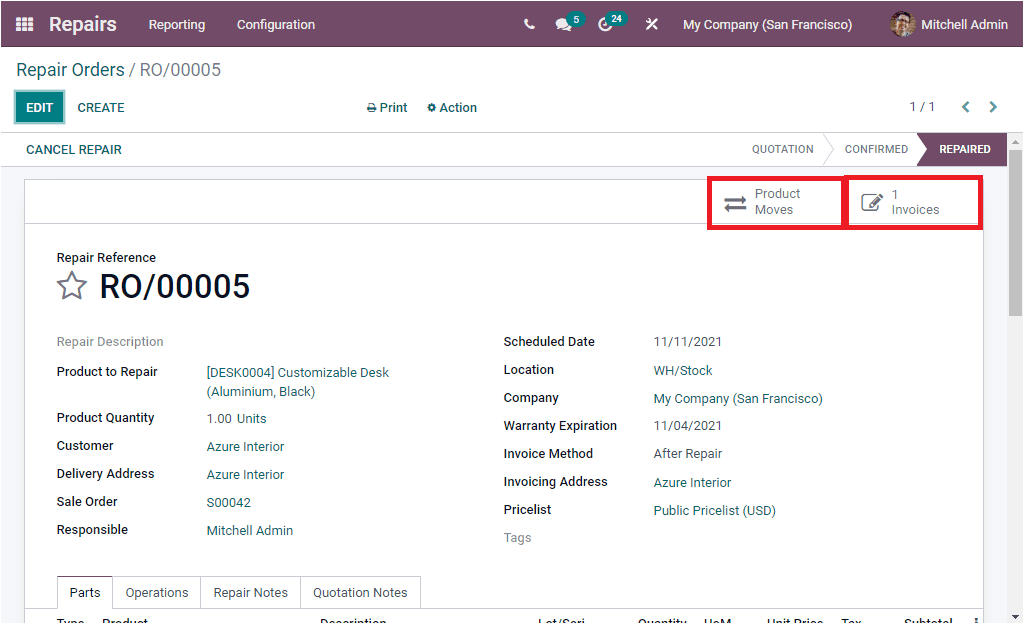
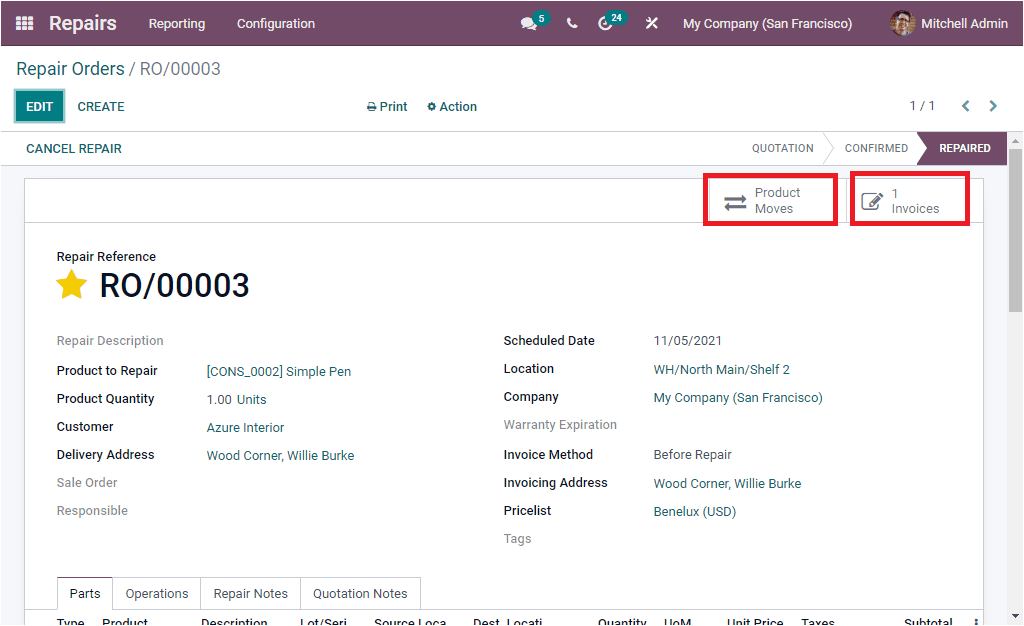
In this window, you can view two smart menus on the top right corner of the window
as highlighted in the above image. This is the link menu to the respective module
to perform the action. The smart menus available in this window are Product Moves
and Invoices as highlighted in the above image. When you click on the INVOICES button,
you will be directed to a draft invoice page as shown in the below image.
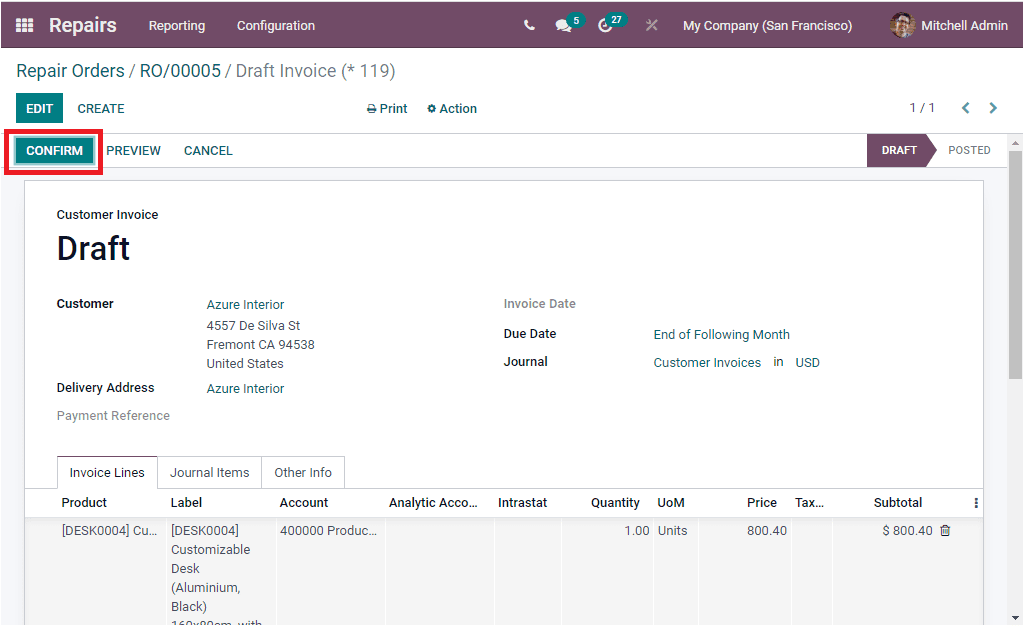
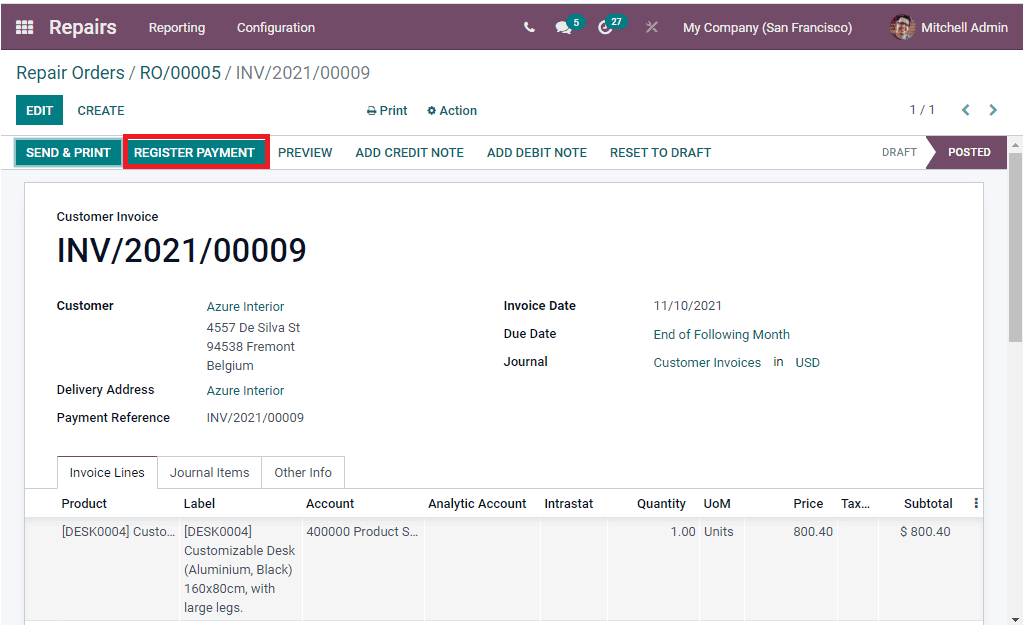
Here on this Draft Invoice page, you will be able to view the CONFIRM button which
will allow you to post the invoice. In this Posted stage, you are allowed to register
for payment. This can be done by clicking on the REGISTER PAYMENT button as shown
in the image below.
Once you click on the REGISTER PAYMENT button, the platform will depict you a pop-up
window as shown in the image below for registering payment:
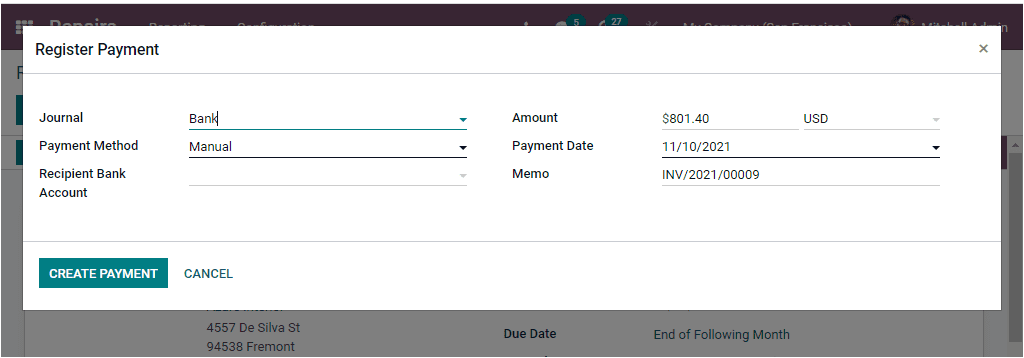
In this Register Payment pop-up window, you should mention the payment details such
as Journal, Payment Method, Recipient Bank Account, Amount, Payment Date, and Memo.
After allocating these details, you can click on the CREATE PAYMENT icon available
on the left bottom of the pop-up window. Now the invoice will be marked with a green
ribbon IN PAYMENT as shown in the image below:
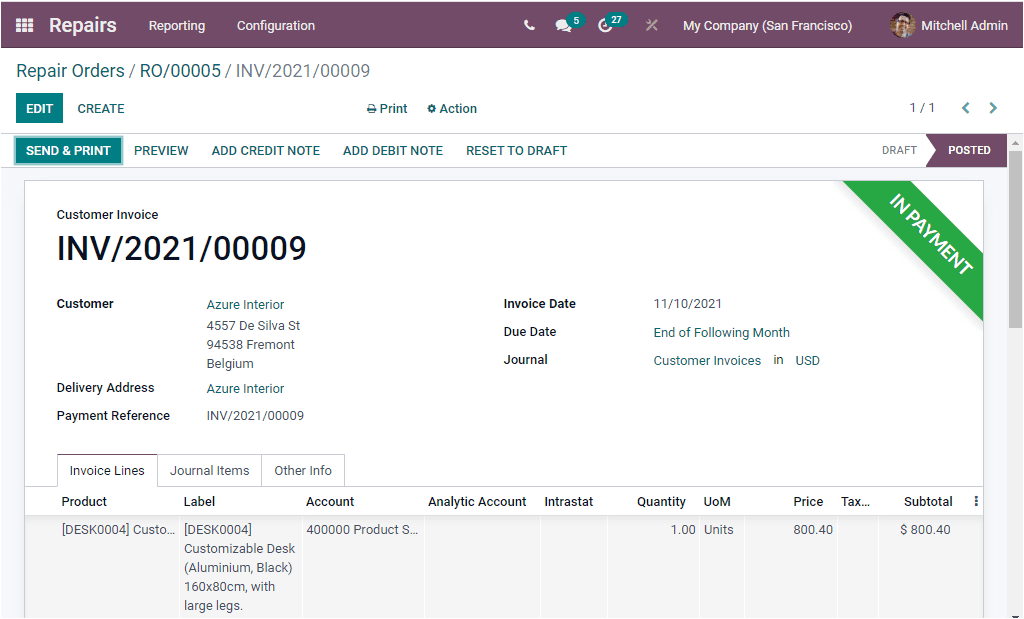
In this window, you can view various icons which are SEND & PRINT, PREVIEW, ADD
CREDIT NOTE, ADD DEBIT NOTE, and RESET TO DRAFT. You can send an invoice by clicking
on the SEND & PRINT icon available.

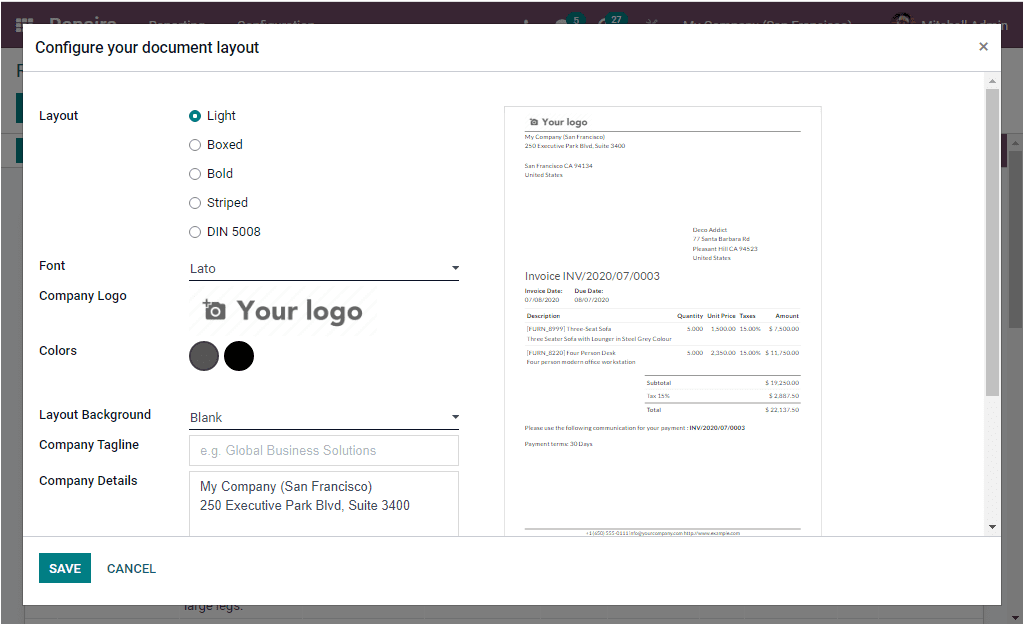
When you press the SEND & PRINT button, you will be displayed with the new page
where you can configure your document layout.
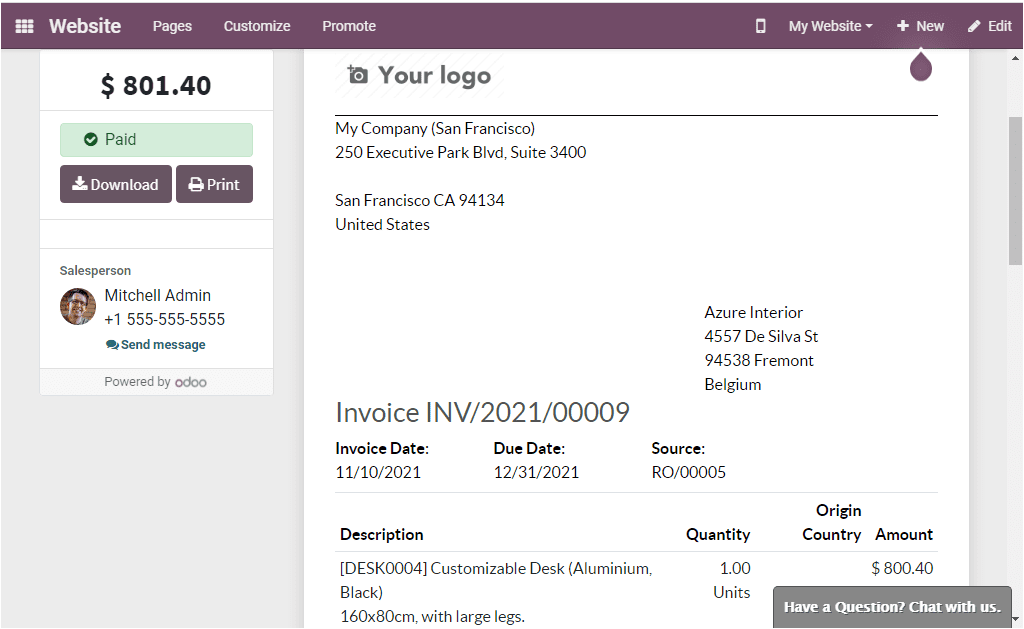
If you click on the PREVIEW button available on the IN PAYMENT window, you can view
the Invoices & Bills page as displayed in the below image. In this preview of the
invoice, you can view the subtotal details.
As we understand the point, how will the invoicing process be when we select the
After Repair as the invoice method. Now let us create a repair order with the Invoice
Method as Before Repair.
Before Repair
If you want to generate invoices before starting the repair process, you can set
up your Invoice Method as Before Repair.
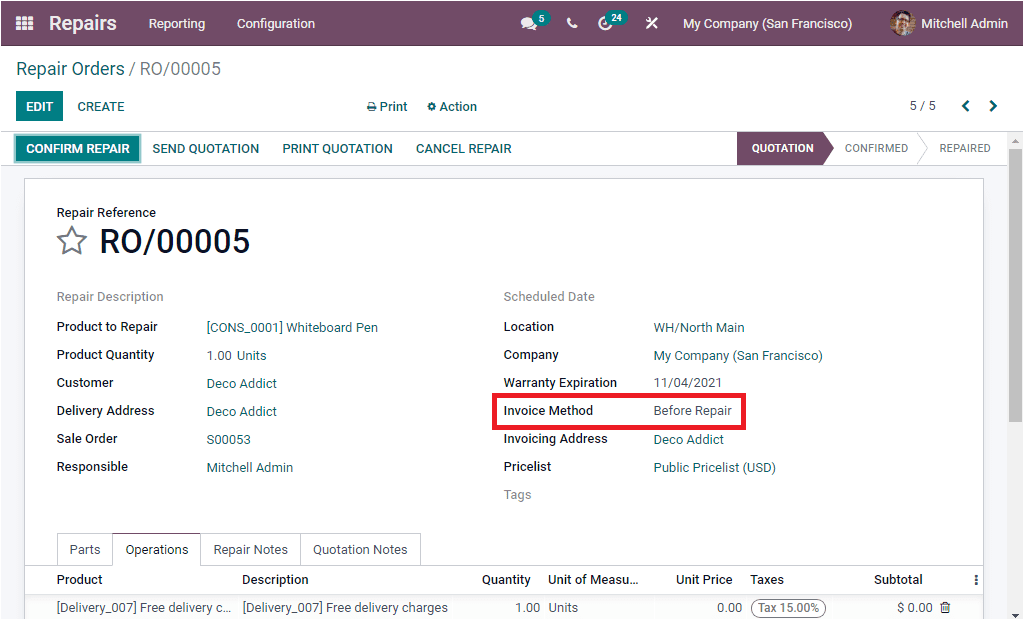
Here we created a Repair Order and set up the Invoice Method as Before Repair. Now
what you want to do is to confirm the repair by clicking on the CONFIRM ORDER button.
The next step is to create an invoice.
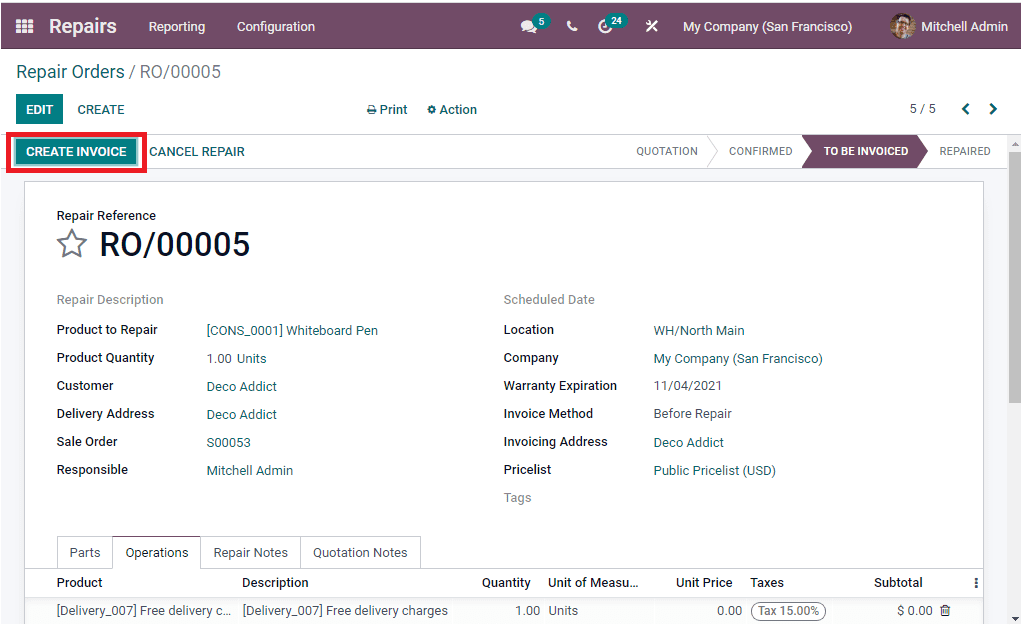
This can be done by selecting the CREATE INVOICE button as highlighted in the above
image. When you click on this button, you will find an INVOICES tab that will allow
you to create and confirm invoices. Using this smart button you can create an invoice
before starting the repair process.
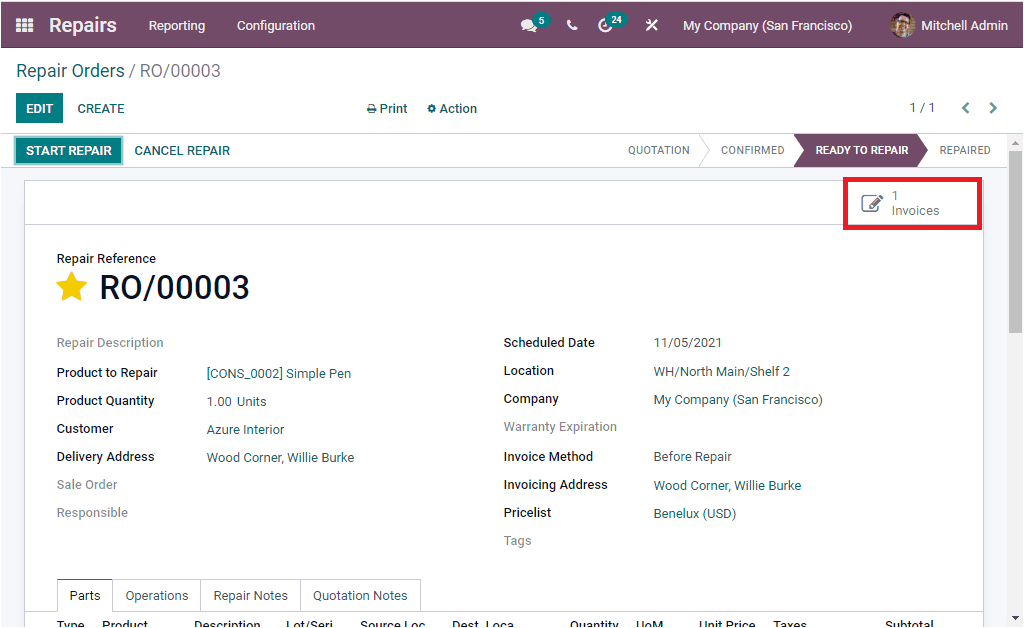
Once the invoice is generated, you can perform further operations. Here you can
see that the Repair Order is in the ‘READY TO REPAIR’ state which indicates that
when we opt for the Before Repair invoice method, you will be able to create an
invoice before initiating the repair process. In the top right corner of the window,
you can view the START REPAIR button which will allow you to start your repairing
process. Now the status of your Repair Order is displayed as UNDER REPAIR.
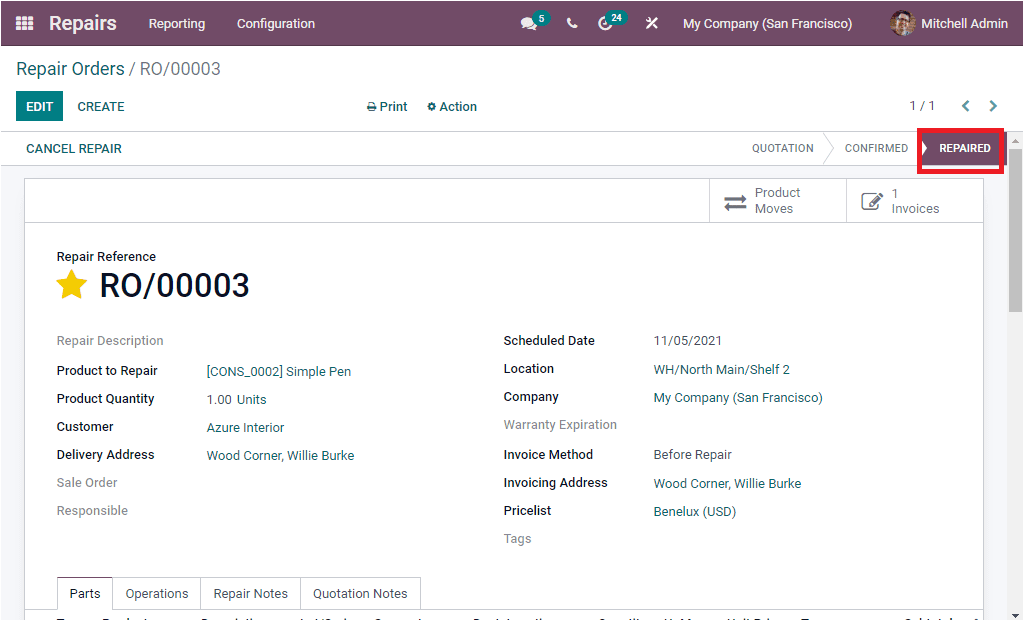
When the repair process is completed you can click on the END REPAIR button. Now
the Repair Order will be in the REPAIRED stage as shown in the image below:
When we come in the case of No Invoice, we did not need to generate any invoices.
This option can be set up in situations where the product has a warranty or if it
is a free service product type. In these cases, you need not to make any payment
for the repair work.
In the 15 edition, Odoo improved the repair work flaw in a more flexible way and
also it has a more comfortable interface that also allows you to track the product
moves. You can also access the Product Moves button along with the Invoices smart
button.
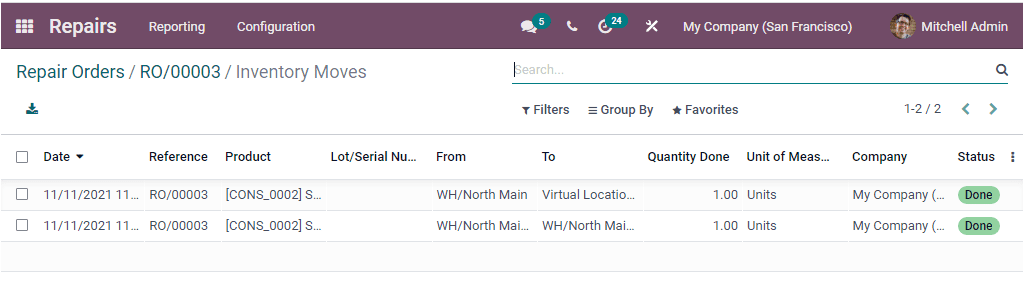
The Product Moves tab allows you to track the product moves. Upon selecting this
icon you will depict the Inventory moves window.
So far we were discussing how to create a repair order and what are the possibilities
for generating invoices. Now let us have a look into the Repair Orders Tag option
available in the module.