Creating new applications with the Studio module
The Odoo studio module comes built into the Odoo Enterprise edition, offering the
complete capacity to craft and define custom applications based on the functional
requirements. The simple drag and drop infrastructure of the Studio module will ensure
that multiple capabilities can be defined based on the platform’s functional needs.
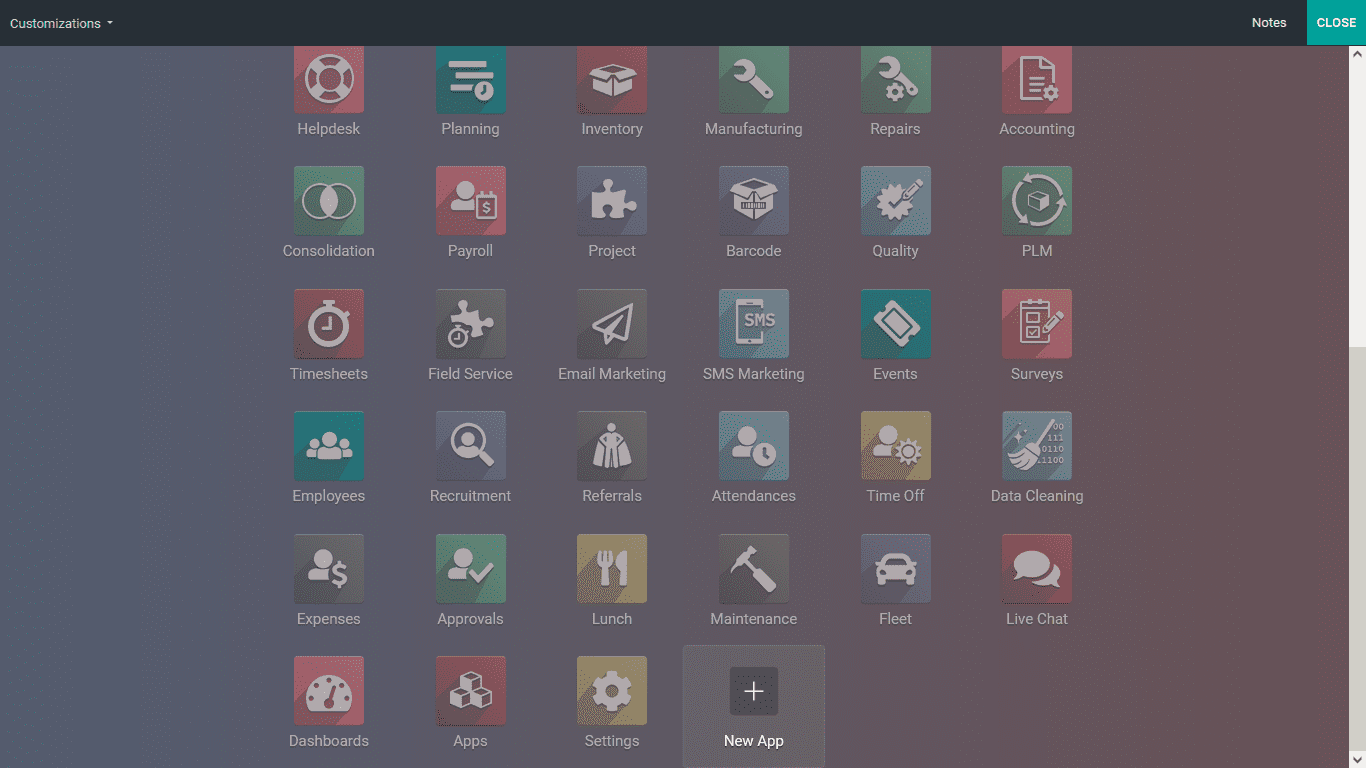
Moreover, with the Odoo Studio module, you will be able to create various applications
based on the operational and functional requirements of the operation. To create a new
application, you can select the Studio module, and you will be depicted with the option
to add a New App as depicted in the following screenshot.
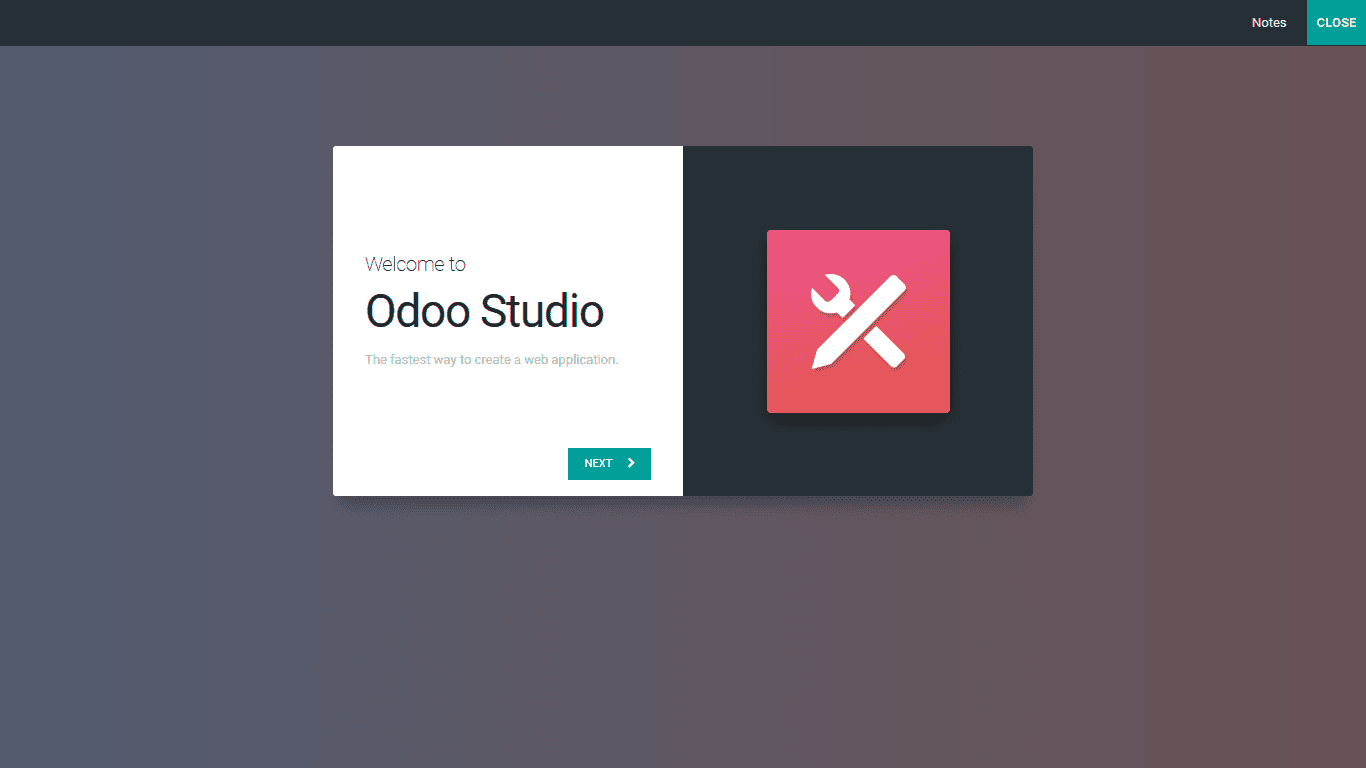
Upon selecting the Add New App option, you will be depicted with the window where the
Odoo Studio welcomes you to craft a new application based on your needs. Select the Next
option available and begin crafting new applications based on your needs.
Initially, you need to provide a Name for your new applications and the icon for it,
which can be created with the help of the available default tools, or an image can be
uploaded from the local server locations to be the icon providing you with full autonomy
and freedom to the aspects of the new application creation.

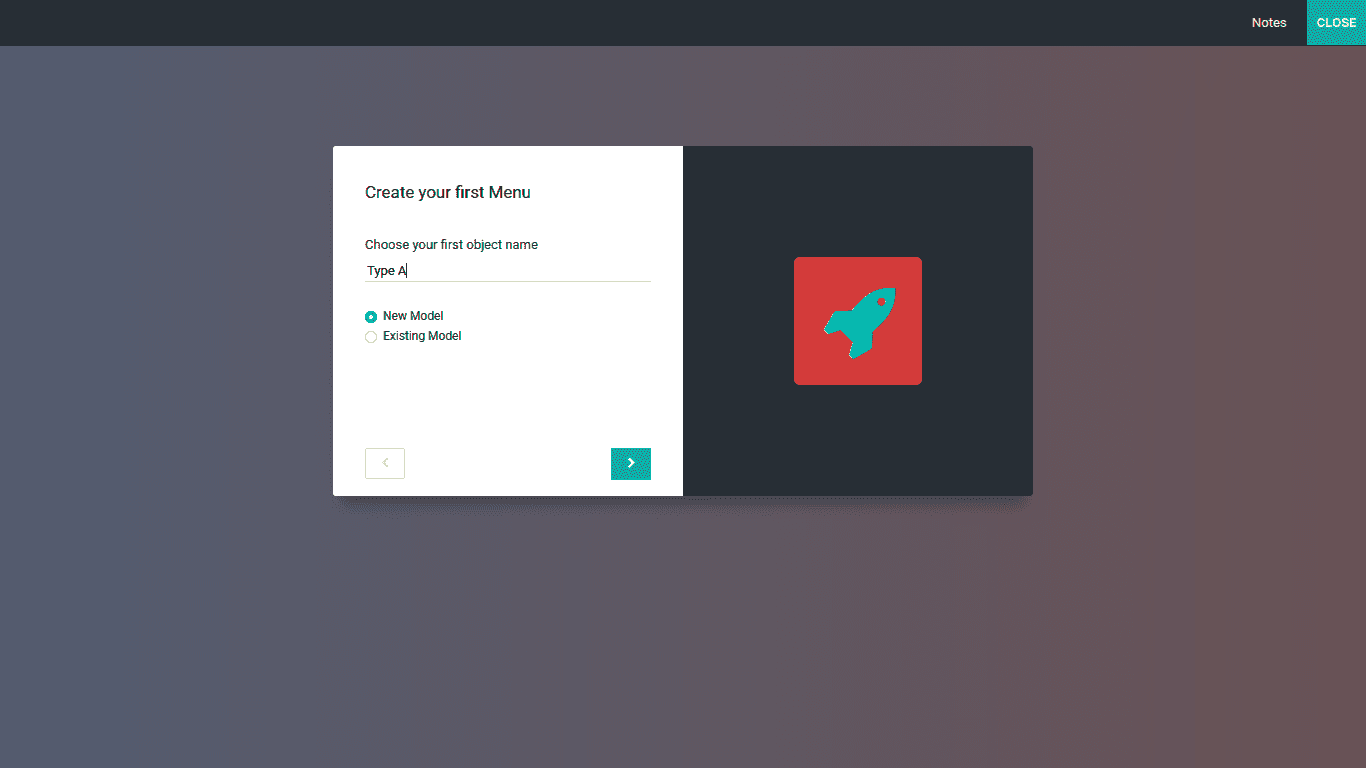
Once the Name and the Icon of the new application have the following existing, you will
have to Create Your First Menu, which can be done after selecting the Next arrow as
depicted in the above screenshot. Here you need to provide the First Object Name in the
respective section as described in the following. Moreover, you need to define a Model,
whether it's a New Model or an Existing Model. And finally, select the next arrow
option, which will take you to the menu where you can configure the Model.
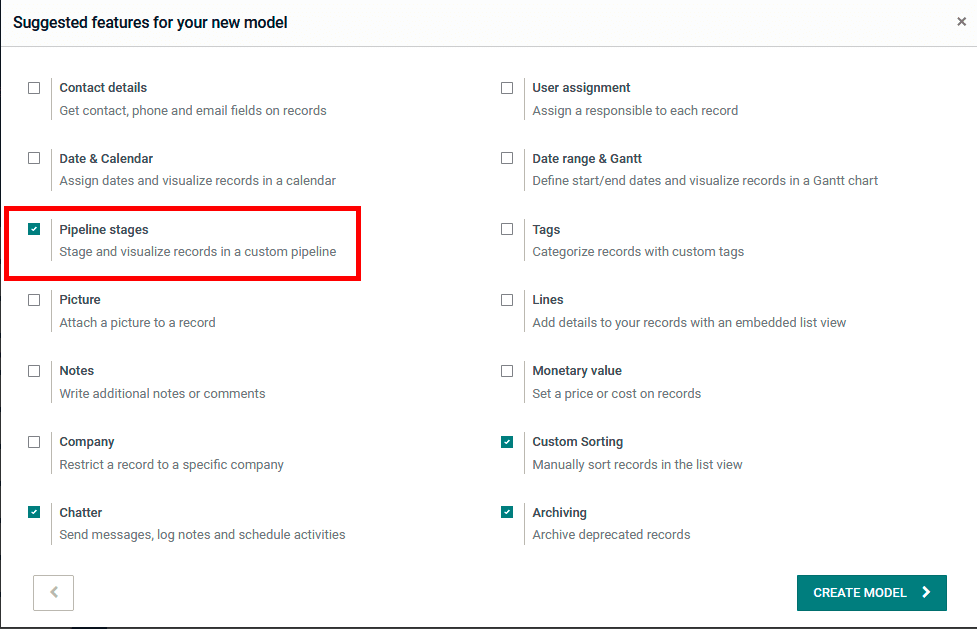
In the Configuration menu for the model, you will be depicted with certain suggested
features that can be included. These features can be enabled or disabled based on the
operational and functional needs of the platform. Here you can enable or disable the
features such as Contact details, User assignment, Date & Calendar, Date range & Gantt,
Pipeline stages, Tags, Picture, Lines, Notes, Monetary value, Company, Custom Sorting,
Chatter, Archiving, and many more based on the suggestions provided.
The Contact Details feature can be enabled to a definite Field where the Contact Details
can be defined for the respective menu which will be helpful if the customer fills in
their information in the application. With the User assignment feature, you will be able
to assign a dedicated User i.e. an employee of the organization to be responsible for
maintaining and checking on the record. The Date & Calendar field can be used to define
the date through the calendar which will be opened up to be selected by the user. The
Date range & Gantt will be helpful in describing the start Date as well as the End Date
of the respective aspects along with a view of the dates in a Gantt view. This will be
helpful in knowing a clear insight on the Dates which have been defined. The Pipeline
stage is a Field that has been defined in operations depicting the stage of respective
entries which have been defined. This will provide information of the entry in the
respective menu thus indicating the current stage which can be changed by selecting the
stages. Moreover, the stages of the Pipeline can be custom-defined based on the
operational need.
The Tags field can be described in the new application window which will ensure that the
entries which are being defined have tags associated with them which will be helpful in
the filtration as well as grouping aspects. In the Picture field the picture of the
respective entry whether it’s a product or the contact information. In the Lines
section, the respective lines of information or a description of any aspects can be
defined, this may be the product description, address lines, terms, and conditions, or
any other aspects in concern to the entry which is being described. In the Notes Field,
the defined notes on the entries can be described which will provide information to the
users as well as other users when they are functioning with the respective entry. The
Monetary value Filed where the Value of the product or an asset can be described, this
feature will help to define the price of the respective entry let it be a product,
service, or an entry of any form.
The Company Field will allow you to define the company in which the respective entry is
associated. This will be helpful for the operations of the business where there are
multiple companies of functioning being defined. The Custom Sorting aspect of the
entries being defined will be helpful in the menu where all the entities are defined.
Moreover, the respective Custom Sortings can be saved based on the need and altered at
times. Chatter functionality can be enabled which will ensure that the users or the
customer have a chatter field where the users can communicate with each other. The
Archiving field will ensure that the respective entries will be Archived for it to be
used at a specified time of operation by Unarchiving it.
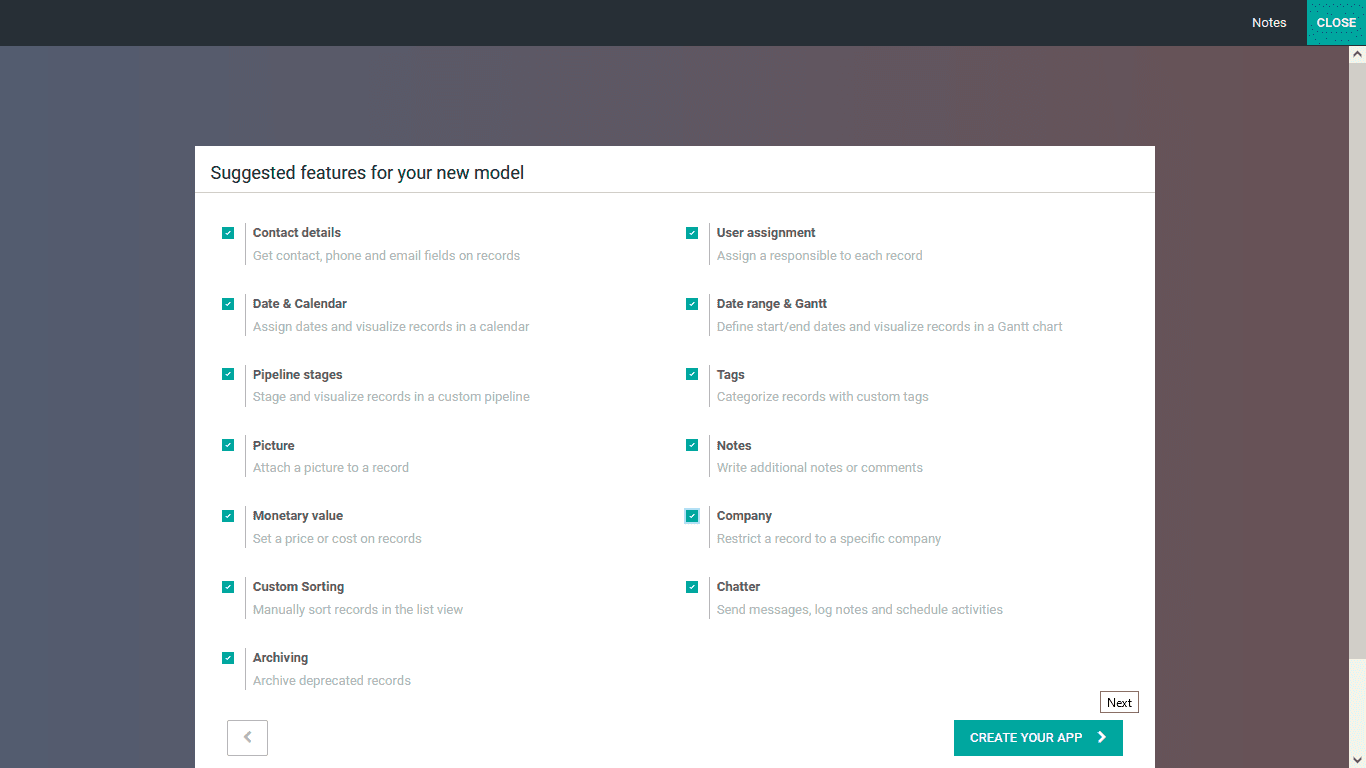
Once the configuration-based options are undefined and the ones that are enabled, the
next stage will move further with the aspects of the creation of the new applications.
You can select the Create Your App option available as depicted in the above image. You
will be driven to the App configuration window, as shown in the following screenshot.
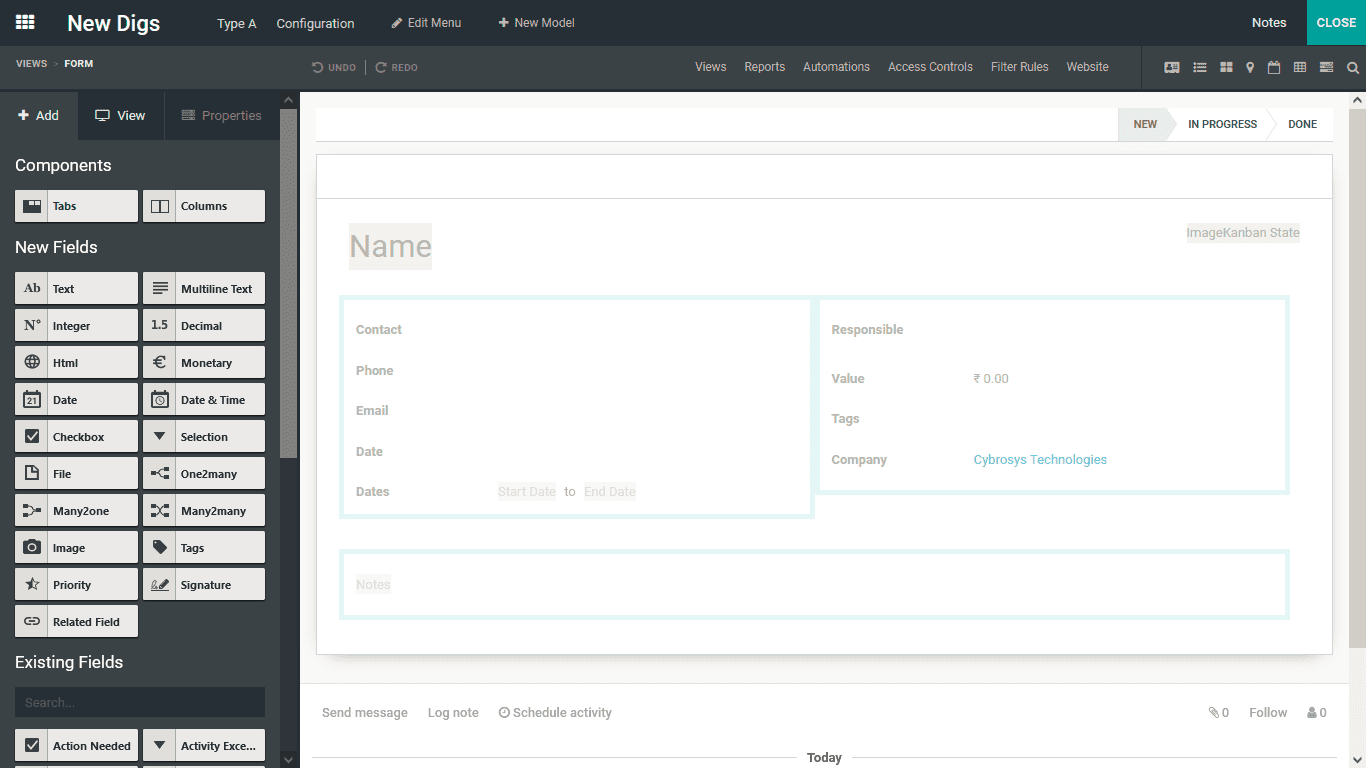
Here you will have the provision to add the Field based on the operation’s needs.
Initially, the components required for the application’s operations, either Tabs or
Columns, can be selected, dragged, and dropped in the desired location of the
Application window as depicted on the right side of the following screenshot. You can
add in the New Fields by selecting the respective icon from the menu and drag and
dropping it in the desired location of the application. If you have chosen an existing
model for your application, you will be depicted with the Existing Fields, where all the
defined fields can be viewed and used again based on the modifications needed.
Furthermore, the stages of operation of the menu of the respective application can also
be changed based on the need, and the Log aspects of the menu of the respective
application, which is depicted on the lower side of the menu, can also be crafted based
on the needs.
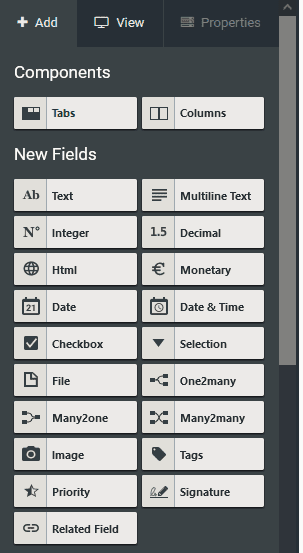
The + Add functional menu available will help you bring new elements to the application
window based on the need. Initially, you can add the Tabs and Columns based on the
application’s functional requirements. The Tabs are helpful in collaborating multiple
information to the application which has been developed. Moreover, the available options
in the application can be sorted based on the operational and functional needs on the
respective tabs. These can be custom build tabs based on the application’s requirements
and usage.
Further, the different Columns of operations can be defined where the various sections in
each of the application menus can be described. This will bring a distinctive style and
an arrangement to the tabs and the menus, along with the related options. Moreover, the
Columns can be configured based on the operational needs of the application and what the
creator intends to do with it.
Once the Tabs and Columns are being described which can be done by selecting the
respective one and dragging and dropping into the operations are of the application. The
further configuration aspects of the respective Tab and the Column which is being
defined will ensure that the operational aspects are based on your functional needs The
next step is to define the Fields, where you can bring in New Fields and define the
Existing Fields and create new ones based on them. All the Fields that are not described
in the application will be depicted in the New Fields section. The Existing Fields are
the ones that are already defined in the model which you have selected if the model is
already existing in the Studio application. However, if you are selecting a new model to
be in operation, there won't be any Existing Fields to be depicted. You can simply
select each of the Fields and drag and drop it to the desired location in the
application window, specify and use multiples based on the functional and operational
needs of the application. You can add fields such as Text, Multiline Text, Integer,
Decimal, Html, Monetary, Date, Date & Time, Check Box, Selection, File, One2many,
Many2one, Many2many, Image, Tags, Priority, Signature, Related Fields any many more can
be defined. All the Fields which are not being defined in the New Fields will be defined
in the Existing Fields.
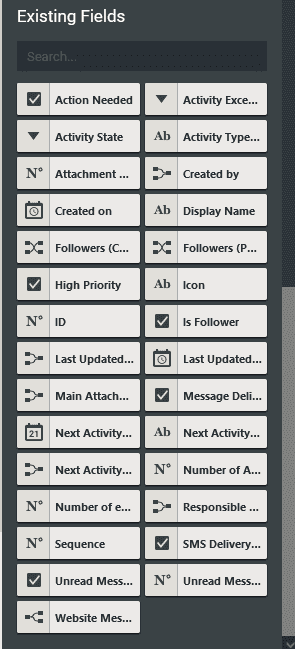
As we have selected an Existing module for the application developed, the Existing Fields
will be defined. All the defined Fields of the module will be depicted in the Existing
Fields section over here. You can define the Fields such as Action Needed, Activity
Execution, Activity Stage, Activity Type, Attachment, Created by, Created On, Display
Date, Followers, High Priority, Icon, ID, Is Follower, Last Updated Date, Last Updated
Time, Mian Attachment, Message Delivered, Next Activity, Next Activity Date, Number of
Execution, Responsible Person, Sequence SMS Delivery, Unread Message, Website Message
and many more.
These Fields have already been defined in the model that we have selected. Moreover, each
field can be used multiple times regarding the operation tools functions based on the
needs.
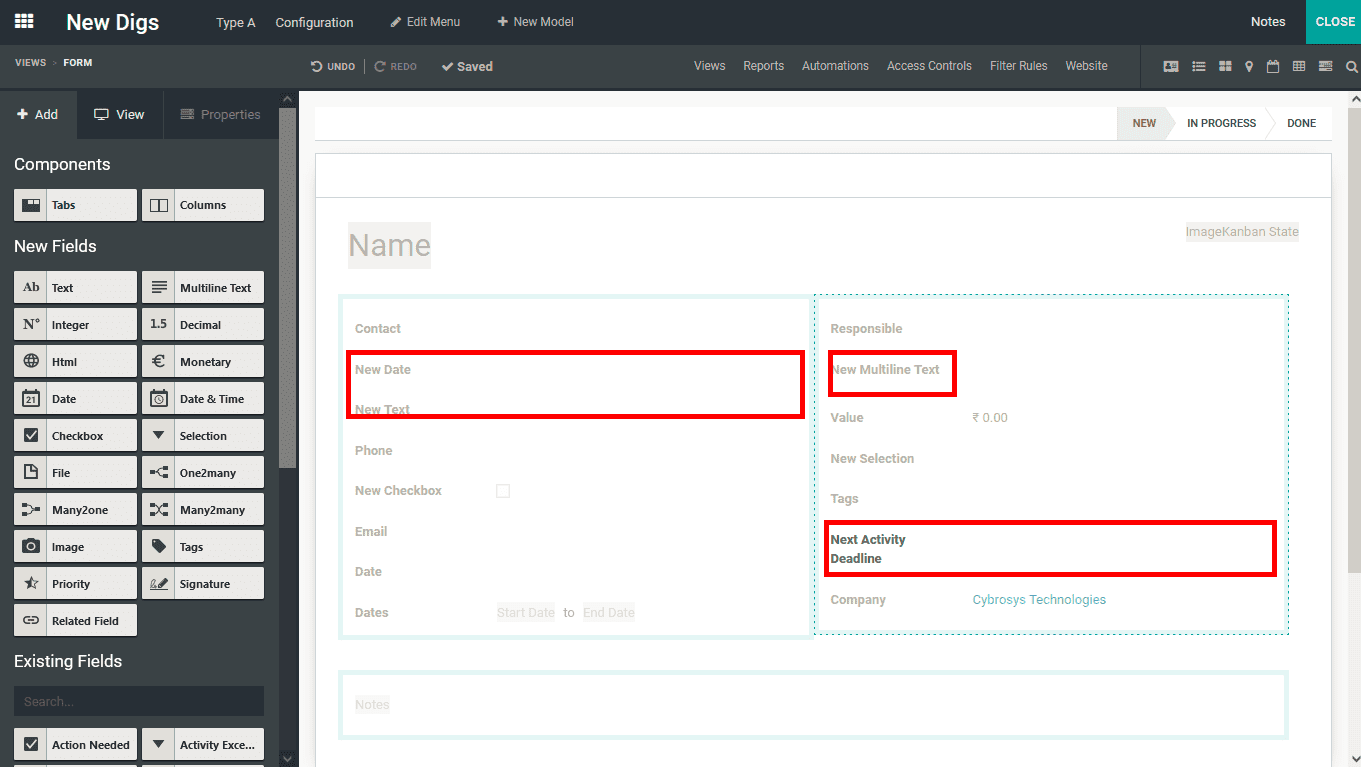
You can define the required Fields, whether following an existing Field or a New Field,
into the application by dragging and dropping them to the required spaces of the
application window. Moreover, the functional configuration aspects regarding the
operations of the applicational options can be effectively done by an Odoo developer if
the user has the right on the operational aspects of the various Fields as operational
and configurational aspects. The following screenshot describes the Fields defined in
the application.
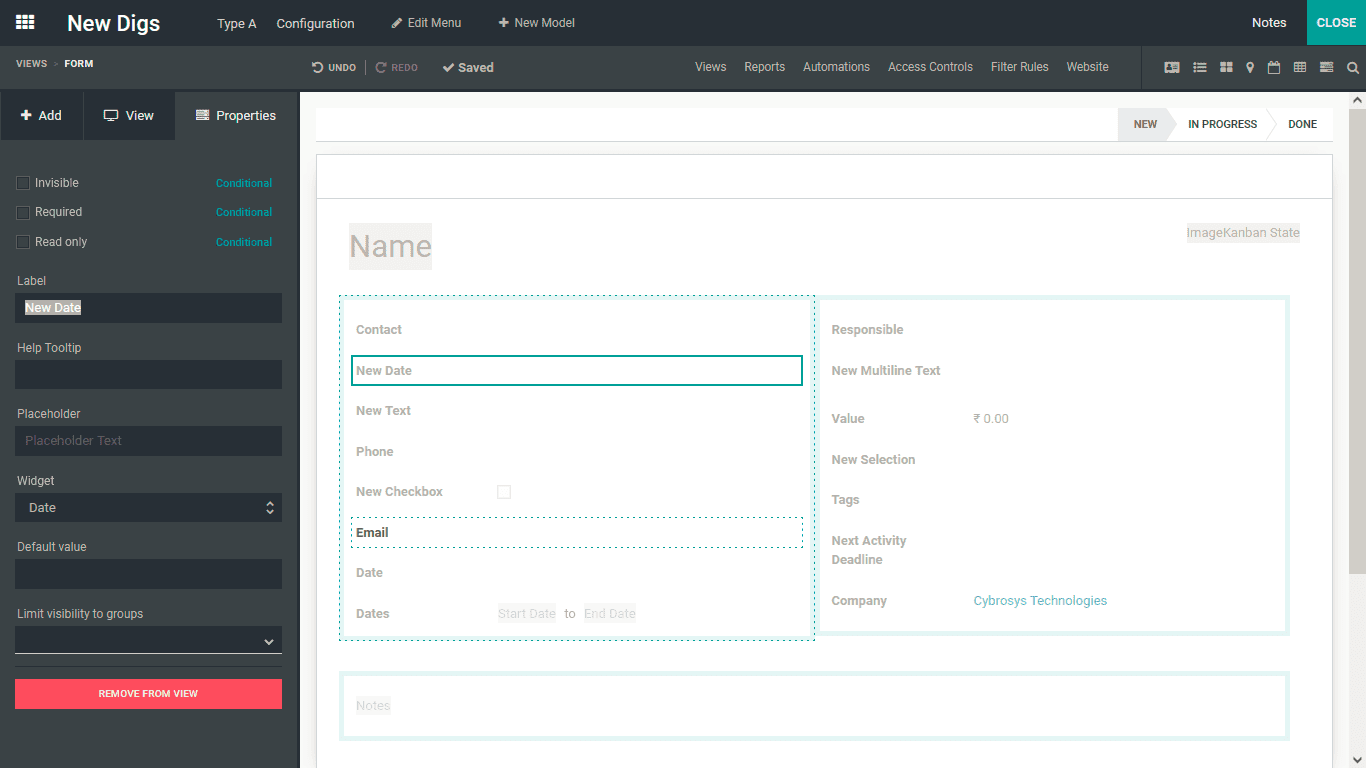
To modify the aspects and configure the Field, you can select the respective Fields and
will be depicted with the Properties window where all the configurational elements in
regards to it can be defined. The respective Field can be selected as;
- Invisible- Wish will ensure that the Field is invisible to the
users until it is made visible by the authorized user or if a user has the
authorization.
- Required- Enabling this Field will ensure that the respective one
is required to be described in the applications menu while the entries are being
described.
- Read Only- Once this property is enabled for a Field that is being
described the users will only be able to read the Content and will not be provided
with the provision to modify or contribute to it.
- Label- Defining the label will ensure that the Field is being
labeled based on the description provided.
- HelpTooltip- Enabling this will ensure that the Users are provided
with Helpful tips to fill in the respective field that is being described in the
menu.
- PlaceHolder- The element which is depicted initially in a text box
where the Visitors can type in the details. Moreover, it provides information to the
viewer on which details should be filled in.
- Widget- The widget that should be described in the menu can be
selected over here for the users to select them for the entry.
- Default Value- The Default value of a Field can be defined for the
menu where the application will be depicted with it.
- Limit Visibility to Groups- The respective Groups to which the
visibility of this field hat should be restricted can be defined here.
Additionally, a Remove From View Option is available, which will delete the Field from
the application.
As of now, you will understand how the new application is crafted with the help of the
Odoo Studio Module and especially with the use of the Fields, Tabs, and Columns of
operation. Let's now move on to undertaking the further aspects of the configuration of
the new application with the Odoo Studio Module. Let's now move on to understand how the
Smart Tabs can be defined using the Odoo Studio in a respective menu.
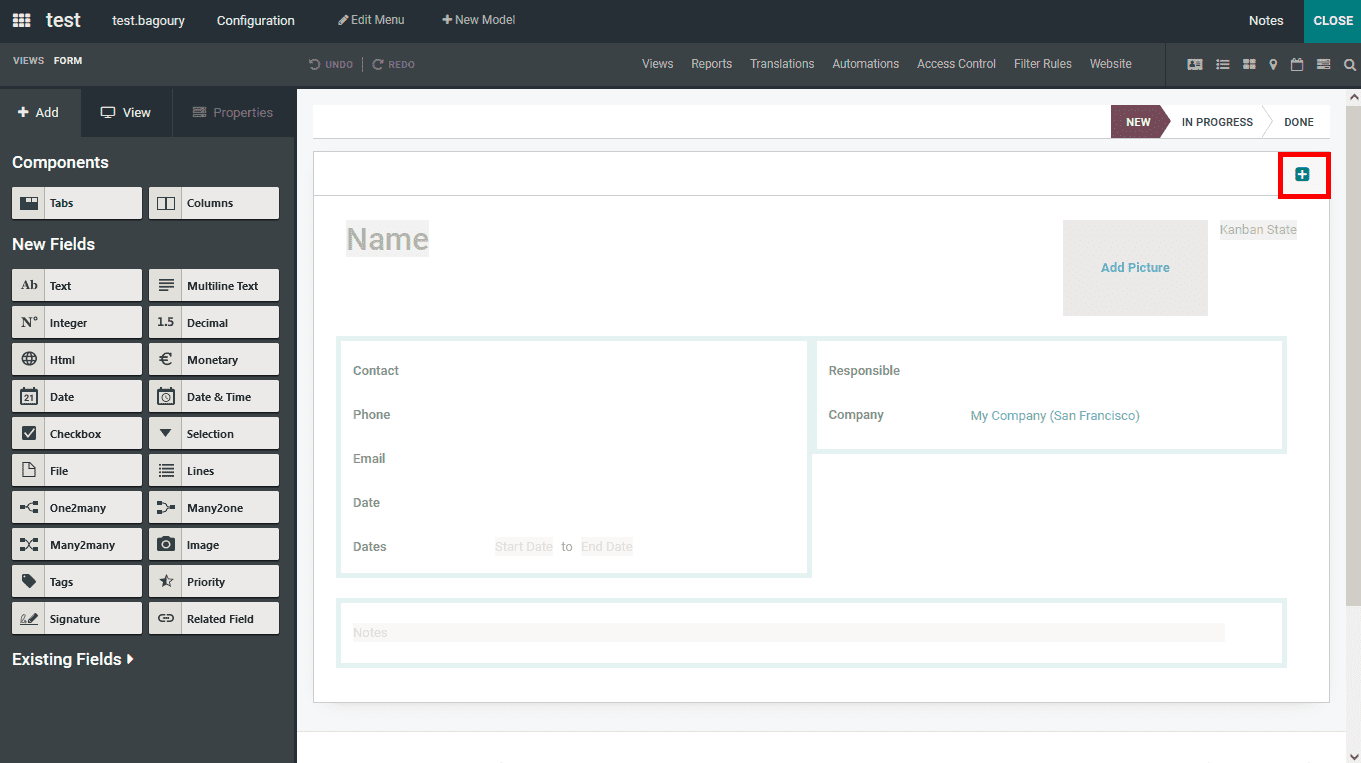
How can smart tabs be added to form views?
The use of Smart tabs in the Odoo applications plays a huge role in the aspects of
instant actions which can be performed. With the help of the Odoo Studio module, you
will be able to define multiple smart tabs of operations that can be used for direct
functions. To define the Smart Tab you can select the Studio applications for any module
and you will be depicted with the editing window just as depicted in the following
screenshot. Here, the + icon available as highlighted in the below screenshot can be
selected.
Upon selecting the + icon to add the Smart tabs you will be depicted with the
configuration window. Here initially the Label can be defined and the Icon can be
selected. Further, Select a related Field from the ones which have been defined for the
platform where the smart tab action will be based on.
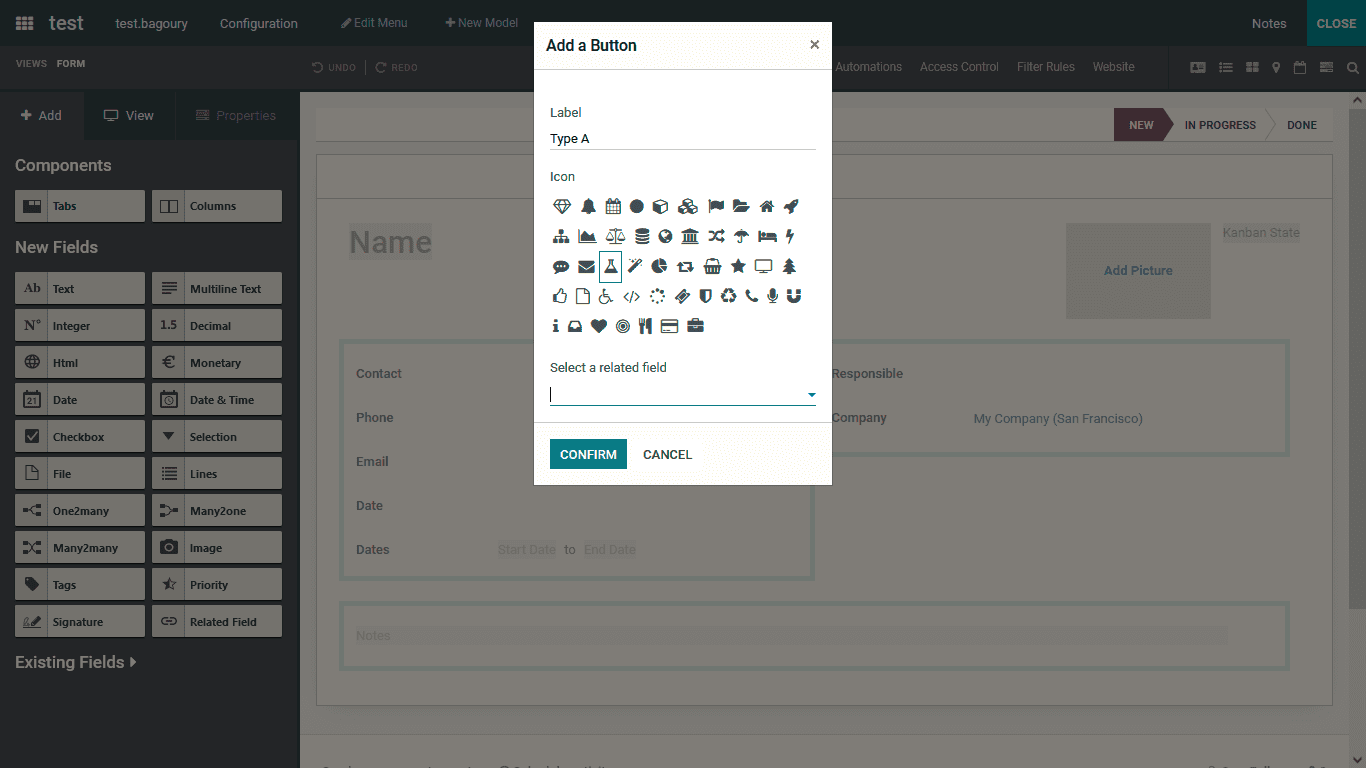
Finally, upon selecting the Confirm button the respective Smart tab will be defined.
Moreover, with the Studio module, you will be able to configure multiple smart buttons
to a defined mnu of the application developed as well as the already existing
applications. Let’s now move on to the next section where the Pipel Stage Configuration
capabilities of the Odoo Studio module have been defined.
How can the pipeline stages be set?
The Pipeline based operations of the Odoo platform will allow you to categorize the
entries based on the stages of operations they are at currently. These Stages can be
custom-defined in the Odoo platform however, for these stages to be defined the Stage
options should be enabled and configured before they are to be described. Upon
describing the model of the applications which has been created using the Odoo Studio
the Pipeline Stages option should be enabled.
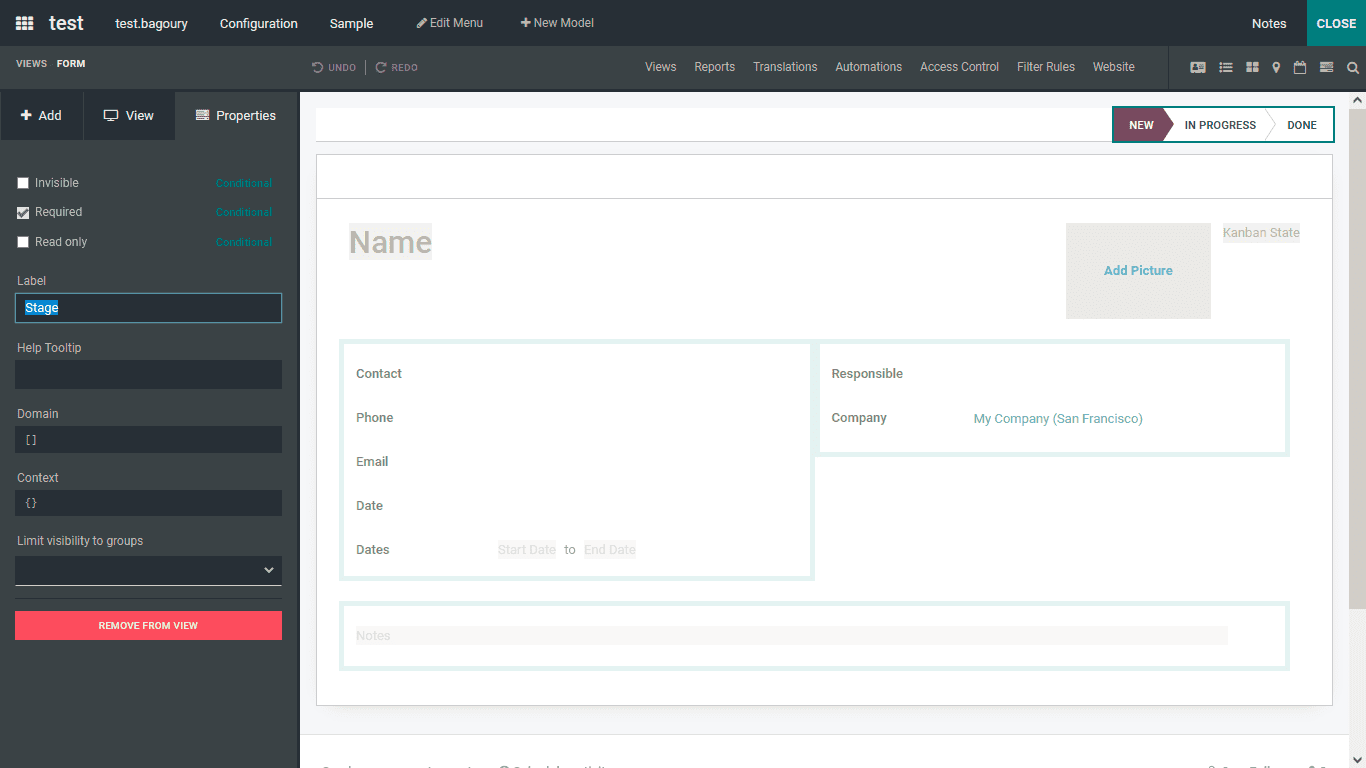
Upon enabling the Pipeline Stages option once you select the Form view for the
configurations you will be depicted with the default stages which are being defined.
Upon selecting it you will be depicted with the Configuration options window as depicted
in the following screenshot. Here, the Invisible, Required, and the Read-Only options
can be enabled. Furthermore, the Label, HelpTooltip, Domain, Context, and the Limit
Visibility to Groups option can be enabled. There is also an option that can be selected
to Remove the respective Field from View.
Once the Stages are configured you can select to define them from the Odoo platform
directly and not from the Studio configuration window. Moreover, the Stages of the
Pipeline can be custom-defined based on the need and the defined Pipeline states will be
depicted in the menu. Lets now move on to the next section where the configuration of
the Sorting operations in the List View is done with the help of the Odoo Studio module.
How data on the List view can be sorted?
The data depicted in the List view will provide the complete information of the
respective entry and it is considered as one form of view where detailed information has
been depicted. The configuration of the List view can be done for any new applications
which have been developed using the Studio Module. Moreover, the existing List view of
all the applications available in Odoo can also be configured with custom aspects with
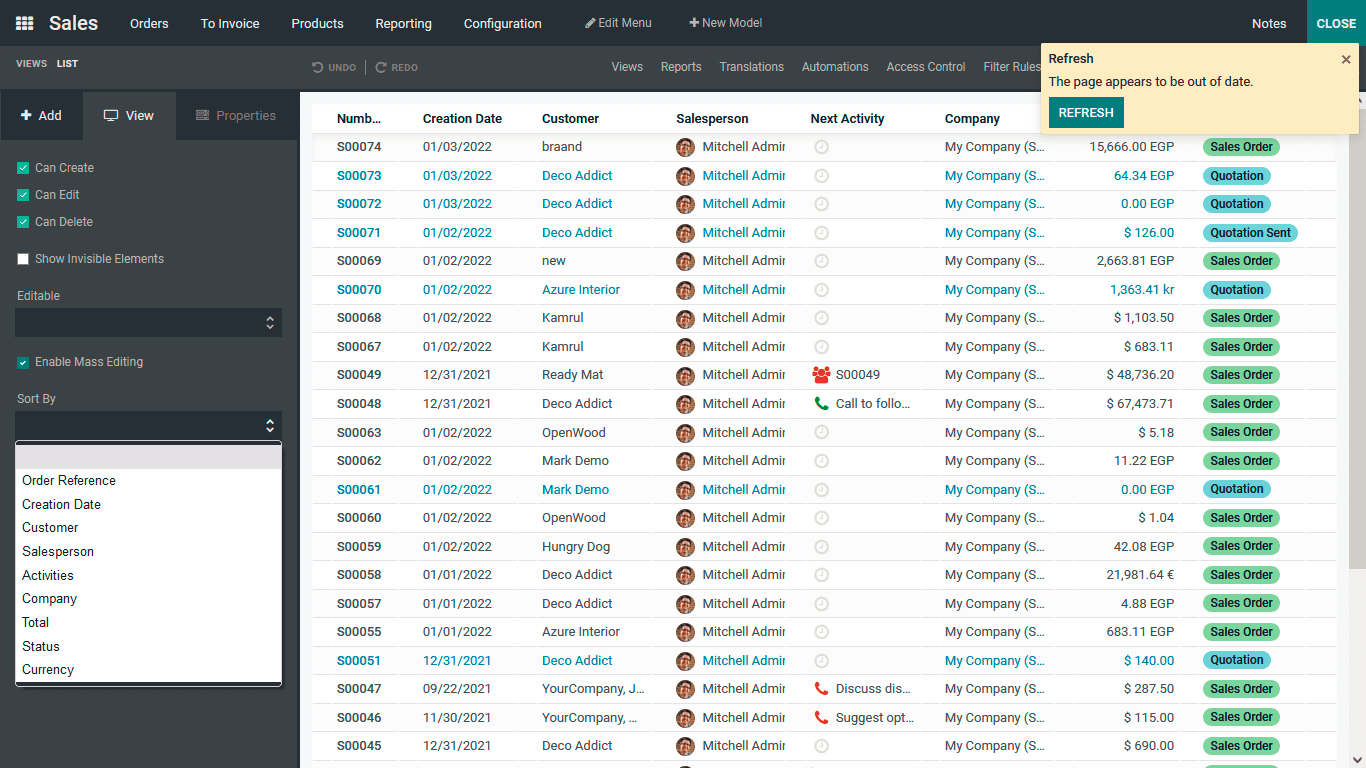
the help of the Odoo Studio module. In the List View of an application select the Studio
module option and you will be depicted with the configuration window. Under the view
menu, the Sort By options are available where they can be selected as Order Reference,
Creation Date, Customer, Salesperson, Activities, Company, Total, Status, and Currency
options which are available.
Once the Sorting operation is enabled based on the distinctive options you have selected
and the Studio Module is saved then the entries defined in the List View will be sorted
based on the sorting option defined. In the next section, the Mass Editing functionality
of the Odoo Studio module is defined.
How to avail mass editing?
Editing the content as a whole is an easy task and the Odoo platform supports the
operations of mass editing of the entries which are being defined. With the help of the
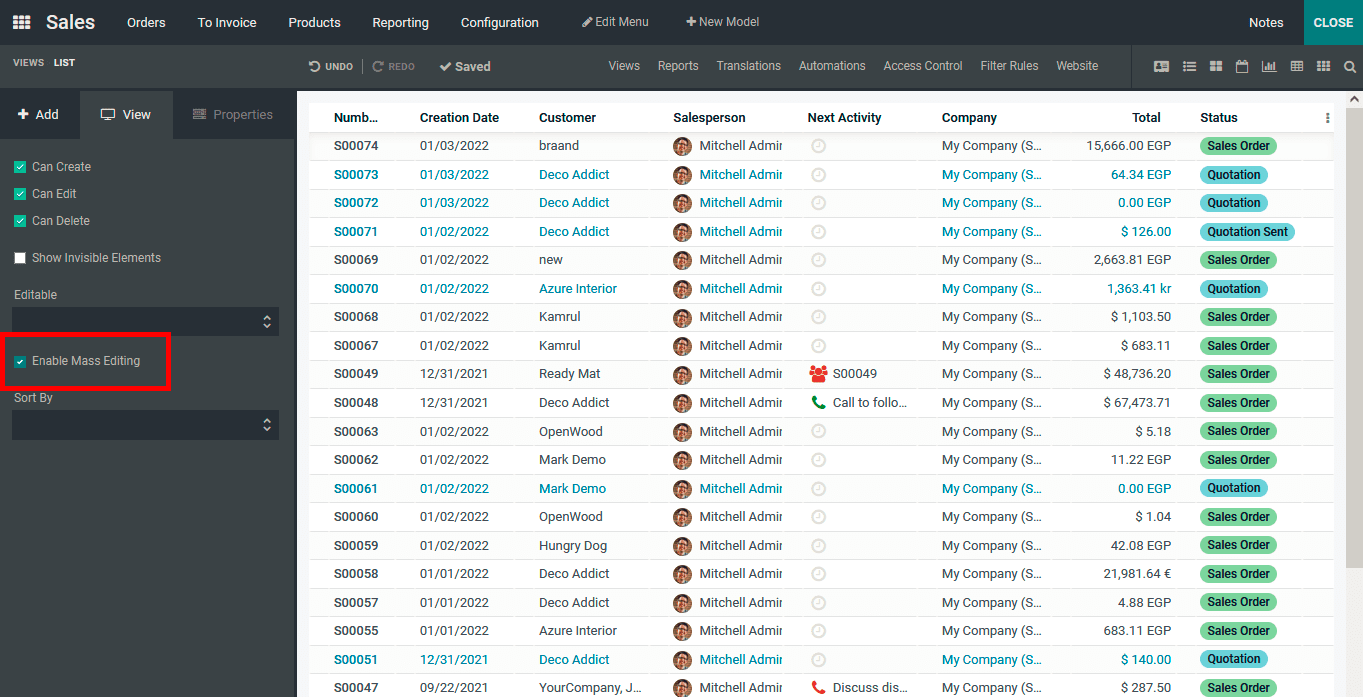
Odoo Studio module, the aspects of Mass Editing can be configured. In the View menu of
the Odoo Studio, you will have the option to Enable Mass Editing which will provide the
user with the capability to undergo any form of Mass Editing.
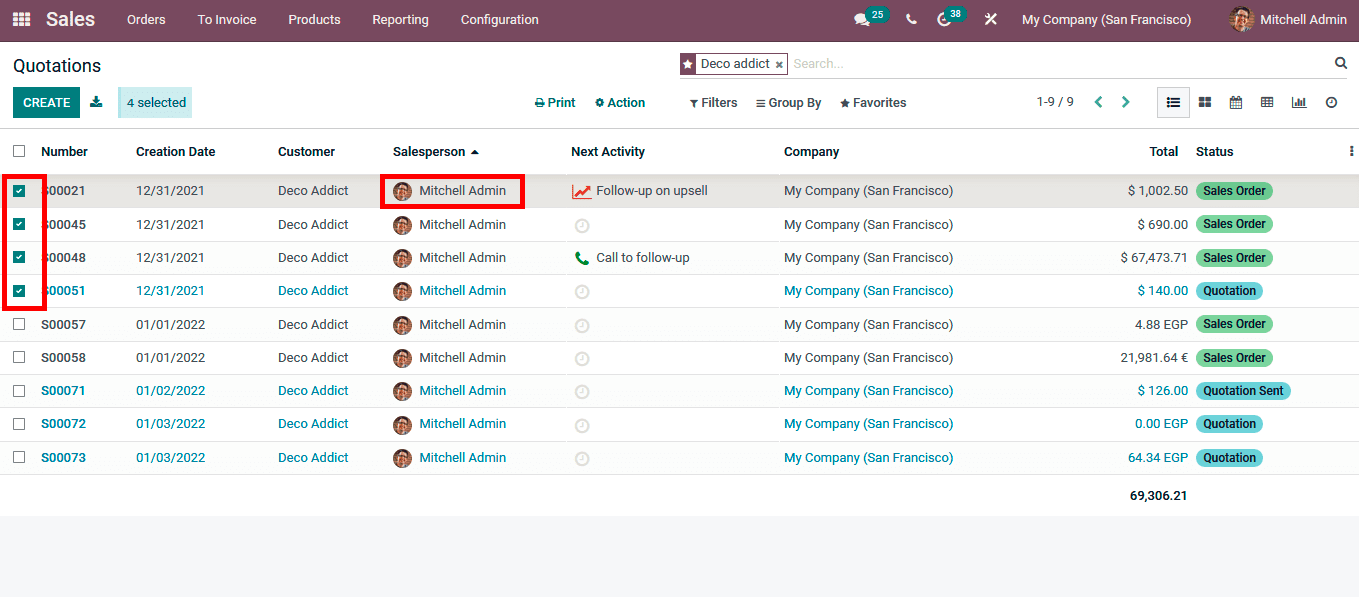
Once the Mass Editing option is enabled and saved in operation then once you select the
respective entries in the window just as depicted in the following screenshot and you
need to change the Sales person for the entries you can select an entry by choosing the
salesperson and you will be depicted with the all Sales persons available to choose
form.
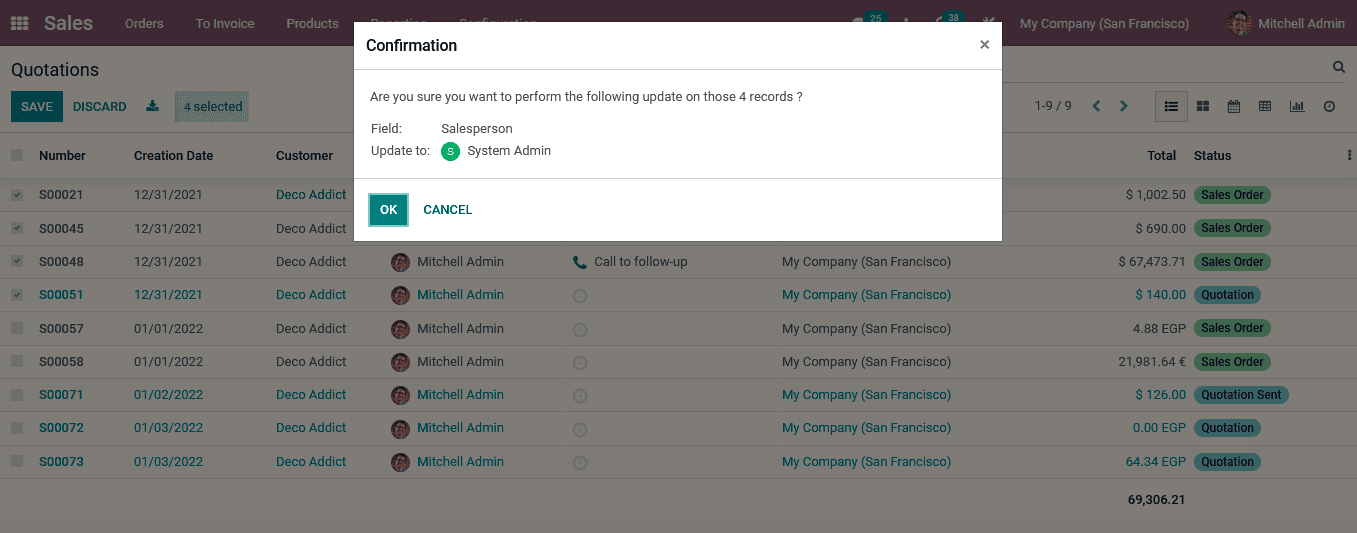
Once the respective Sales person is chosen you will be depicted with a Confirmation
window just as depicted in the following screenshot. Here the selected entries will be
updated with the respective Sales person entry which will be changed by selecting the OK
option that is available.
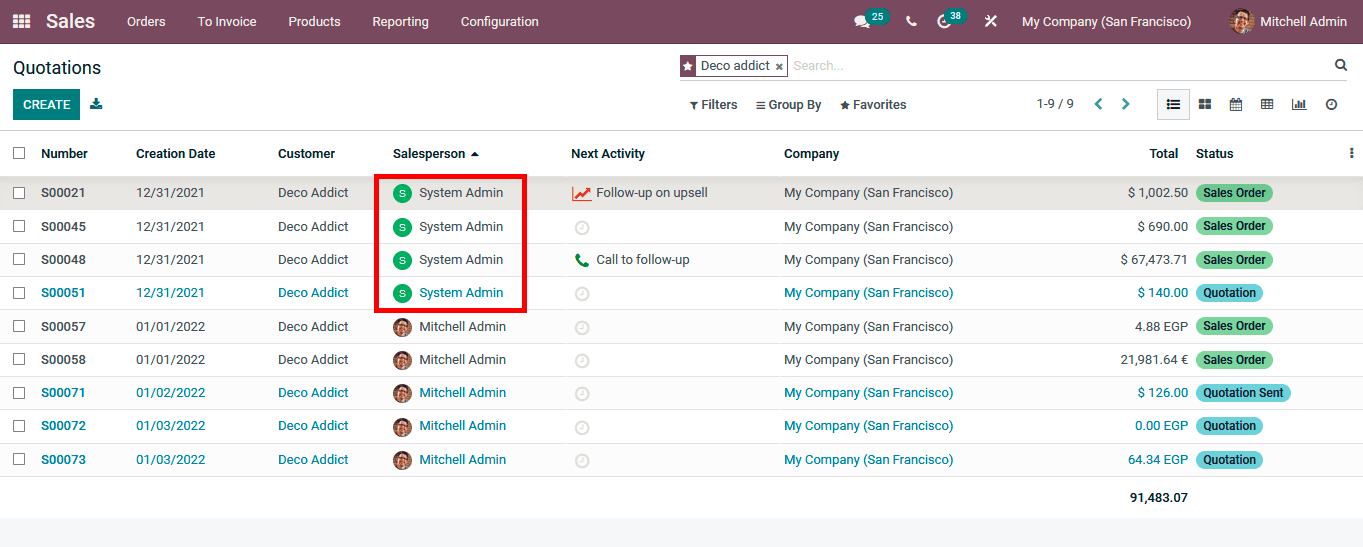
As depicted in the following screenshot the entries which are being defined and selected
for the Mass Editing will be changed which is highlighted below.
The next section will detail the Configuration menus of the Odoo Studio module and how
its operational ability will help you craft exceptional solutions and operational tools
in your Odoo application.