Customer Invoice to Payment
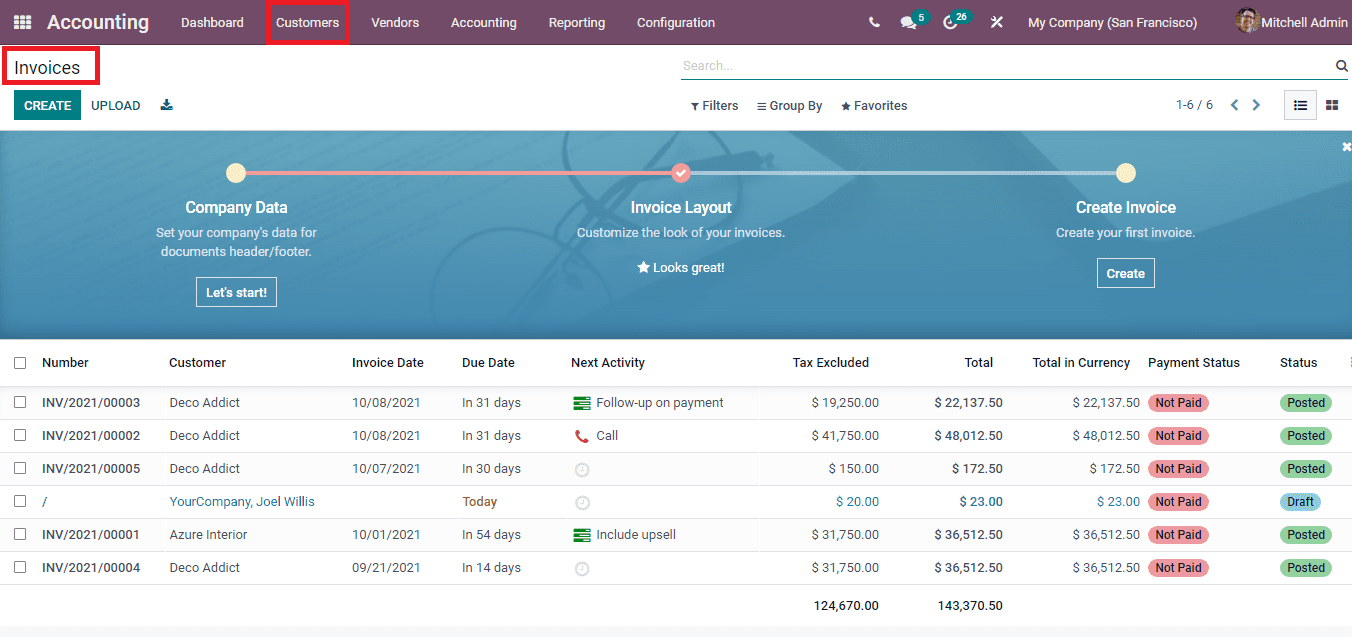
By selecting the Invoices option from the Customers tab you can view the invoices that have been made by the company. The details of the invoices that are displayed in the list includes the Number of the invoice, name of the Customer to whom the invoice is being send, Invoice Date, Due Date of the invoice, Next Activity scheduled, Tax Excluded amount, Total amount, Total amount in Currency, Payment status of the invoice and Status of the Invoice. More details of each invoice can be viewed by selecting the. You can also make changes and add information by editing the invoices.
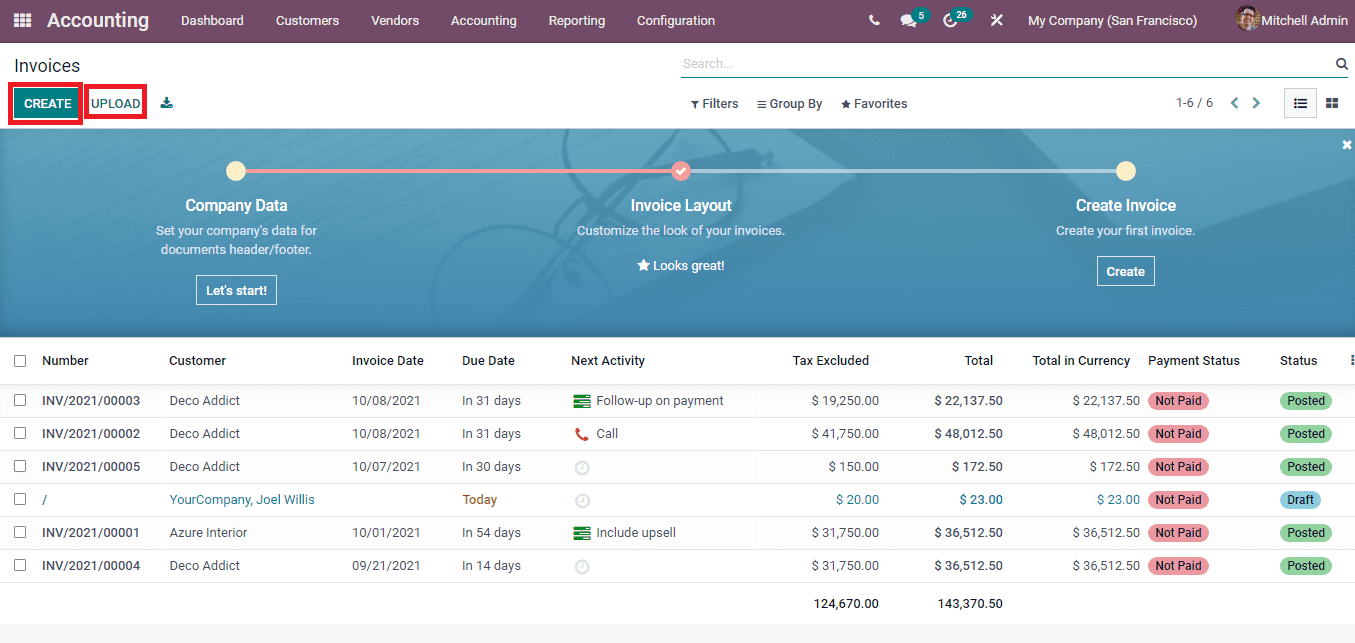
To create a new invoice select the CREATE button. At the new invoice window enter the relevant details into the fields provided. The same action can be performed by selecting the NEW INVOICE button from the dashboard. Invoices can also be uploaded from the system by selecting the UPLOAD button.
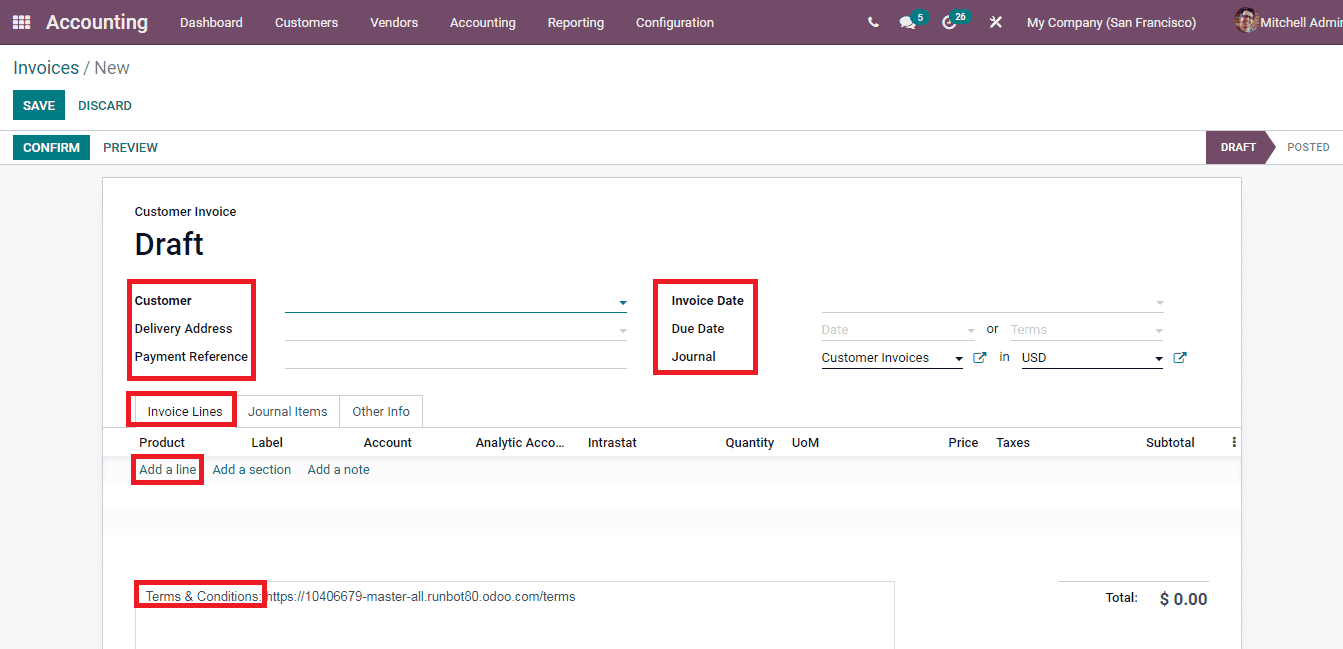
You can make the draft of the invoice by adding the details such as name of the Customer, Delivery Address, Payment Reference, Invoice Date, Due Date, Journal and the Currency used. Other fields that have to be filled are Invoice Lines, Journal Items and Other Info. At the Invoice Lines menu add the name of the Product, Label, Account, Analytic Account, Intrastat (if the transaction is between two countries of the EU), Quantity, Unit of Measurement, Price, Taxes and Subtotal amount. Multiple products can be included in the provided space by selecting Add a Line option. Terms and Conditions of the company can be stated at the field provided. You can also configure and set the terms and conditions that have to be displayed from the Configuration tab.
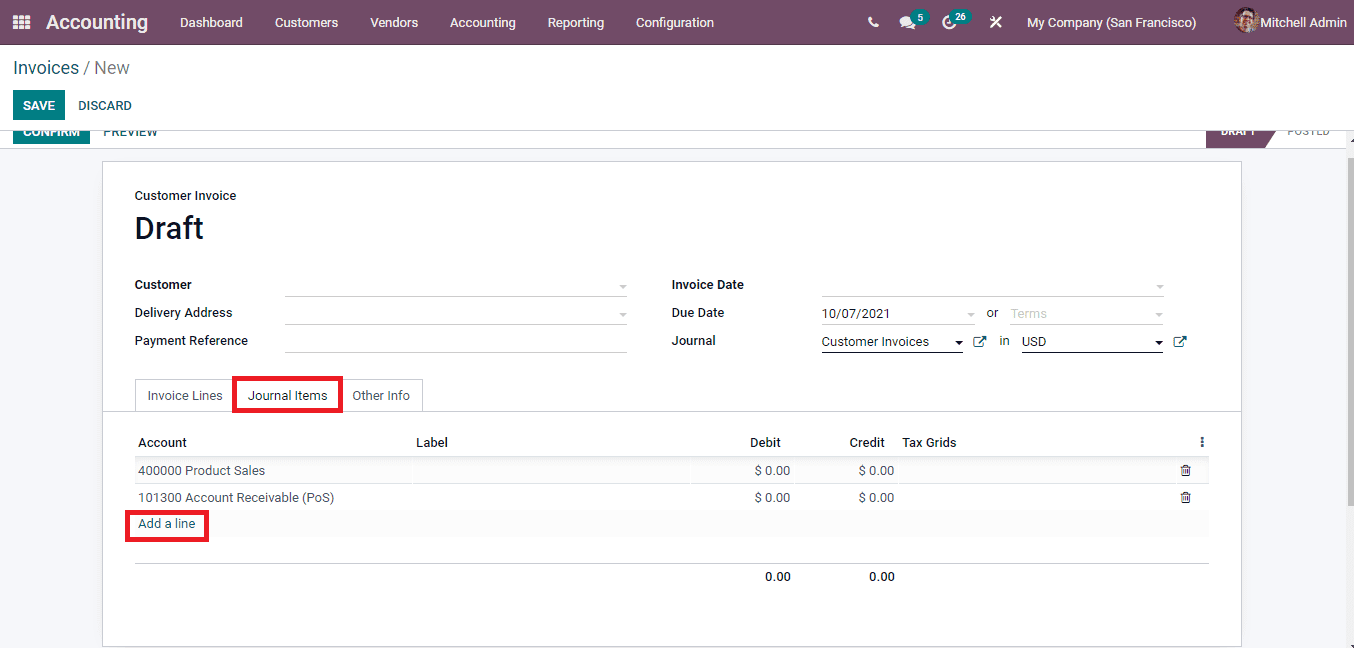
At the Journal Items add the Account, Label, Debit amount, Credit Amount and Tax Grids. Multiple accounts can be added by selecting the Add a Line option and the amount can be credited or debited in multiple accounts with a single invoice.
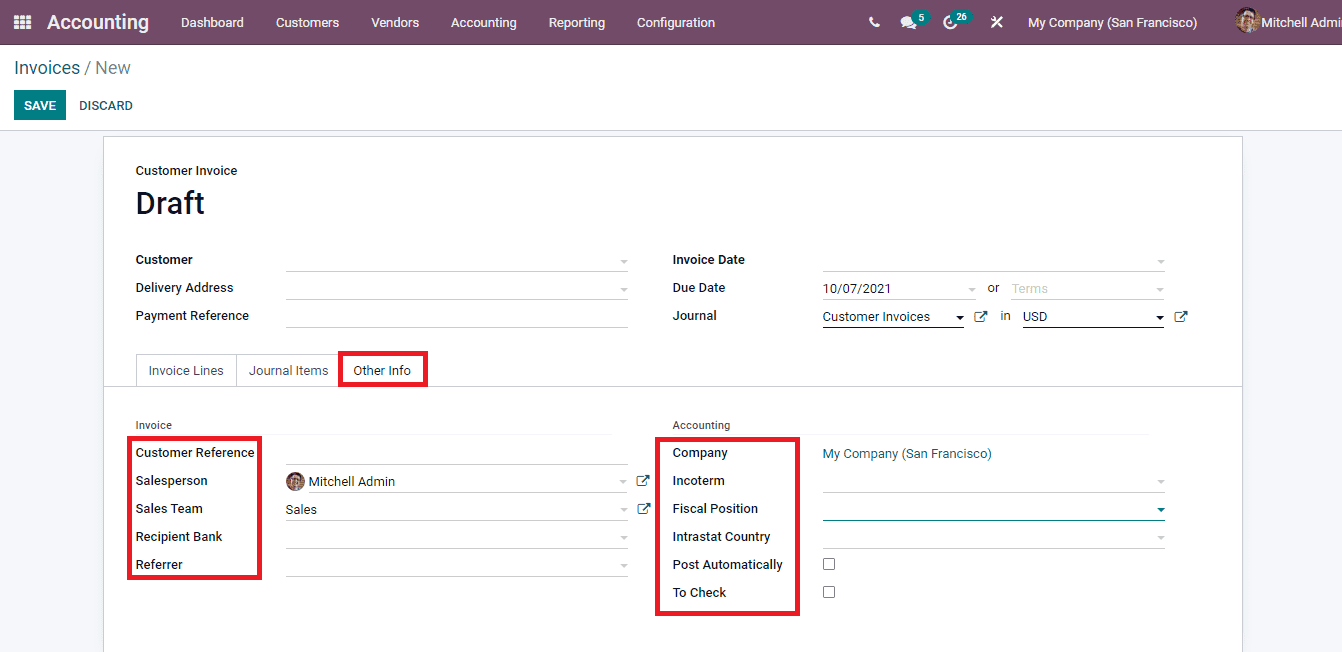
The details that have to be added at the Other Info menu are Customer Reference, name of the Salesperson, Sales Team, Recipient Bank, Referrer, name of the Company, Incoterm, Fiscal Position, Intrastat Country, whether the invoice should be Posted Automatically or not, and whether the information entered in this specific invoice should be Checked again or not.
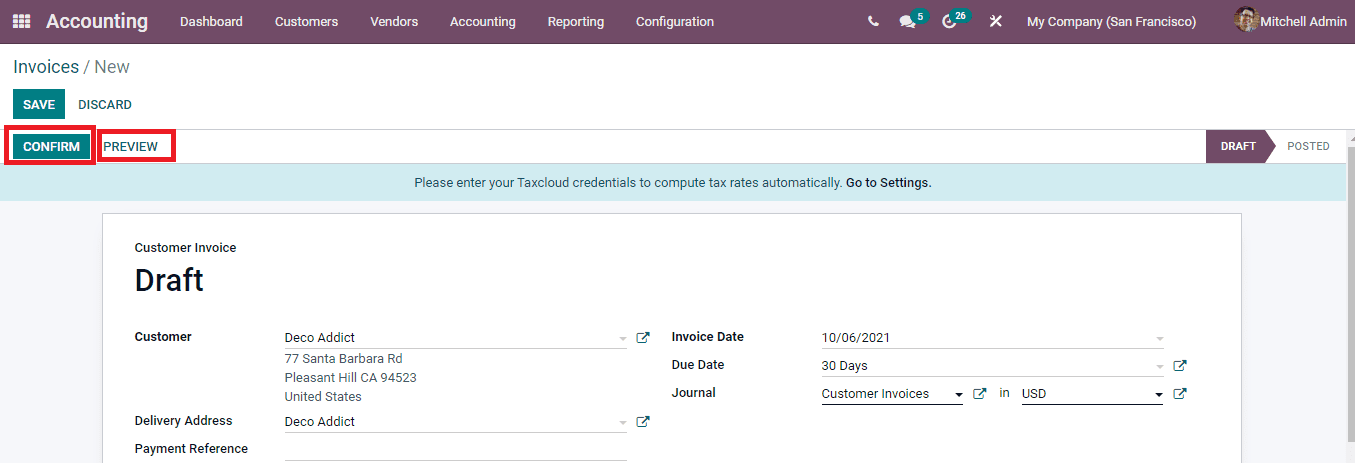
After entering all the relevant information in the form you can view the preview of the invoice by selecting the PREVIEW button. This will give you a picture of what the customer will be receiving. After checking the preview if satisfied you can click on the CONFIRM button to change the status of the invoice from DRAFT to POSTED.
You can send as well as print the invoice by selecting the SEND & PRINT button. The Send Invoice window will pop up, where you will have to enter the details such as whether the invoice must be Printed, Send by Post, or send by Email. Then add the Recipients of the email, Subject of the email and add the message that has to be sent along with the invoice. Templates can be chosen from the already configured templates. Click on the SEND & Print button to send your invoice to the customer.

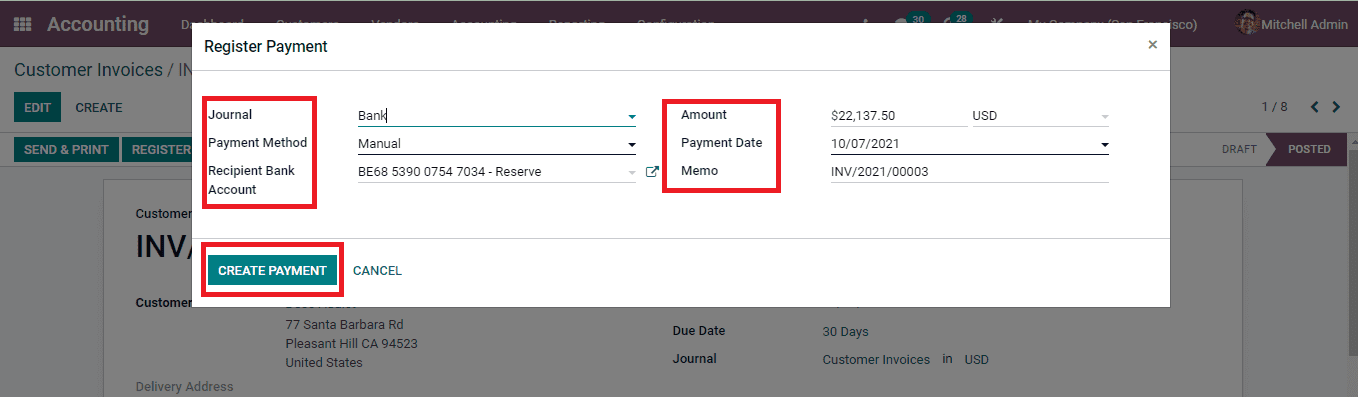
When the customer makes the payment you can record it in the invoice by selecting the REGISTER PAYMENT button. At the popped up Register Payment window enter the information regarding the payment such as the Journal, Payment Method used, Recipient Bank Account, Amount, Currency used, Payment Date and Memo. Press the CREATE PAYMENT button to register the payment.
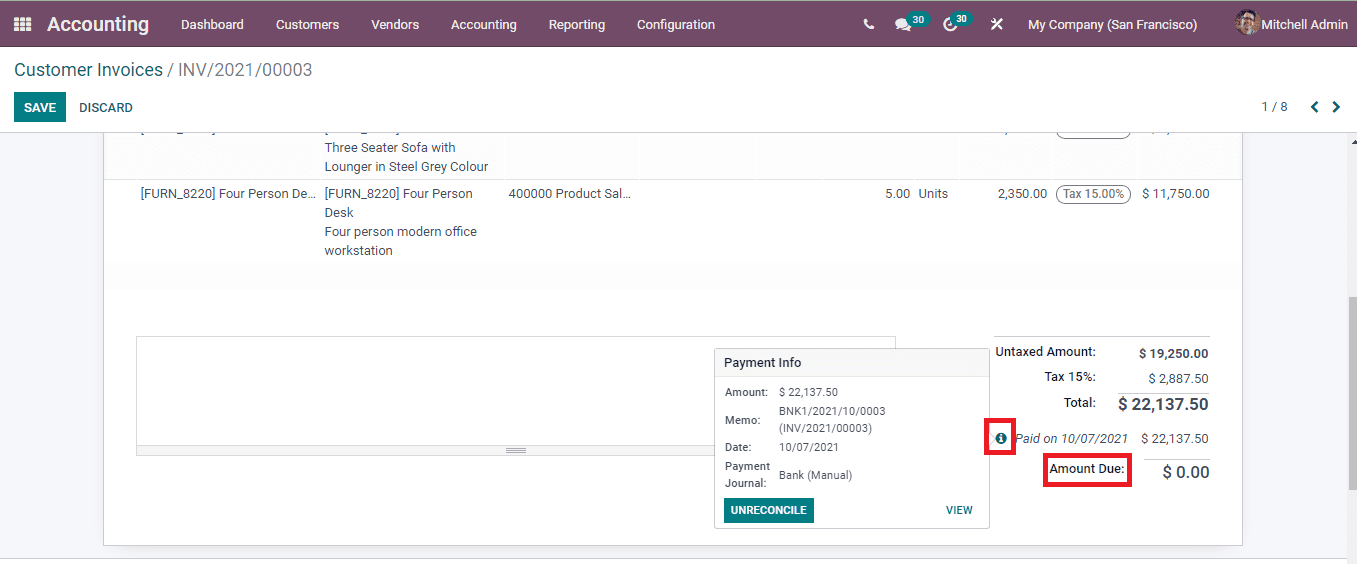
After registering the payment the invoice gets a badge of IN PAYMENT. At the invoice profile , under the Invoice Lines menu you can see the Paid amount and Amount Due. Next to the Paid amount is situated an information icon, by selecting it, you can view the details of the payment in a nutshell. The state of the payment will be changed automatically to Paid after the reconciliation process.
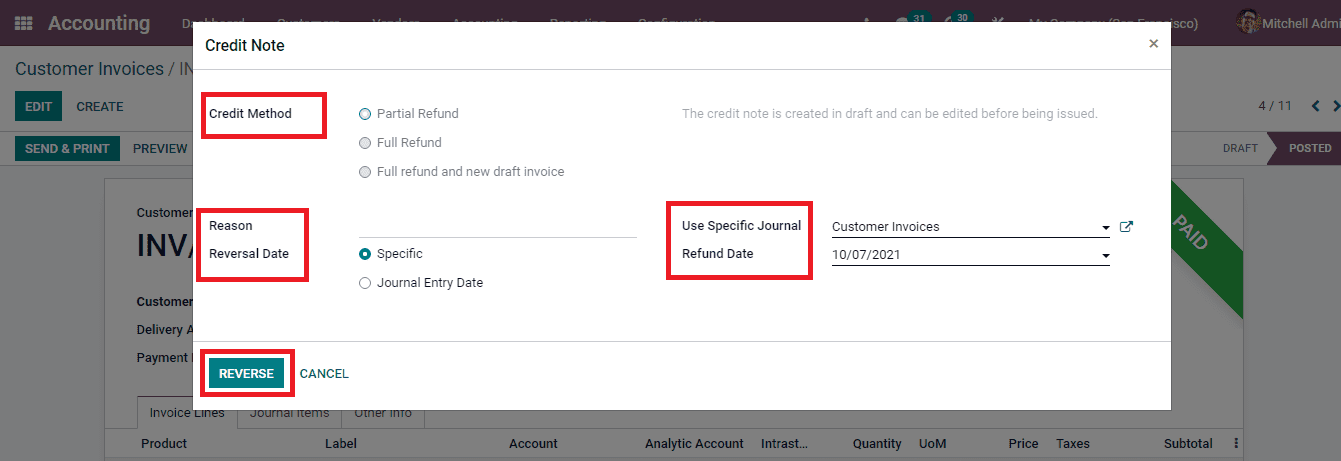
In cases where you wanted to add credit notes to the invoice, you can select the ADD CREDIT NOTE option. At the displayed Credit Note pop up window, enter the details such as the Credit Method whether it is a partial refund, full refund or full refund and new draft invoice), the Reason for refunding, Reversal Date ( specific or journal entry date), Specific Journal and Refund Date. In the Odoo 15 Accounting module, the credit notes are created in drafts You can edit it before issuing the credit note. After entering all the relevant information, select the REVERSE button to add the credit note to the accounts.
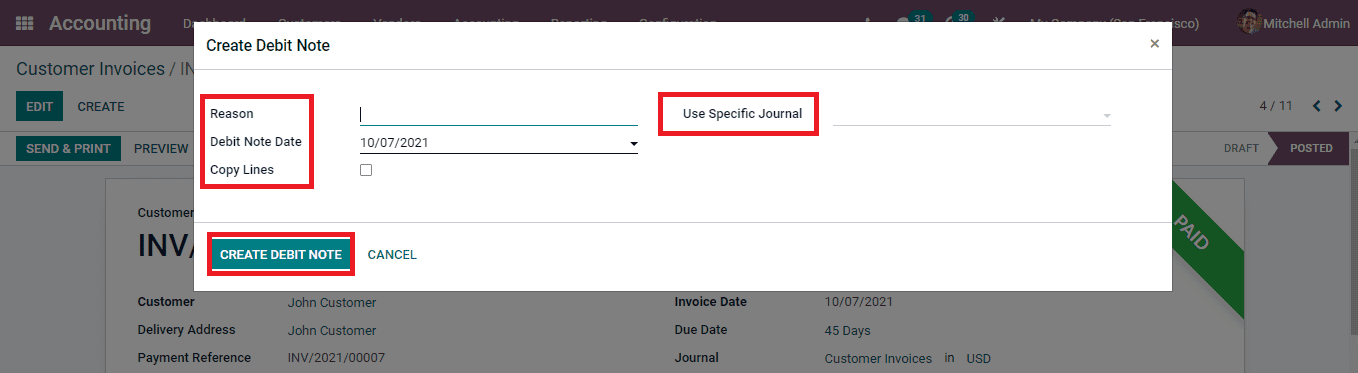
Like adding credit notes to the invoice you can also add debit notes to the invoice for reminding the customer about an immediate payment. In the Odoo 15 Accounting module you can create debit notes by selecting the ADD DEBIT NOTES. The Debit Note pop up window will appear. Here you will have to enter details such as the Reason for adding debit note, Debit Note Date, whether to Copy Line and the Specific Journal. After entering the details select the CREATE DEBIT NOTE button to record the debit note.
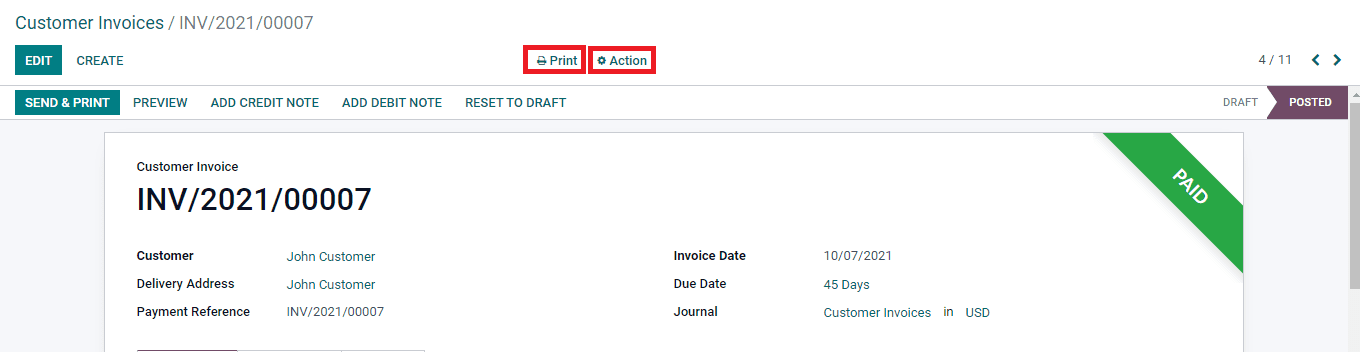
The invoice can be printed with or without payments by selecting the Print option. Actions such as Generate a Payment Link and Switch Into Refund/ Credit Note can be undertaken using the Action option.
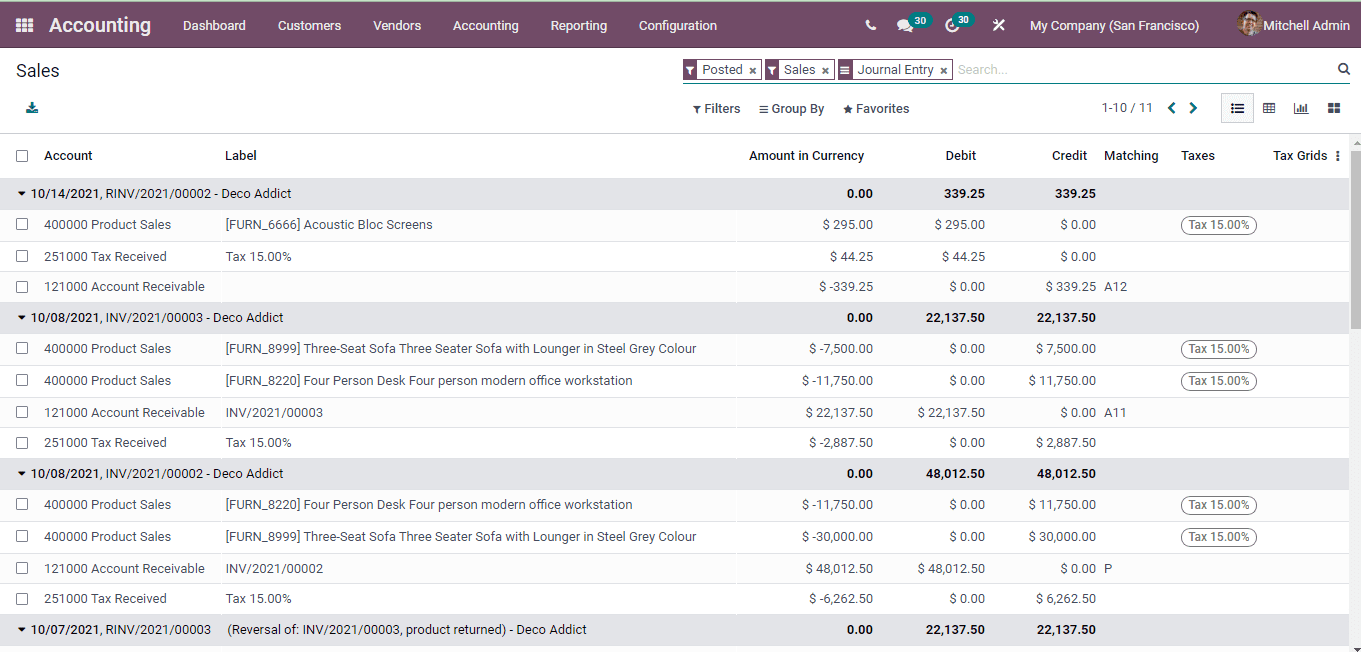
The journal entry for registering the payment will be automatically added to the journals. To view this, you can select the Sales option from the Accounting tab.