Configurations under Employees module
The Odoo Employee module also includes various configuration options, which will be very helpful for making your HR management or employee management a piece of cake. Under the Configuration tab of the Odoo Employees module, you can view the options such as Settings, Job Positions, Departments, Contracts Templates, Work Locations, Departure Reasons, Activity Plans, Challenges, Badges, and Goals History. Let us discuss each one below.
Settings
The Settings window in the Employee module is designed to activate various employee description operations on the Odoo employee module. Under the Employees section, you have Presence Control, Advanced Presence Control, and Skill Management options.
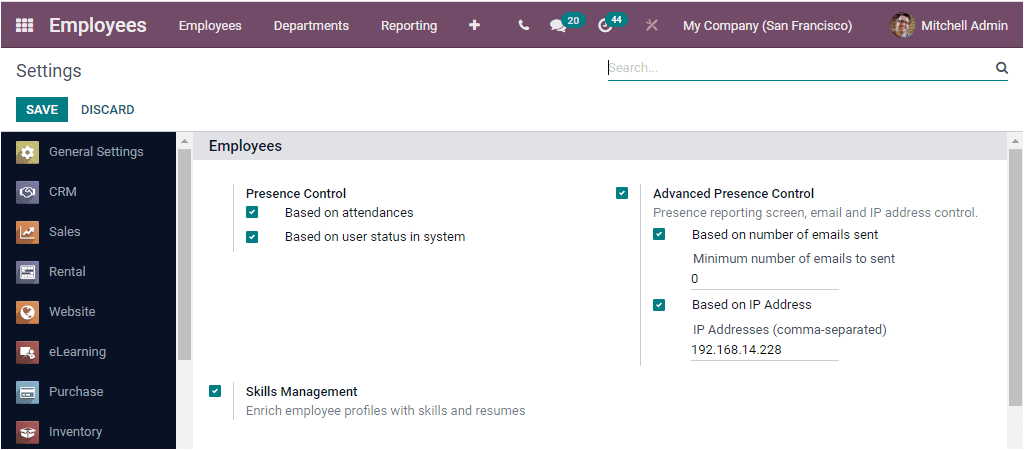
The Presence Control option allows you to define the Employee's attendance details that can be set either Based on attendances or Based on user status in the system or both attendances and user status of the system. The Advanced Presence Controloption enables you to present a reporting screen, email address, and IP Address. It can be based on the number of emails sent ( you should provide the minimum number of emails to send) or Based on IP Address, or both. The next option available is Skill Management, and enabling this option allows you to enrich employee profiles with skills and resumes.
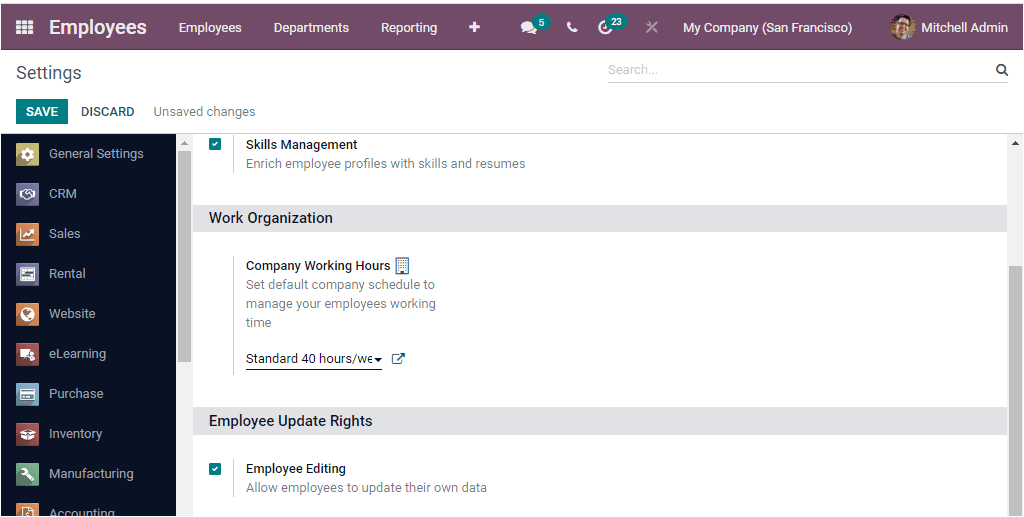
Under the Work Organization section, you have the option to set a default company schedule to manage your employees' working time. The External link menu allows you to modify various working schedules based upon your organization's preferences. In the Employee Update Rightssection, you can enable the Employee Editing option to let the Employee update their own data and information in the Odoo system with their own user dashboards.
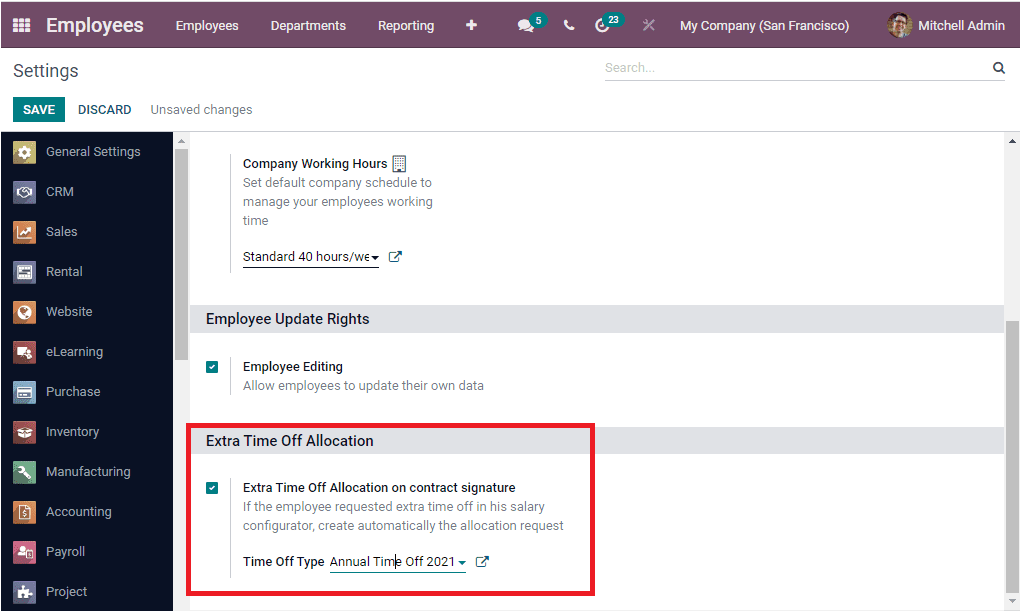
Under the Extra Time Off Allocationsection, you can view the Extra Time Off Allocation on contract signature option. You could activate this option for automatically creating the allocation request if the Employee requested extra time off in his salary configurator. You are also able to set the default Time Off Type.
So far, we have been discussing the Settings window of the Odoo Employee module and now let us have a glance at the Job Positions option available.
Job Position
The Job Positions menu available in the Configuration tab of the Odoo Employee module allows you to configure various job positions. For accessing the Job Positions window, you can click on this menu. The image of the Job Positions window is depicted below.
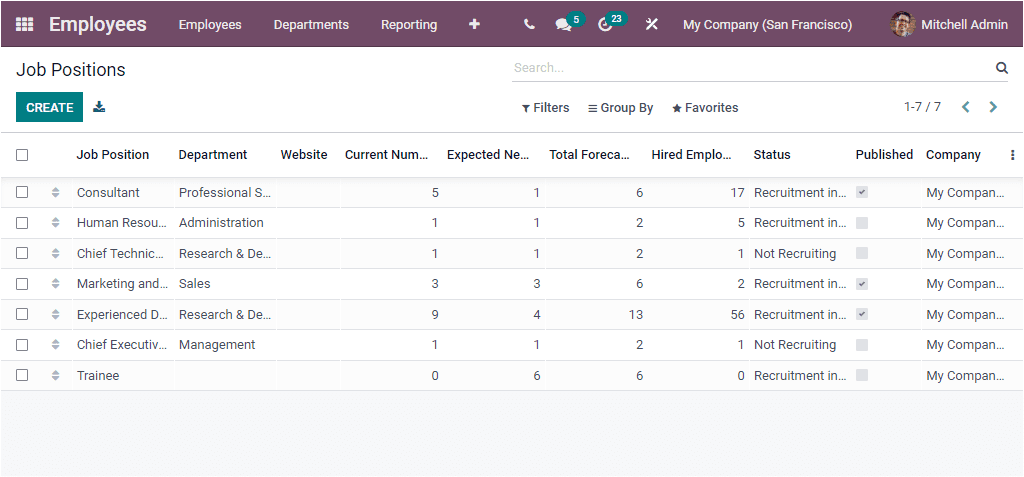
In this window you can view all the predefined Job Positions together with the details such as Job Position, Department, Website, Current Number of Employees, Expected New Employees, Total Forecasted Employees, Hired Employees, Status, Published, and Company. You have the provision to view and edit each of these configured Job Positions in detail by clicking on the respective one. Moreover, you can use the default and customizable sorting options such as Filters, Group By, Favourite, and Search for quickly identifying your required records. Similarly, the Export All icon available near the CREATE button allows you to export all the records into an excel sheet. You can configure new Job Positions using the CREATE icon that can be accessed from the top left corner. The screenshot of the Job Position creation form is depicted below.
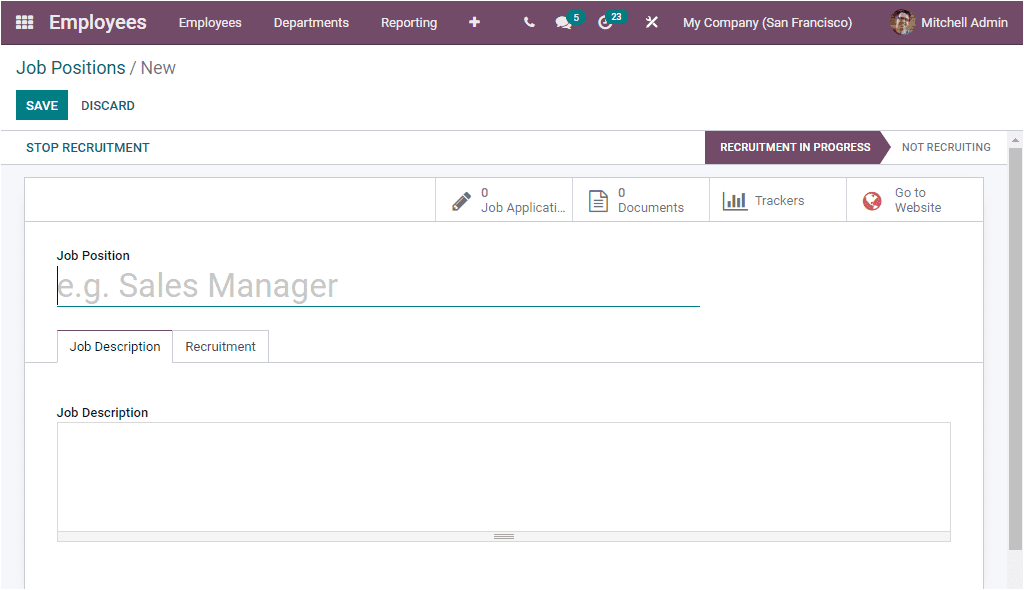
In this Job Positions creation window, you can provide the Job Position. Then under the Job Description tab, you can allocate a customized Job Description. In addition, the Recruitment tab allows you to specify the Website if the system consists of multiple websites. The Company and Job Location will be auto allocated. Similarly, you should define the Department. Then the number of new employees you expect to recruit will be given in the Expected New Employees field. Then you can check the box near the option ‘Is Published” if the application is published on the website of the Company. Moreover, the default contract used when making an offer to an applicant can be allocated in the Contract Template field. Then you have to choose an Interview Form for this job position, and you will be able to print or answer this interview from all applicants who apply for this job. Finally, you can allocate the Recruiter for this Job Position. Once you complete all these steps, you can click on the SAVE button to save details. The Job Position creation window also depicts various smart tabs such as Job Application, Documents, Trackers, and Go To Website based upon the modules you installed.
As we clear on how to configure Job Positions in the Odoo Employee module, let us look into the Departments option available.
Departments
The Department menu available under the Odoo Employee Configuration tab will allow you to jump into the Departments window. The screenshot of the Departments's window is shown below.
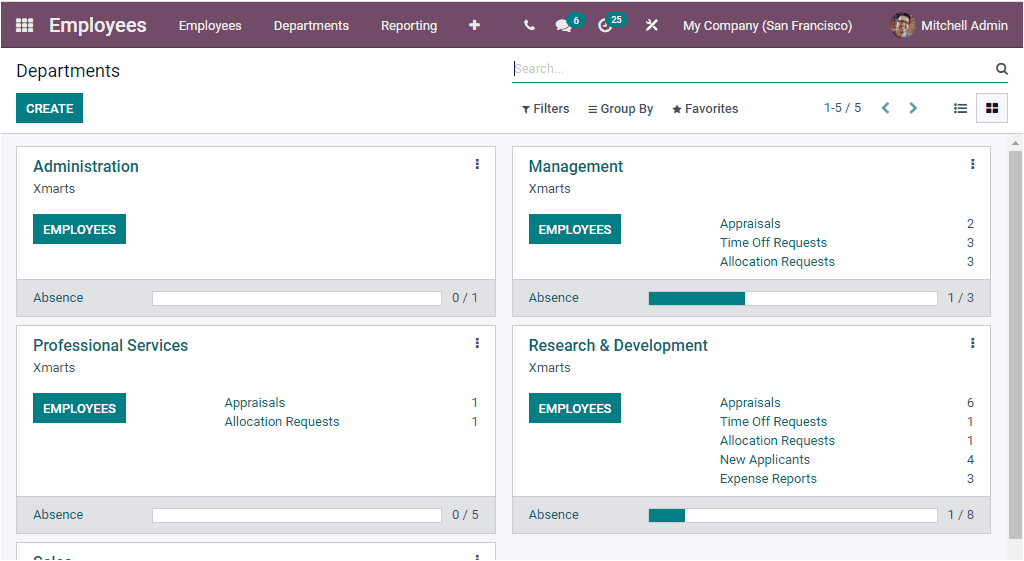
Using this window, you can create and configure several departments for your Company. Odoo depicts this window in two views, Kanban and List view. The Kanban view of the window is depicted below.
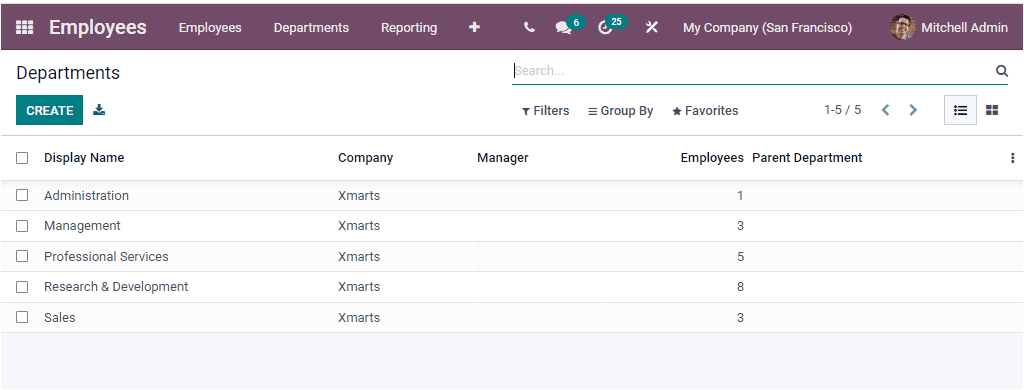
The default as well as customizable sorting features such as Filters, Group By, Favourite and Search options allow you to categorise your data. Odoo includes the CREATE icon in the window for creating new Departments. So let us click on the CREATE button. Upon selecting this button, you will be directed into the Departments creation window as shown in the below image.
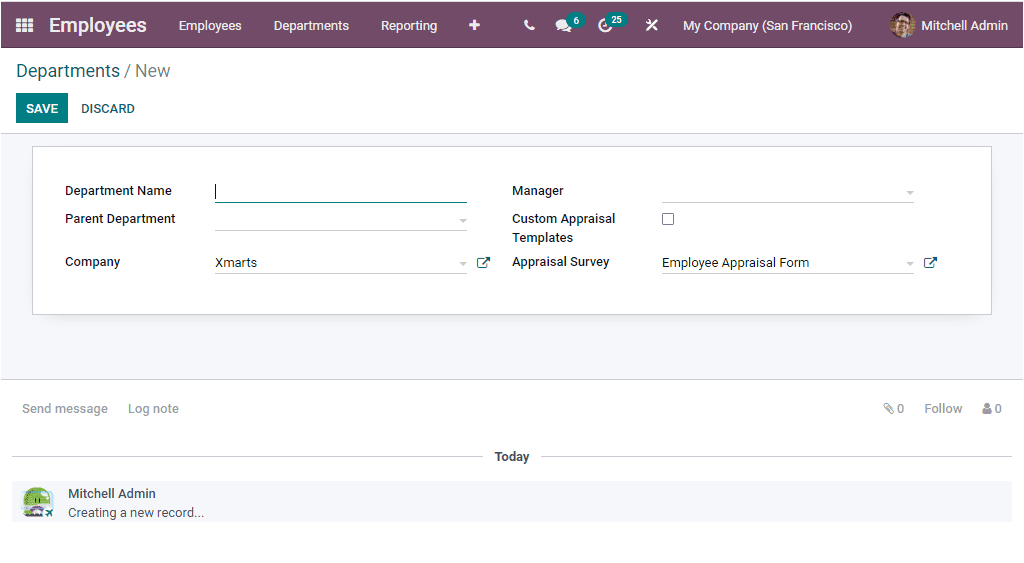
In this Department creation window, you have to fill up the details such as Department Name, Parent Department, and Manager. The Company and Appraisal Survey field will be auto-allocated. This Appraisal Survey field is used with 360 feedback settings on Appraisal application. The main aim of this field is to define a default Survey Template related to this Department. Moreover, you can activate the Custom Appraisal Templates field. The window will depict an Appraisal Templates tab as highlighted in the image below when you activate this field.
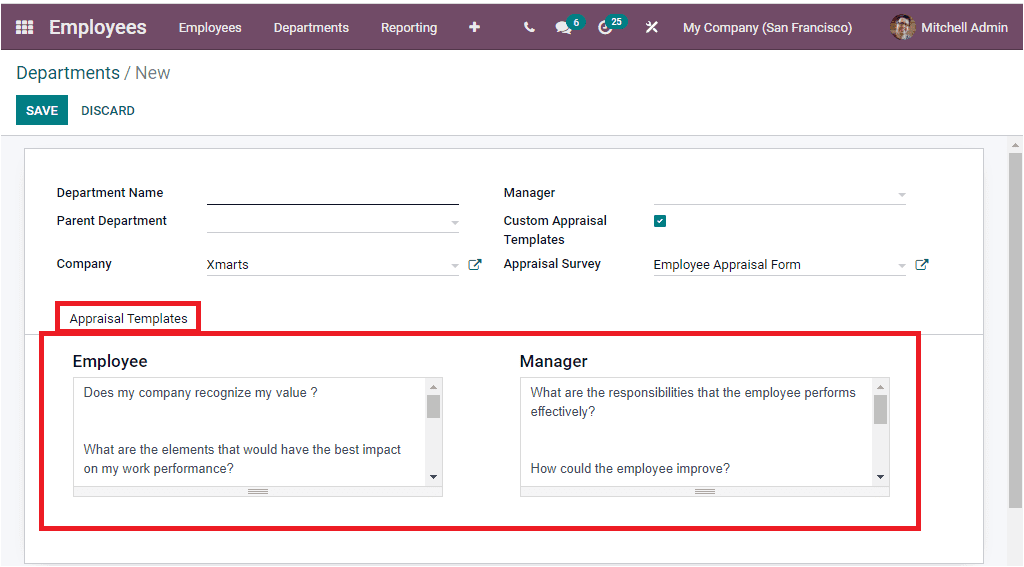
Under the Appraisal Templates tab, you can view the custom appraisal templates.
As we are clear on the Department configuration aspect of the Odoo Employee module, we are going to discuss how to configure Contract Templates in this module
Contract Templates
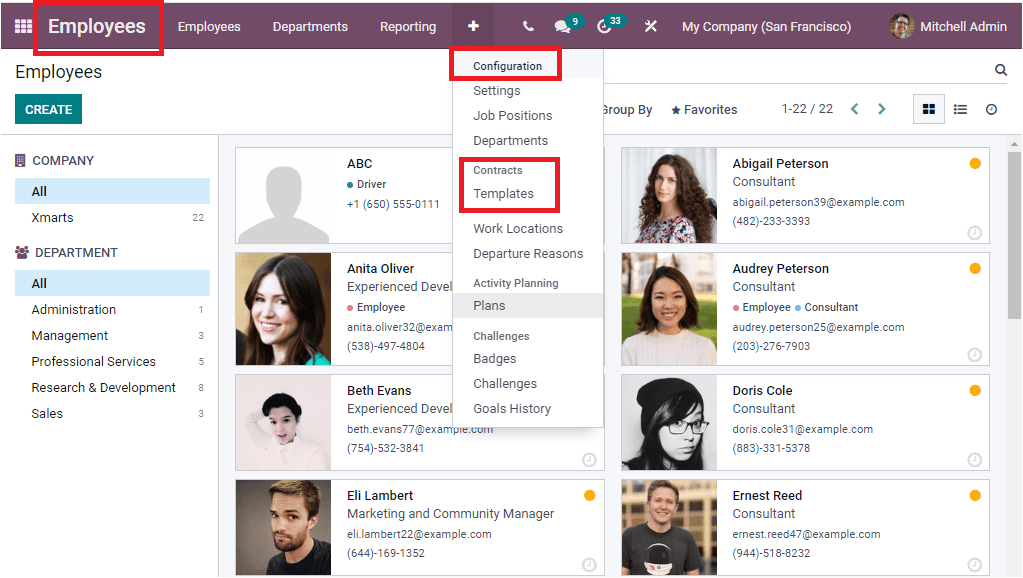
For accessing the Contract Templates menu, you can go to Employees -> Configuration -> Contract -> Templates.
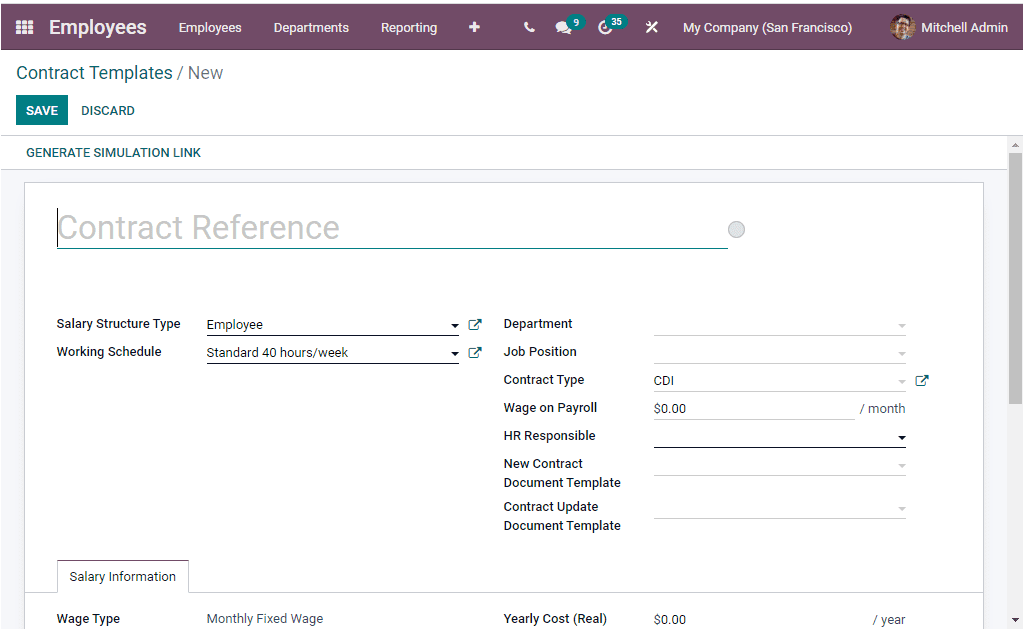
The Contract Templates window allows you to manage all the created Contract Templates. This window will list out already described Contract Templates along with the details such as Contract Reference, Department, Job Position, Working Schedule, Salary Structure Type, Status, and Company. You are also able to view each of them in detail by clicking on the respective one. If you want to make modifications to the described template, you can use the Edit option. The image of the Contract Template window is depicted below.

You can use the CREATE icon to create new Contract Templates.
Now let us have a look at the Work Locations menu available in the Odoo Employee module.
Work Locations
The Work Locations menu available on the Configuration tab of the Odoo Employee module will allow you to configure Work Locations. Upon selecting the Work Locations menu, you will depict the Work Locations window where you can view and access every Work Location described in the platform along with the Work Location, Work Address, and Company
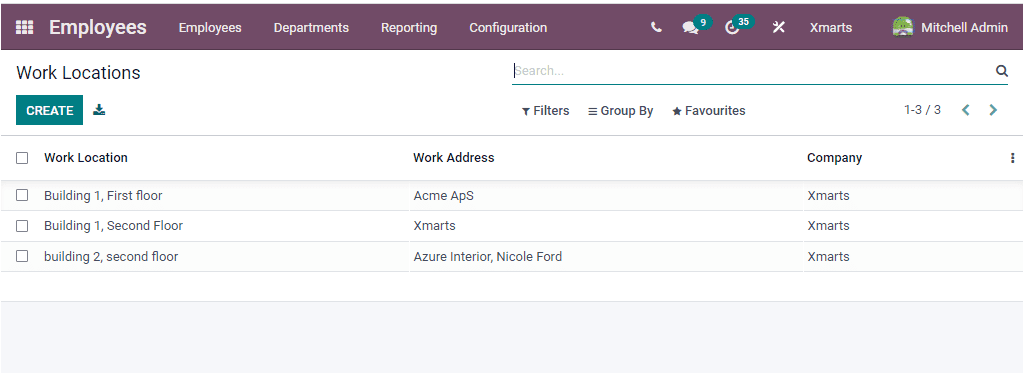
In the Work Location window, you can view the CREATE icon on the top left corner. This button will allow you to access the Work Locations creation window. The screenshot of the window is depicted below.
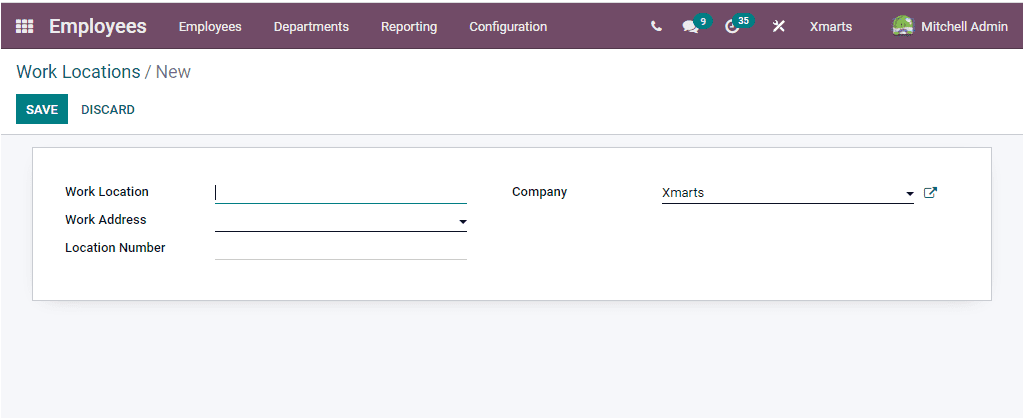
In this Work Location creation form, you can provide the details such as Work Location, Work Address, Location Number, and Company.
Now we can move on to the next menu available under the Configuration tab of the Odoo Employee module.
Departure Reasons
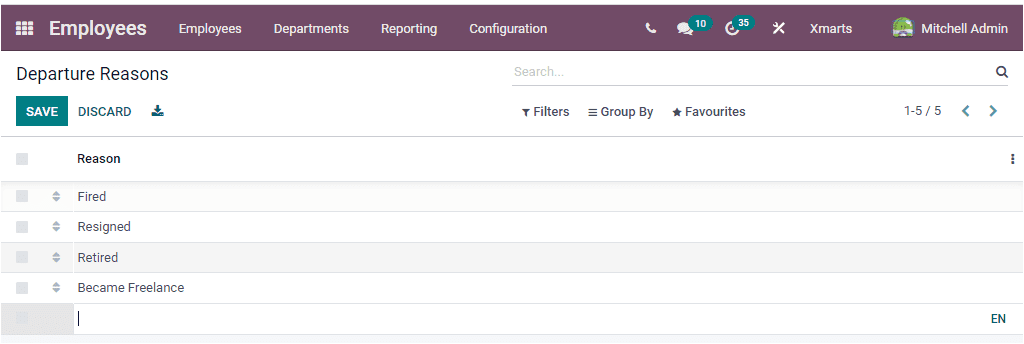
Odoo maintains the Departure Reasons menu under the Configuration tab of the Odoo Employee module, and the window helps you define various departure reasons. The Departure Reasons window will depict all the predefined Departure Reasons in a list format. You can also create new departure reasons in the same window by clicking on the CREATE button.
Let us discuss the following configuration menu Activity Plans.
Activity Plans
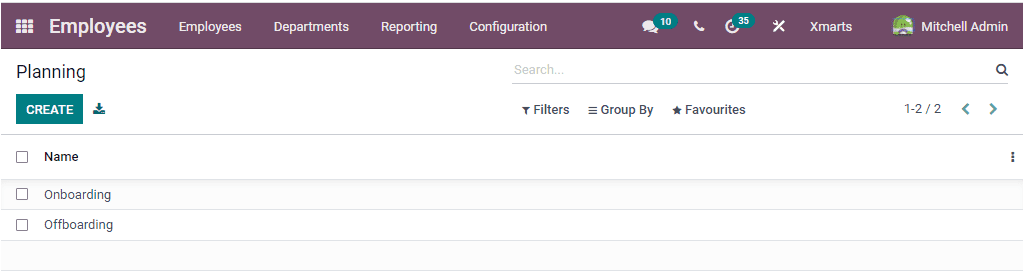
The Plans Menu available under the Configuration tab of the Employee module will depict the Planning window. This window contains various predefined plans. With this window, Odoo grants you the chance to include both the onboarding and off-boarding operations related to your company employees. The window also contains sorting functionalities such as Filters, Group By, Favourite, and Search options.
The CREATE button available in the window will help you to access the Planning creation window.
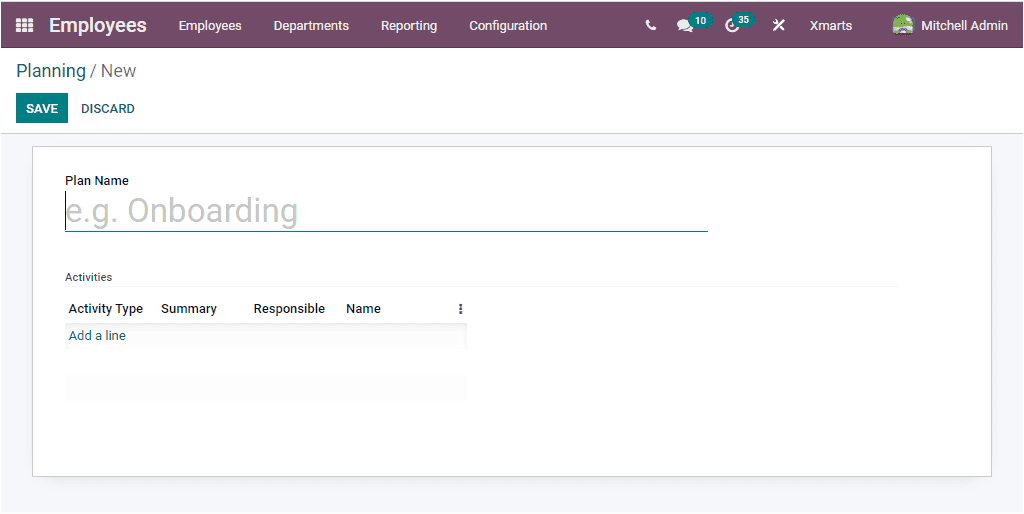
You should need to provide the Plan Name, and you can allocate the Activity Type, Summary, Responsible, and Name by clicking on the Add a line option available. As soon as you click on the Add a line button, you will depict a pop-up window as shown in the image below.
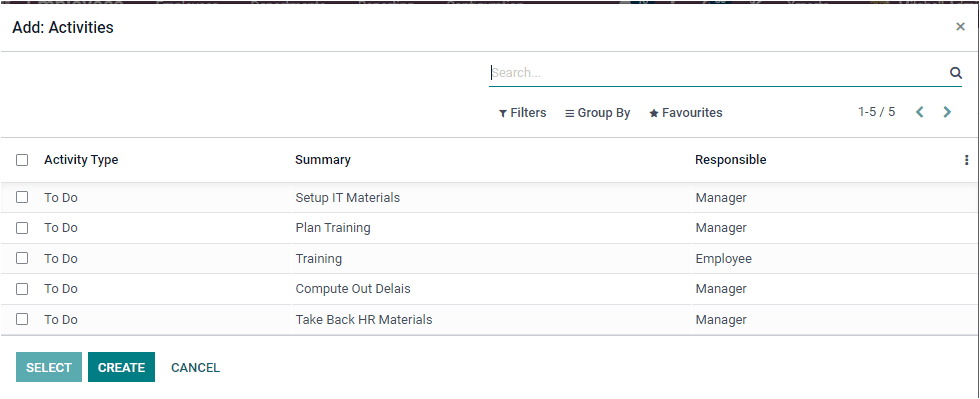
By using this window, you can either select the predefined one or create a new one using the respective icons available. Odoo provides you the provision to include more than one activity in single planning.
Badges
Badges can be considered the perfect way to show your gratitude towards your employees based on their performances. It will also be a suitable solution for enhancing your employees' performances and achievements. Odoo gives acceptable importance to managing employee badges. The platform allows you to assign or award the employees concerning their achievements with specific badges. These gained badges are displayed in the employee profile, and this will be very useful when evaluating employee performances. When evaluating employees, you can easily calculate their efforts and dedication towards their works and Company. The Badges option can be accessed under the Configuration tab of the Odoo Employee module. Upon selecting this menu, you will depict the Badges window as shown in the below image.
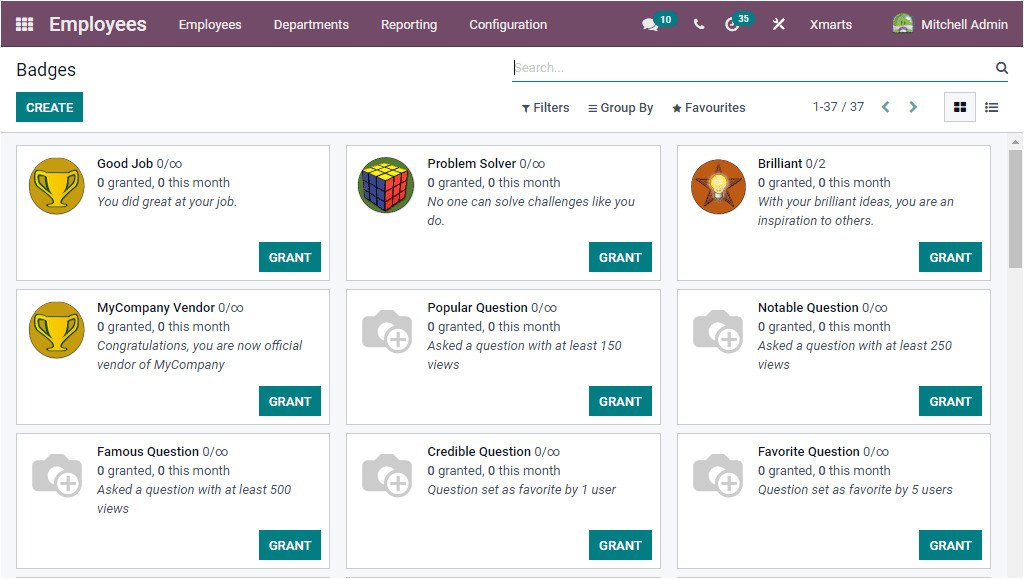
In this window, you can view all the predefined Badges along with their details. Odoo allows you to view this window in both Kanban and List view. The GRANT icon available on each of these badges allows you to grant these badges to the respective Employee. Also you have the right to configure new Badges by clicking on the CREATE button available. The screenshot of the Badges creation window is displayed below.
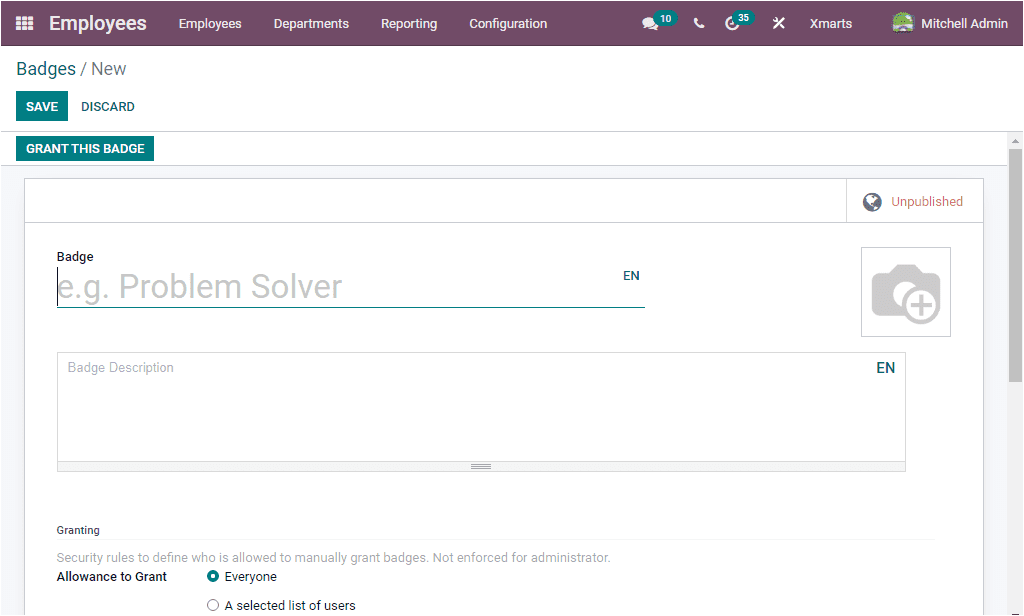
The above image shows the creation form for configuring new badges. The Badge field allows you to allocate a Badge name. Then you can include an image and a Badge Description in the provided space. Under the Granting section, you should specify the Allowance to Grant. This means the Allowance to Grant field allows you to set security rules to define who can grant badges manually. Here you have four options which are
Everyone: If you are choosing Every one, each one will be able to grant badges.
A selected list of users: A selected list of users will be able to grant these badges.
People having some badges: The persons who do have the badges can grant this badge.
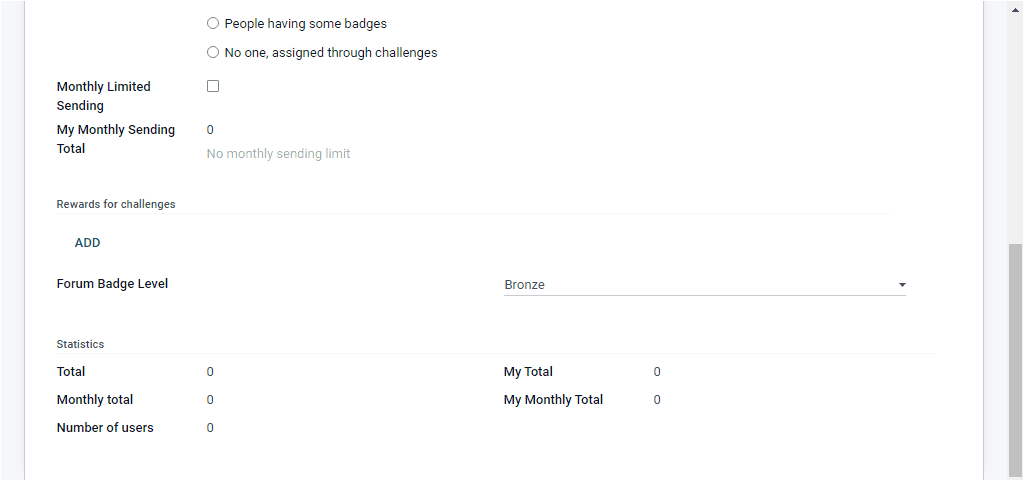
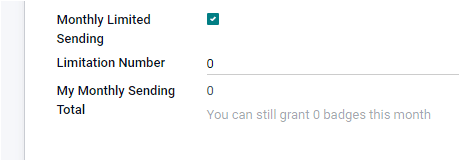
No one, assigned through challenges:After specifying this field, you can enable the field Monthly Limited Sending. If activating this field, you will be able to set a monthly limit per person for sending this badge. The maximum number of times this badge can be sent to a person per month can be allocated in the Limitation Number field. Then the account of time you (the current user) have sent this badge in this particular month can be specified under the“My Monthly Sending Total” field available.
Now under the Rewards for challenges field, you can create a record using the ADD icon available. Upon selecting the ADD icon, you will depict a Reward of Challenges window, as shown in the image below.
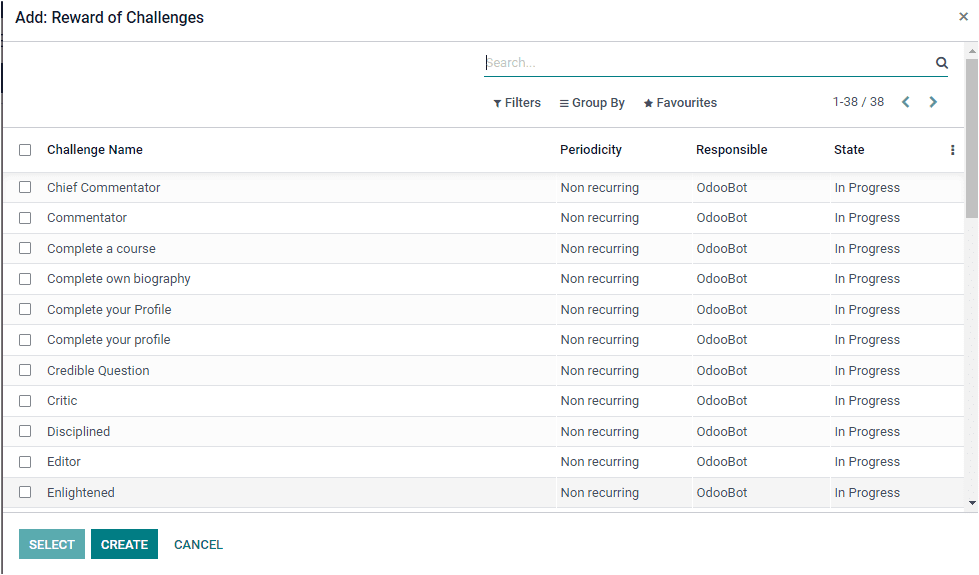
Using this window, you can opt or create a new challenge in which the badge can be included as a reward for attaining this specific task. After allocating this field, you have to mention the Forum Badge Level. Under the Statistics section, you can view the fields such as
Total: It is the total number of times this badge has been received.
Monthly Total: This field means the total number of times this badge has been received this month.
Number of Users: This is the number of times this badge has been received by unique users.
My Total: This is the number of times the current user has received this badge.
My Monthly Total: This case defines the number of times the current user has received this badge this month.
After providing all the necessary details, you can click on the Save button to save the details.
Badges are a very effective way to motivate your employees to reach specific goals and improve their work capacity and productivity. It is an excellent strategy to bring more outcomes.
Let us move on to the next menu available under the Configuration tab of the Employee module.
Challenges
Odoo Platform provides you the provision for configuring Badges and will help you greatly to manage Challenges. It is necessary for creating challenges to motivate and reinforce your employees. The Odoo system is the perfect medium for creating and addressing challenges. The Challenges window available in the Odoo Employee module can be accessed by taking the route Employee -> Configuration -> Challenges. The screenshot of the challenges window is depicted below.
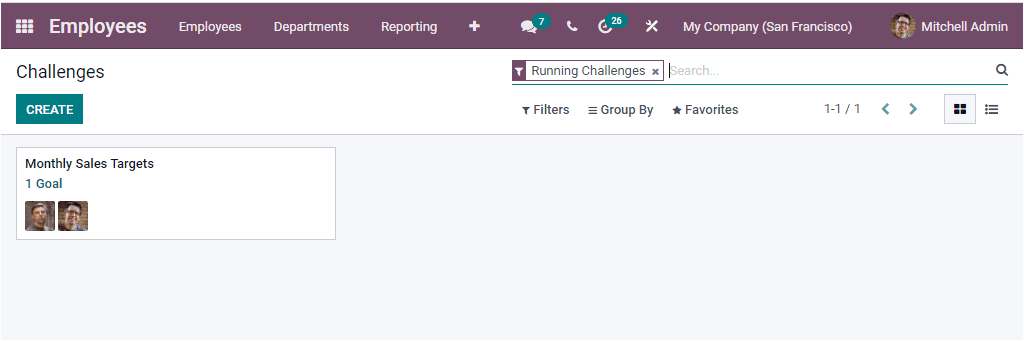
The challenges configured in the Odoo system will be depicted in this window. You can select and view each of them separately if required. You are even able to Edit the defined details. The CREATE icon helps you to create new records using the default creation form.
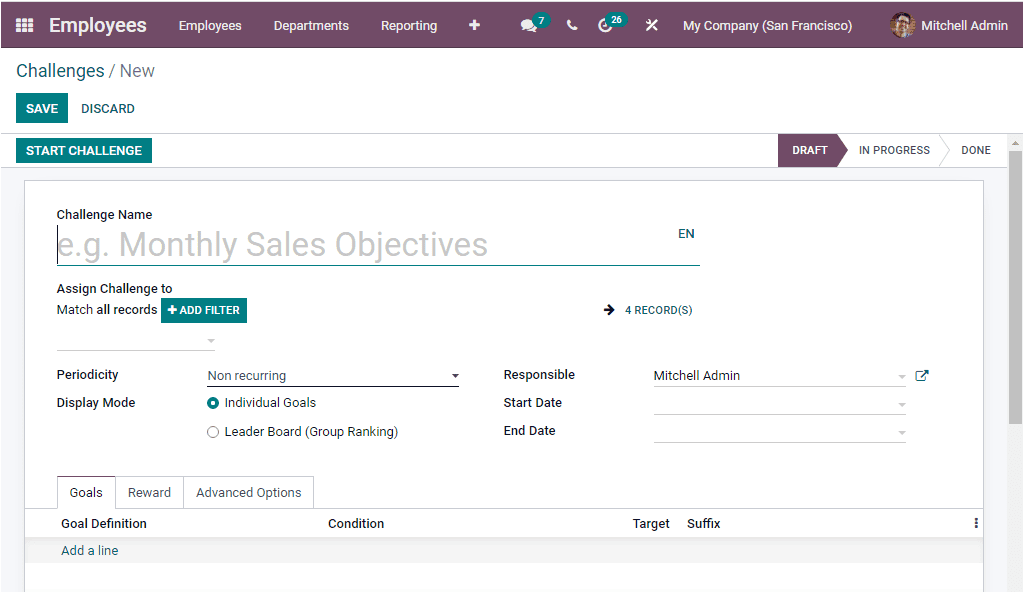
In this Challenges creation window, you should provide the Challenge Name. Then you can describe the list of users participating in this challenge under the Assign Challenge to the field. You can add filters using the ADD FILTER option available. Moreover, the period of automatic goal assignment can be made Non recurring, Daily, Weekly, Monthly, or Yearly. It can be defined under the Periodicity option. Then the Display Mode can be selected as either Individual goals or Leader Board( Group ranking).
Similarly, you can allocate the user responsible for this challenge and the Start Date and End Date. Furthermore, the creation form includes more tabs such as Goals, Rewards, and Advanced options.The Goals tab allows you to describe the challenge. You can tell each detail, such as what it is for, who it targets, why it matters, and many more aspects using the Add a line option available. Under the Reward tab, you have to fill in the details such as the Reward for Every Succeeding User and various positions achieved like the first user, second user, and many more can be assigned in the window. Apart from these options you will have the enabling options such as “Reward Bests if not Succeeded?” and “ Reward as soon as every goal is reached”. If you enable the “Reward as soon as every goal is reached” option, users can only receive the badge once. The top three badges are still rewarded only at the end of the challenge. The defined badges are granted when a challenge is completed. This can be done either at the end of a running period. For example, if it is a monthly challenge, the badges will be granted at the month's end. If you do not set the Periodicity or plan to close the challenge manually, the badges will be present at the challenge's end date.
Let us have a glance at the Goals History window available.
Goals History
The Goals History menu available under the Configuration tab of the Odoo Employee module will allow you to view the Goals History window. The image of the window is described below.
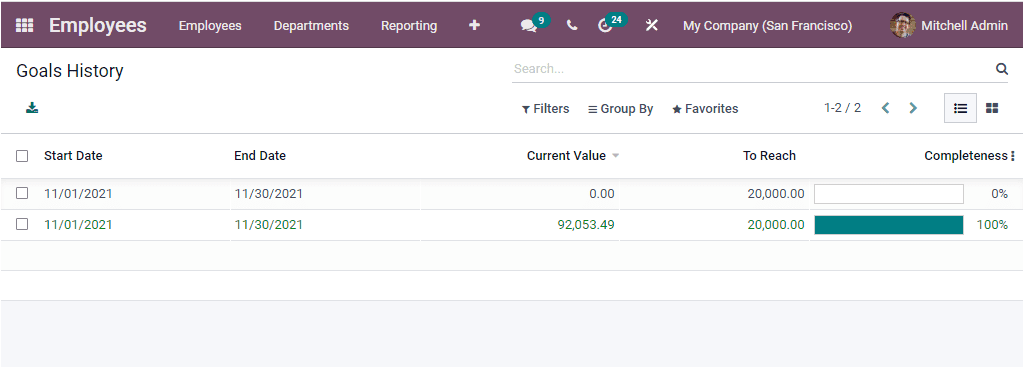
The Goals History window allows you to view and analyze the performance of your employees in a transparent way. The window will depict the Start Date, End Date, Current Value, To Reach, and Completeness. The functionalities such as current value and the value to reach will let you measure the performance level. Moreover, this window will help to make the Employee motivated. They can view the history of the goals achieved by the employees. It will be an inspiration for them to attain their goals and work hard towards their goals.
So far, we have been discussing the Configuration options available under the Odoo Employee module and now let us look into the Reporting aspect of the module.