Creating Request for Quotation
When we have configured product details and vendor details, you can start to create Requests for Quotation. Request for Quotation is the business document preceded by the company authorities showing an interest in the product or services of certain vendors. This document includes the details of the particular product, features, Quantity, amount for the purchase, offer details and other information. This RFQ is a necessary aspect for getting you a clear description of the product and price. Odoo platform allows you to send Requests for Quotation for multiple vendors. So that you can come to a conclusion on your best service provider and can choose a suitable vendor. In the Sales module, we discussed how to send a quotation. Now in the Purchase module Odoo manages all your Request for Quotations in a perfect manner. Odoo manages the Request for Quotations in the platform in its dashboard window. The screenshot of the Request for Quotation window is displayed below.
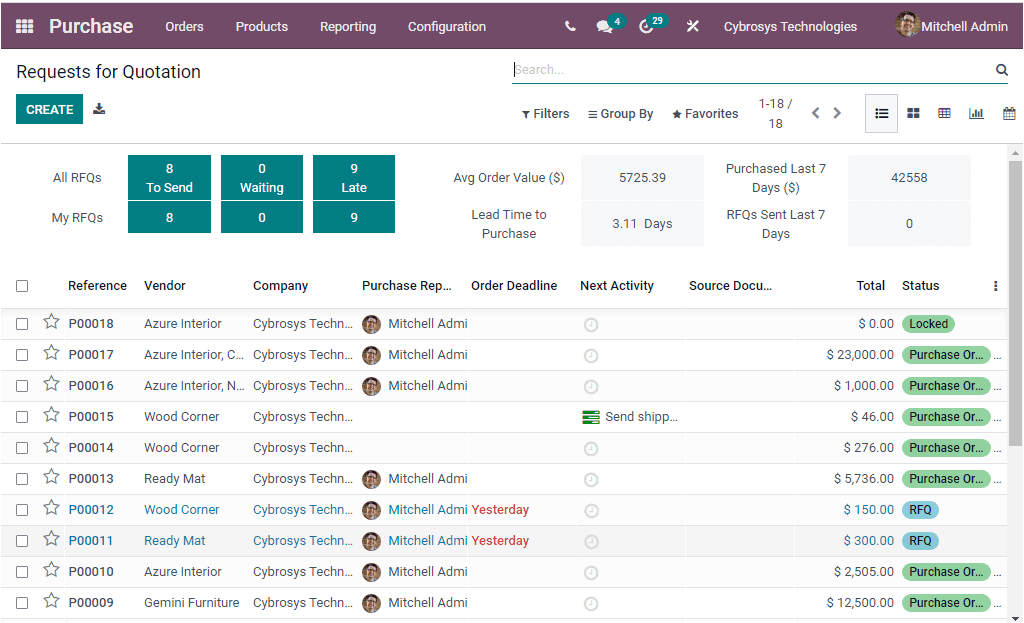
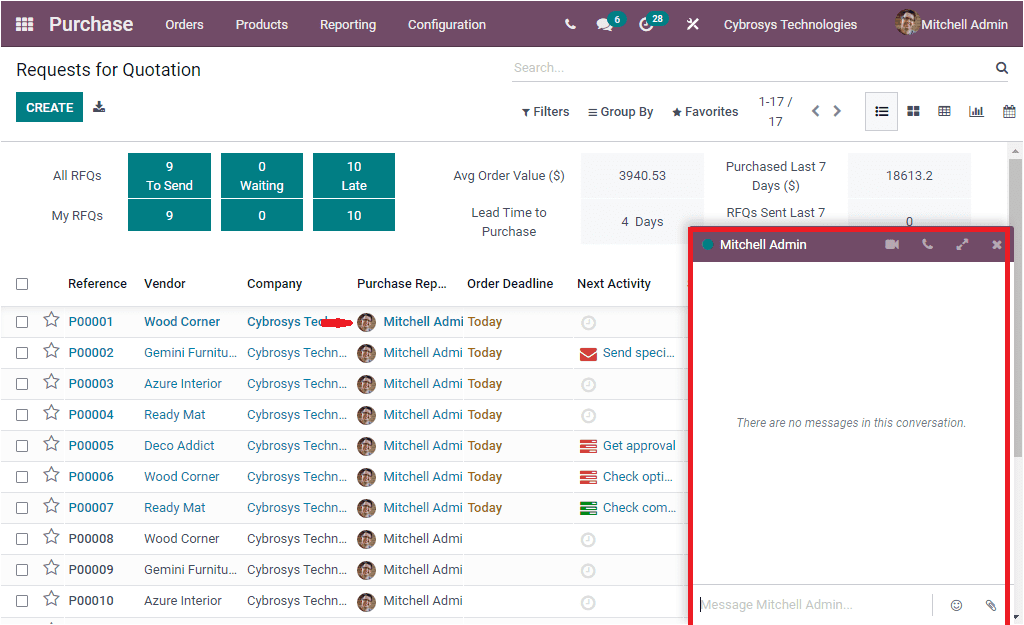
This is the List view of the Request for Quotation window. This window will depict every Request for Quotation described in the database together with the Reference number, Vendor details, Company, Purchase representative, Order deadline, Next Activity, Source Document, Total amount, Status. The Priority can also be marked as a star symbol. You are also able to include more default as well as customizable fields by clicking on the three dots available. We can conduct a direct chat with the Purchase Representative by clicking on the photograph of the respective Purchase Representative.upon selecting the photograph, you will be depicted with a pop up window as shown in the below image. Here in the pop up chat window, you have so many tools. You can begin a chat by sending a message. You can add smileys to your chat and are also able to attach files. You can start a video call by selecting the respective icon. Similarly you can start an audio call and even open in Discuss.
You can schedule further activities on this particular vendor directly by clicking on the Next Activity button available.
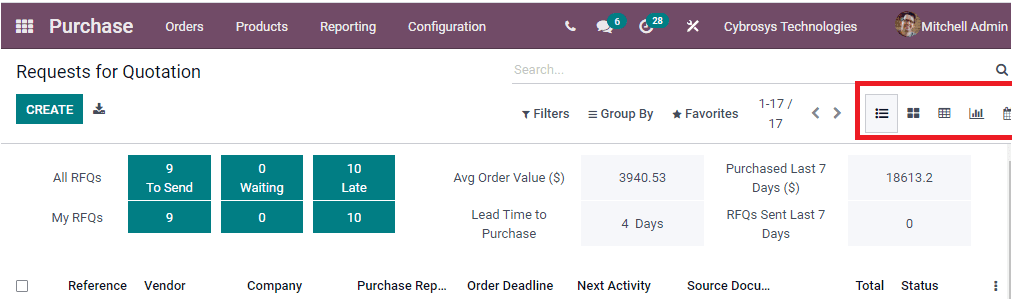
Odoo displays RFQs in various views such as List, Kanban, Pivot, Kanban, Graph and Calarder view. The icons for accessing these views are available on the top left corner of the window as highlighted in the below image.
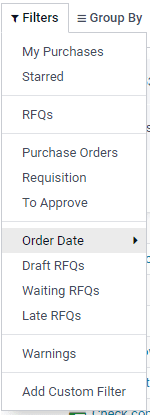
Moreover the sorting functionalities of the Odoo such as Filters, Group By, Favourite, and Search options are available here in this window also. Using these options,you can easily find out your required data. You can apply filters on your RFQs based upon My Purchases, Starred, RFQs, Purchase Orders, Requisitions, To Approve, Order Date, Draft RFQs, Waiting RFQ, Late RFQs, Warnings. What’s more… you can easily customize more filters based on your requirements.
It is possible to arrange your RFQs in various groups based on their similarities. You can group the RFQs of the same vendor in one group by clicking on the default Vendor option available under the Group By option. Similarly you can group them based on Purchase Representative, and Order Date. The Add Custom Group option allows you to customize various groups.

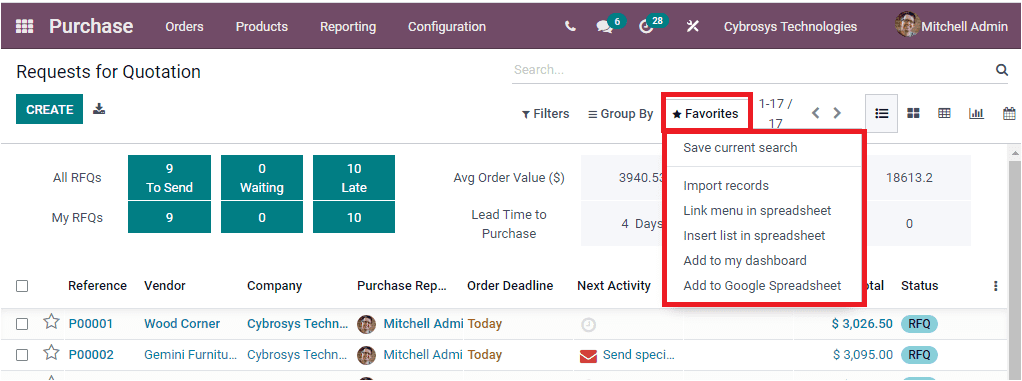
Under the Favourite tab, you have the options for Save Current Search, Import Records, Link menu in spreadsheet, Insert list in spreadsheet, Add to my dashboard, and Add to Google spreadsheet.
The Export All button can be viewed along with the CREATE icon. Using this Export All button you can export all the records to an excel sheet. The CREATE button will help you to navigate to the Request for Quotation creation window. The image of the creation window is depicted below.
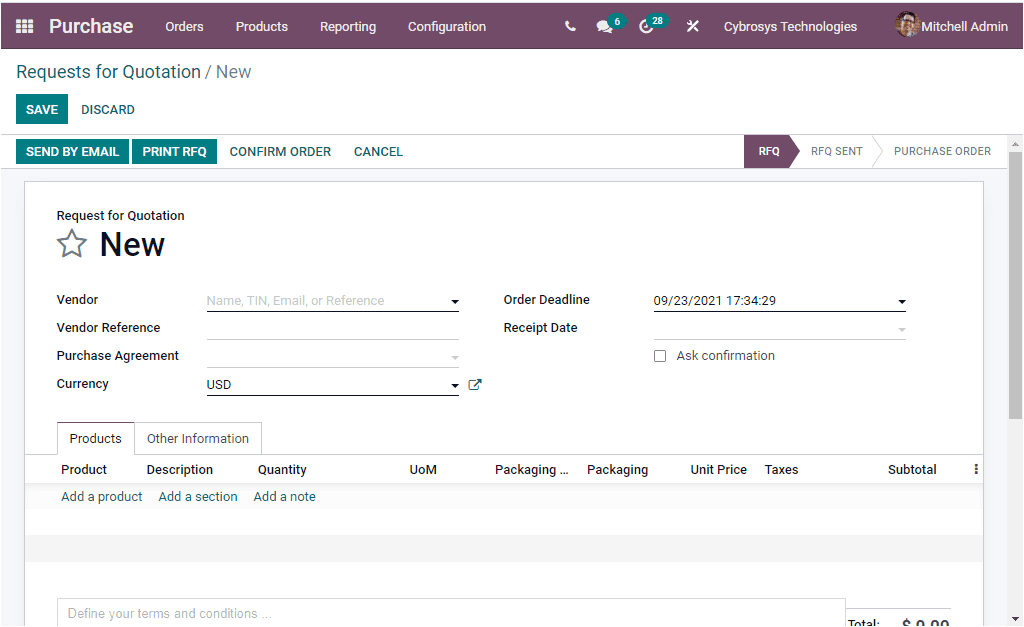
When you create a new RFQ, if it is an urgent one, you can click on the star icon to mark the priority. Then you can fill up the Vendor field using the drop down menu available.The dropdown menu will display all the default vendors in the Odoo system. If it is a new vendor, Odoo allows you to create his records from here itself. Then you can provide the Vendor Reference. This is considered as the reference of the Sale order sent by the vendor. It is used to do the matching when you receive the products as this reference is usually written on the delivery order sent by your vendor. Moreover, the Purchase Agreement can be defined along with the Currency. In addition the Order Deadline can be mentioned. Within this date, the quotation should be confirmed and converted into a purchase order. Similarly the Receipt Date can be allocated. This is the delivery date promised by the vendor. This date is used to determine expected arrival of products. Then you have the Ask confirmation option which can be enabled or disabled. If you enable this option, the system will automatically send a confirmation email to the vendor some days before the expected receipt date. For the purpose of confirming the exact date.
Under the Products tab of the RFQ creation form you can add the product details. For doing this, you can select the Add a Product option available. Moreover, you can add a section and note by clicking on the Add a section and Add a note menu available just near the Add a product option. When you select a product from the list, the details of the product will be auto allocated under the Description section. You will be able to edit the Quantity, Unit of Measure, Unit Price, Taxes, and Subtotal. You can also include more default or customizable fields by clicking on the three dots available at the end of this row. In addition, you might be able to define your terms and conditions in the given box. The Other Information tab allows you to include the other details such as Purchase Representative, Company associated with this operation, Source document which is the reference of the document that generated this purchase order request. Then you can allocate the Incoterms. Incoterms is the International Commercial Terms are a series of predefined commercial terms used in international transactions. Finally the Payment Terms and Fiscal position can be defined. When you give all the details, you can save the details by clicking on the SAVE button available. When you save the details, your window will look like in the image below.
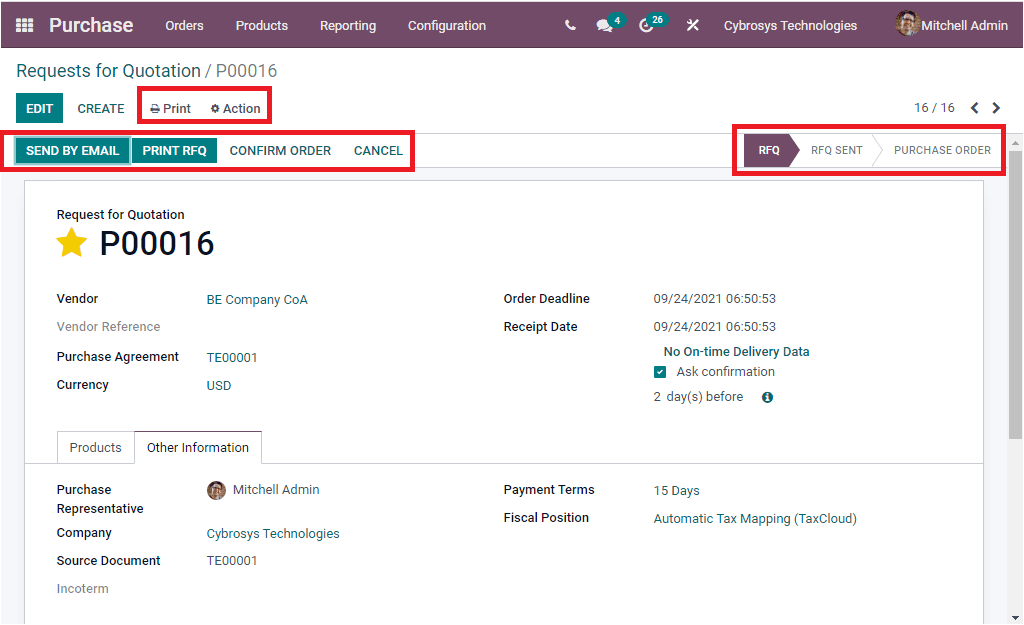
Here in the window, you can view the Print button and Action button. The Print button includes two submenus such as Purchase Order and Request for Quotation. Using this menus you can take print out of both Purchase order and Request for Quotation. The additional actions can be carried out by using the Action button. The Action button includes a list of sub menus as depicted in the below image.
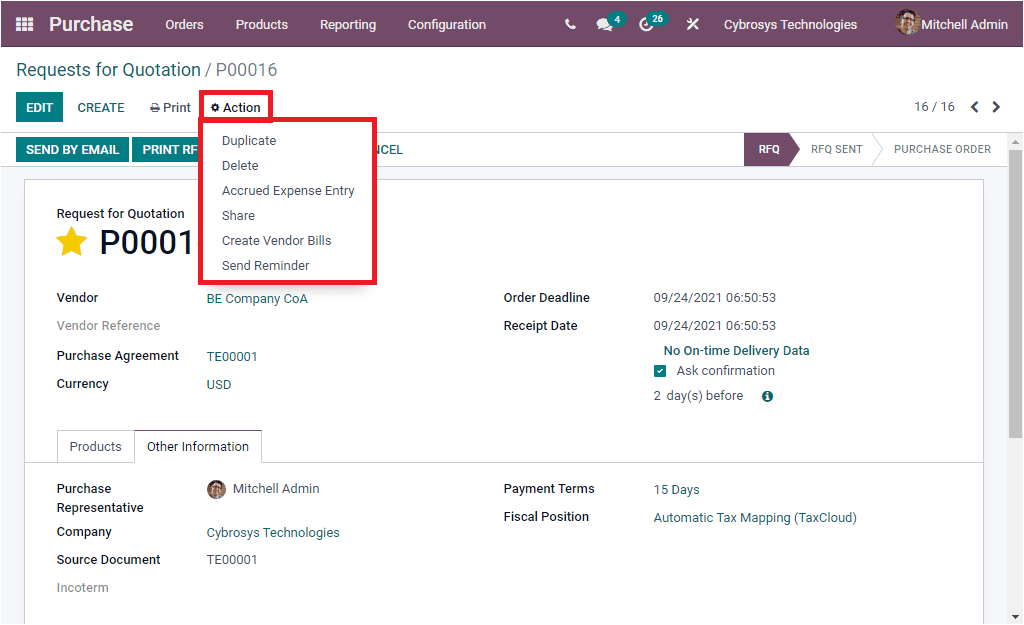
This list includes the menus such as Duplicate, Delete, Accrued Expense Entry, Share, Create Vendor Bills, and Send Reminder. You will be able to perform these actions by clicking on the respective options. Additionally, in the status bar, you can view three statuses such as RFQ, RFQ SENT, PURCHASE ORDER. And on the left side, you have the options such as SEND BY EMAIL, PRINT RFQ, CONFIRM ORDER and CANCEL. If you want to send the created RFQ by email, you can click on the SEND BY EMAIL button. Now you will be depicted with an email template as shown in the below image.
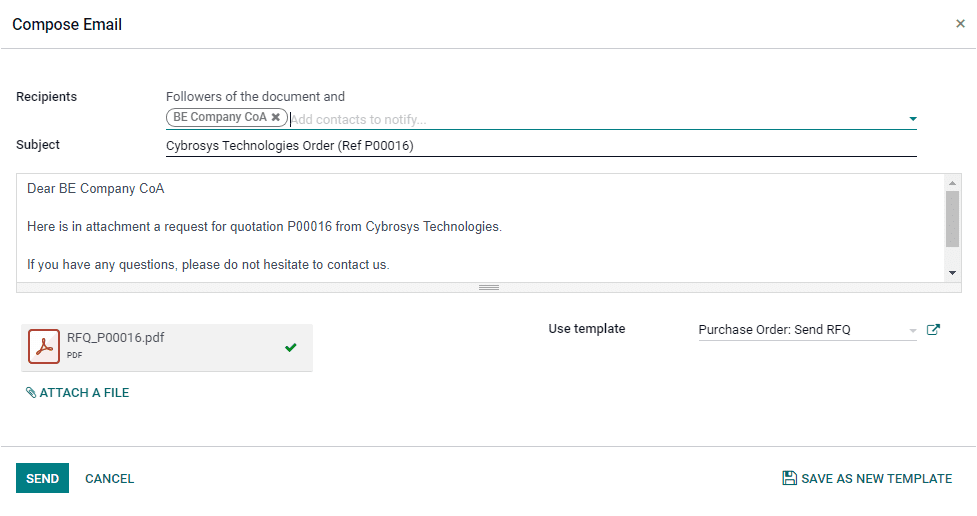
The details in the email are auto allocated and the RFQ is auto attached. If you require any editing, you can just do it. Also you can add more Recipients if needed. If you want to save the email for further use, you can save it as a new template by clicking on the SAVE AS NEW TEMPLATE. You can send it by clicking on the SEND option available. When you send the quotation by email, your status will automatically change to the RFQ SENT as highlighted in the below image.
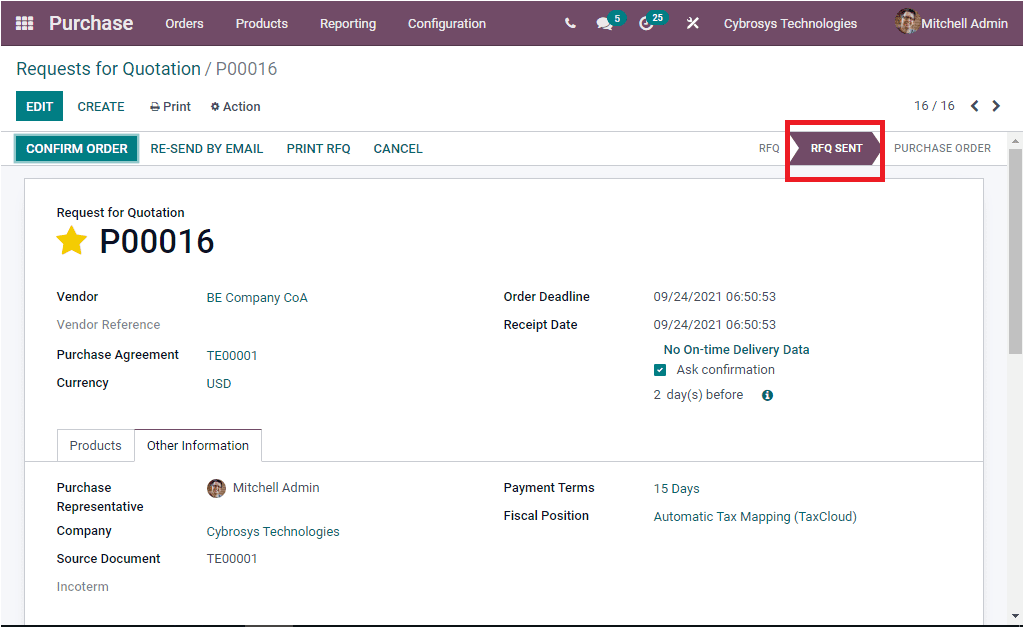
In the left side, you can view the CONFIRM ORDER button along with the RE SEND BY EMAIL, PRINT RFQ, and CANCEL.
When the Request for quotation is validated, the terms and conditions of your company and the vendor are officially agreed or satisfied, you can confirm order by clicking on the CONFIRM ORDER button available. Now the Odoo system will automatically change its status from RFQ SENT to PURCHASE ORDER. This will be emphasised in the below image.
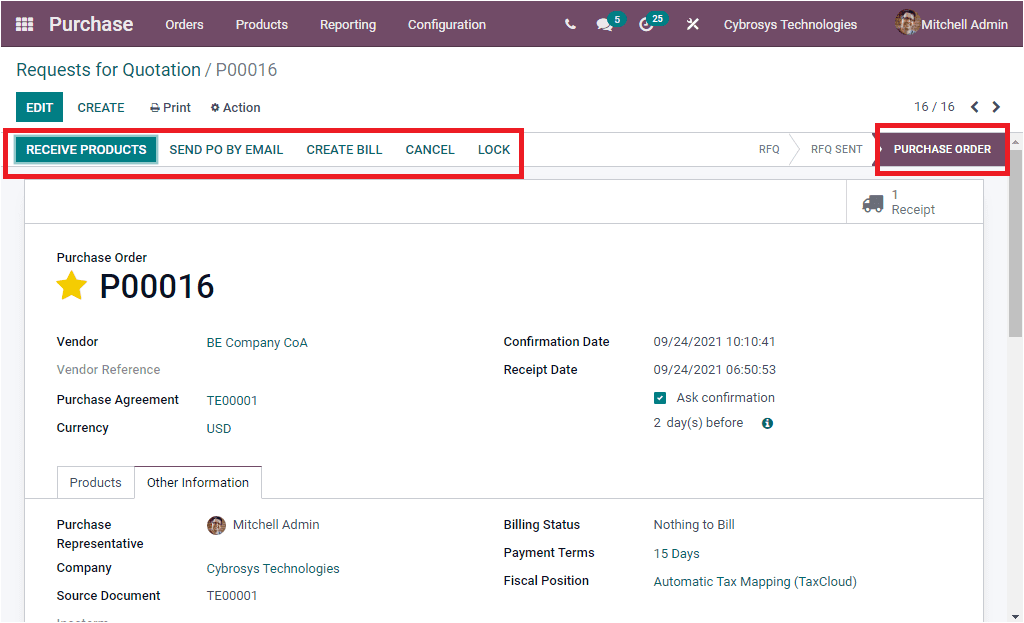
In the left top side of the window, you can view the RECIEVE PRODUCTS, SEND PO BY EMAIL, CREATE BILL, CANCEL and LOCK buttons to perform respective operations.
So far we were discussing how to create and manage Request For Quotation in the Odoo Purchase module and now we can talk over how Odoo manages the Purchase Agreement aspects.